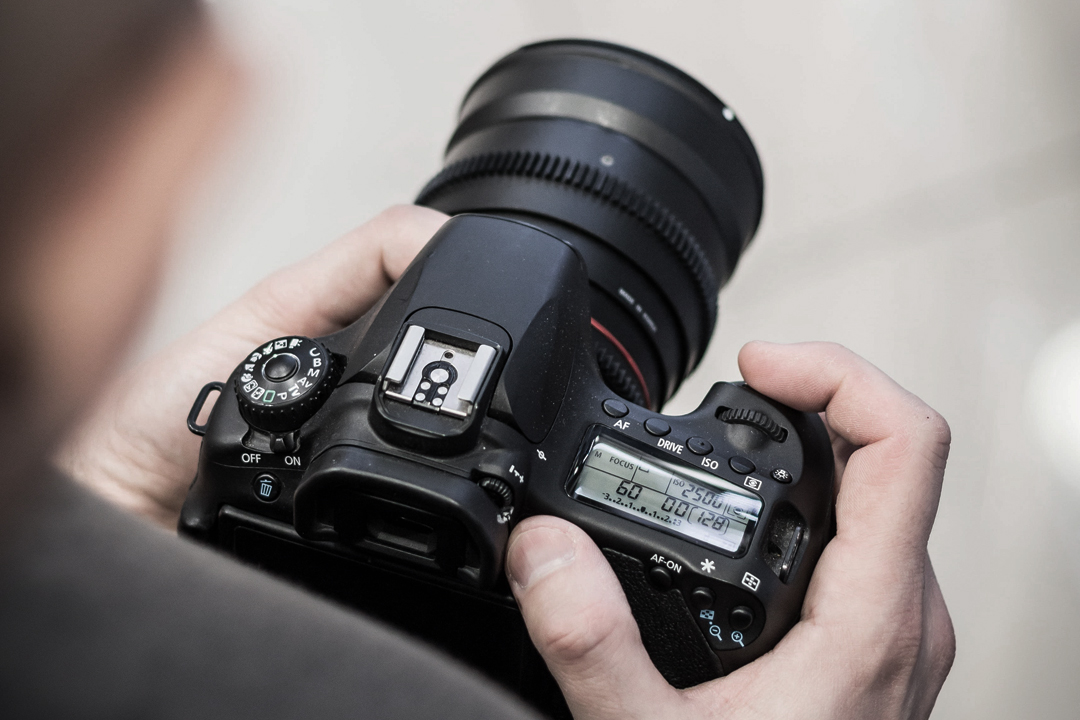
How to use your camera: the basics
If you’re just starting out in photography, you’re going to want to learn how to use a digital camera. Learning to take control of settings like aperture, shutter speed, ISO and more is one of the most important first steps in learning to take photos properly, and it isn’t too difficult to do. This guide is here to help you get started.
Here, we’ve put together a series of quick guides to the most basic settings on a camera. If you’re not sure how to go about exposing an image – or even what exposure really means – then this is a perfect place to start. There are no stupid questions here, so feel free to drop in the comments if there’s anything you don’t understand.
How to set shutter speed on a camera
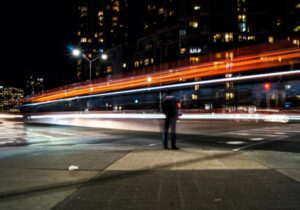
The shutter speed setting on a camera dictates the amount of time that the camera’s sensor is exposed to light. Longer shutter speeds allow more light to hit the sensor, allowing you to create a clear and balanced exposure when light levels are low. However, this extended time will mean that anything in the frame that moves will be rendered blurry. Also if you’re hand-holding the camera, the sharpness of the entire image may be compromised by camera-shake.
Image stabilisation can help here, but for significantly extended shutter speeds, you’ll need to securely mount the camera on a tripod. Shorter shutter speeds are therefore useful when you’re hand-holding the camera, or when you want to freeze fast-moving action.
Here are the steps to set the shutter speed on most cameras:
- Select a shooting mode that allows you to change your shutter speed. Your best bet is Shutter Speed Priority (labelled as S or Tv), which allows the user to control shutter speed and automates all other settings. This may be on your camera’s top dial, or you may have to delve into the menus. Another option is Manual (M), in which all settings are dictated by the user, including shutter speed.
- Once shutter speed is selected, use the camera’s dial or arrow buttons to adjust the value. Shutter speed is measured in seconds and fractions of a second – 1/100sec, 1/500sec, 1sec, etc.
- Set the shutter speed to the desired value. A slower shutter speed will allow more light to enter the camera, while a faster shutter speed will let less light in. This will affect the exposure and the amount of motion blur in the image.
- If you are using the camera handheld, a general rule of thumb is that to keep your shots sharp, your shutter speed should be ‘1 / your lens’ focal length’. So if you’re using a 50mm lens, use a shutter speed of at least 1/50sec. If it’s 100mm, 1/100sec, and so on. If your camera and/or lens have built-in stabilisation you can push this a bit – the best way to figure out how much is to experiment with it.
- Check your camera’s exposure meter to make sure that your settings are giving you a proper exposure. If you are using shutter priority mode then your camera will automatically adjust the other settings to compensate; if you’re using manual, you’ll need to adjust them all yourself. Even in the former case, you’ll want to check your exposure is within tolerances – e.g. that you haven’t set a shutter speed so fast that the image is still underexposed even with other settings maxed out.
How to set aperture on a camera
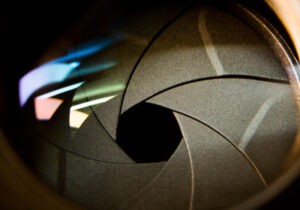
When you adjust the aperture setting on your camera, what you’re actually doing is controlling the size of the opening in the lens. It’s measured in f-numbers, such as f/1.8 or f/11, and determines how much light reaches the camera’s sensor. The smaller the number, the wider the aperture, and therefore the more light is being let in.
Aperture speed has two main effects on your image. First, as mentioned it controls the amount of light that enters the camera, which affects the overall exposure. Having as wide an aperture as possible is hugely useful for shooting in low light. Second, it affects the depth of field, or the area of the image that appears in focus. A large aperture setting (such as f/1.8) creates a shallow depth of field, rendering the main subject sharp and the background out of focus. A narrow aperture setting (such as f/11) creates a larger depth of field with more of the image in focus.
One way that aperture differs from other settings is that it can in some cases be set on the lens, not just the camera. Some lenses offer aperture rings, which provide direct mechanical control of the opening; for many photographers, these provide a much more intuitive way of working with aperture. For this section, we’ll be assuming that you’re setting aperture on your camera, as many beginner lenses don’t have aperture rings.
Here’s how to set aperture on your camera:
- Choose your shooting mode. Aperture can be adjusted in Aperture Priority mode, commonly abbreviated as A or Av. In this mode, the user sets the aperture value, and the camera automates everything else (often you can set parameters, e.g. not to let shutter speed go below a certain value, or ISO above a certain value). Manual mode (M) allows the user to take control of all settings, including aperture.
- Decide on the desired effect: Your subject, creative vision and the level of available light, will all affect the aperture setting that’s best for your shot. For example, if you’re shooting a portrait, you may want to use a wide aperture setting to create a shallow depth of field and blur the background. If you’re shooting a landscape, you may want to use a narrow aperture to keep the entire scene in focus. If the scene is dark, you may simply need to use the widest aperture possible.
- Adjust the aperture speed. Use the command dial, the buttons or the aperture ring (if your lens has one) to adjust the aperture speed up or down in increments of 1/3 or 1/2 stops. Check using your camera’s metering system that you are getting a balanced exposure, and if you’re in Av mode, that your camera hasn’t raised the ISO too high, or set the shutter speed too slow or too fast for what you want to achieve.
- Take a test shot and review the results. Make sure that the exposure and depth of field are what you intended. If necessary, adjust the aperture speed further until you achieve the desired effect. Experiment with different aperture speeds to find the right balance of exposure and depth of field for your subject and creative vision.
How to set ISO on your camera
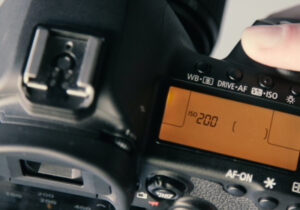
ISO is a system for measuring the sensitivity of a camera’s sensor to the available light. It forms the third part of the exposure triangle, along with aperture and shutter speed. The higher you set the ISO value on your camera, the more sensitive to light it will be. However, this increased sensitivity comes with a cost, as you also increase the level of noise in your images – the term ‘noise’ referring to digital artefacts and grain that can compromise image quality. As such, it is usually encouraged to keep your ISO level as low as the light conditions will allow.
ISO is expressed numerically – more or less all modern digital cameras will have ISO 100, 200, 400, 800, 1600, and 3200, with 100 producing the cleanest images and 3200 being the most sensitive to light. Many will also offer settings lower and higher than this, with maximum settings like 25,600 or 51,200 being common. The ISO value doubles with every stop of exposure gained – so a jump between ISO 25,600 and ISO 51,200 is not as enormous as it sounds, it’s actually just a single stop of exposure. Some cameras also offer Extended ISO settings at the upper or lower end of their ranges – these can be useful if there’s no other option, but will usually severely compromise image quality.
Here are the steps to adjust the ISO on most cameras:
- Turn on your camera and select the shooting mode you want to use. Any shooting mode except for Full Auto should allow you to set your ISO, so feel free to use whatever you prefer.
- Locate the ISO button or setting on your camera. On most cameras, this is represented by a symbol that looks like a circle with a dot in the middle. Some cameras have a dedicated ISO dial on the top plate – many Fujifilm cameras offer this.
- Use the dial, wheel or arrow buttons to adjust the ISO setting. You may need to press a button or navigate to a submenu to access higher ISO values. A higher ISO value will make the camera more sensitive to light, while a lower ISO value will make it less sensitive.
- Check your camera’s exposure meter to make sure that your settings are giving you a proper exposure. If the meter shows that your photo will be over or underexposed, adjust the aperture or shutter speed accordingly.
- Many cameras offer range-limited auto ISO modes. These will automatically set the ISO value according to the input of the camera’s metering system, but never push it beyond a user-specified value, which is useful if you don’t want to have to keep fiddling with settings, but also don’t want the automated system to bump it too high and produce grainy images. This will likely be accessed through the same ISO menu.
How to adjust exposure compensation
Exposure compensation is a camera setting that allows you to adjust the brightness of your image. It’s typically represented by a +/- button or dial on your camera, and can be adjusted in increments of 1/3 or 1/2 stops.
Photographers typically use exposure compensation in situations where they want to override their camera’s automated metering and make an image brighter or darker than the system recommends. There are many reasons you might want to do this – you may want to intentionally overexpose for an ultra-bright, dreamlike effect, or underexpose to accentuate a silhouette.
Some scenes can also cause a camera’s metering system to think conditions are brighter or darker than they really are – snowy scenes, for instance, are often underexposed by automatic metering systems as the excess of white causes the camera to think they are brighter than they actually are.
Here’s how to adjust exposure compensation:
- Choose your shooting mode. Exposure compensation can be adjusted in most shooting modes, including manual, aperture priority, shutter priority, and program mode.
- Locate the exposure compensation control on your camera. This may be a button or a dial depending on your make and model of camera. It is usually denoted by a ‘+/-’ symbol, so if in doubt, look for that.
- Press the button or turn the dial to adjust the exposure compensation in the desired direction. Each click of the dial typically represents a 1/3 or 1/2 stop change in exposure, and the setting will normally be denoted on the screen or in the electronic viewfinder as ‘+1’, ‘-1/3’, ‘+2/3’, etc.
- Check your results. After adjusting exposure compensation, take a test shot and check the results. If the image is still too bright or too dark, continue adjusting exposure compensation until you achieve the desired brightness.
- An important, often neglected step – once you have got your shot, remember to readjust exposure compensation back down to neutral. It’s one of the easiest settings to accidentally leave on, and it’s all too common for photographers to wonder why they are consistently getting overexposed images until they remember that their exposure compensation is still set to +1.
Remember that exposure compensation is just one tool for controlling exposure. It’s important to understand the basics of exposure and how aperture, shutter speed, and ISO work together to create a properly exposed image.
How to choose metering modes on a camera
The metering mode is a camera setting that determines how the camera measures the light in the scene to determine the appropriate exposure for the image. There are typically three metering modes available on most cameras: centre-weighted, spot, and evaluative/matrix.
- Centre-weighted metering: This mode measures the light in the centre of the frame and applies greater weight to this area when calculating the exposure. This mode is useful for portraits, or any situation when the subject is in the centre of the frame.
- Spot metering: This mode measures the light in a small, specific area of the frame (usually in the center). This mode is useful when you want to expose for a specific part of the image, such as a person’s face.
- Evaluative/matrix metering: This mode measures the light in multiple areas of the frame and calculates an average exposure. This mode is useful for most situations, as it takes into account the entire scene and provides a balanced exposure. For street, documentary and general-purpose photography, this is a good, flexible metering mode to use.
When choosing a metering mode, consider the lighting conditions of the scene and the placement of the subject. For example, if the subject is backlit, spot metering may be necessary to properly expose for the subject’s face. If the lighting is even throughout the scene, evaluative/matrix metering may be sufficient. It’s also important to keep in mind that the metering mode is just a starting point, and you may need to adjust the exposure compensation or manually adjust the settings to get the desired exposure.
Ultimately, the choice of metering mode will depend on the specific situation and your creative vision for the image. Experiment with different modes and settings to find what works best for you.
How to set white balance on your camera
White balance is an important setting in photography that ensures the colours in your images are accurate and natural-looking.
Different types of light produce different colour temperatures, measured in Kelvin (K), which denotes how warm (orange) or cool (blue) an image looks. A Kelvin number of around 5,000 is considered ‘neutral’ or natural – this is the kind of light you’d expect to see at around midday on a clear day. Some types of light produce a warm, orange cast, such as candlelight, sunrise/sunset or incandescent bulbs – these have a lower K value of around 1900 to 4000. Higher K values denote a cooler, blue colour cast, which is common on overcast, cloudy days.
By adjusting the white balance on your camera, you can ensure that image colours look consistently natural in different lighting situations.
Here’s how to set up white balance on your camera:
- Navigate to the white balance setting on your camera. This may be accessed via the menu system, or your camera body may have a button labelled ‘WB’ or similar.
- Choose a white balance setting. Most cameras have several white balance settings, including Auto, Daylight, Cloudy, Shade, Tungsten, Fluorescent, and Custom. In most situations, the Auto setting will do a pretty good job of getting the balance right. However, if you are consistently getting an undesirable colour cast, try selecting the option that best matches the light conditions you are shooting in.
- If you want to get perfectly accurate colours, consider using a grey card. A grey card provides an accurate reference point for colour A grey card provides a completely neutral surface with no colour temperature or hue, meaning it can be used as a reference for colour temperature in any situation. Hold it in front of your subject and take a reference photo. You can now use this to calibrate your white balance – either in-camera using the ‘Custom’ setting, or in post-processing.
- To adjust the white balance in post-processing, you need to shoot in RAW format, as this allows you to completely alter the colour temperature and tint of an image as you see fit. Use the white balance tool in your photo editing software to adjust the colour temperature of your image. If you have a grey card reference image, you can use this to fine-tune your adjustments, then apply these settings to other images from the same shoot.
- Experiment with different settings. White balance is subjective and can vary depending on your personal preference and the mood you want to create in your image. Pay attention to the lighting conditions in your environment and adjust the white balance accordingly for the best results.
How to use burst mode
Burst mode (also known as continuous shooting mode) is a feature found on many cameras that allows you to take a series of photos in quick succession with a single press of the shutter button.
It’s hugely useful for capturing images of fast-moving subjects such as wildlife or athletes, though can also be handy when taking group photos or portraits, as you may want to capture a variety of expressions and poses.
Here are the general steps of how to use burst mode:
- Set your camera to burst mode. How to do this will vary from camera to camera, but will usually involve selecting the burst mode option from the camera’s shooting mode menu.
- Frame your shot and prepare to take the first photo. If your subject is moving, try to think in advance about how you may need to move the camera to keep them in frame.
- Press and hold down the shutter button to start taking photos in rapid succession. The number of photos you can take will depend on your camera’s burst mode speed and buffer capacity. Some professional sports cameras have effectively unlimited buffer capacity, while others can only shoot in very short bursts.
- Review your photos. After taking a burst of photos, review them on your camera’s LCD screen to see which ones turned out the best. You can then delete the photos that you don’t want to keep. This is a useful habit to get into if you are spending a day firing off lots of bursts, as you can save time in the edit by getting rid of misframes and other useless photos as you go.