We drill deep into the video functionality offered by Canon’s 4K-shooting EOS-1D X Mark II
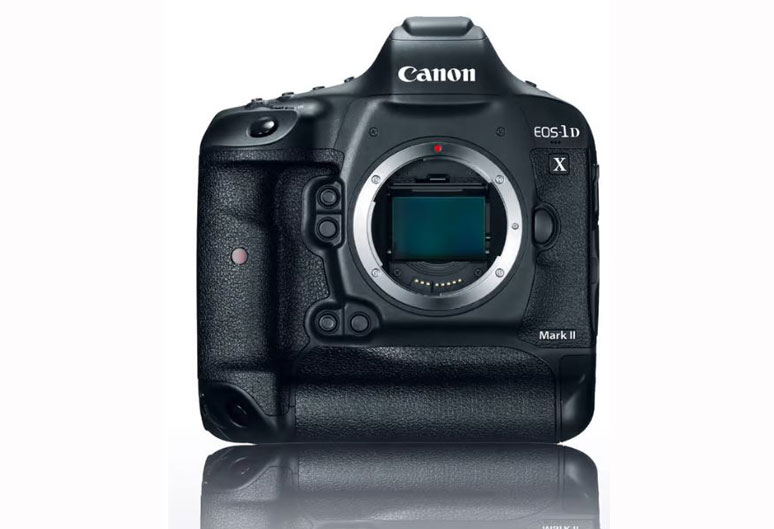
Canon’s flagship EOS DSLR, the EOS-1DX Mark II, is one of the company’s few DSLRs to record 4K-resolution video, and this is supported by a range of additional control over recording, playback and output. We’ve gone deep into the menu system to find out exactly what’s possible, and how the camera can be set up to meet your requirements.
The Basics
The EOS-1D X Mark II records DCI 4K-resolution footage (4096 x 2160 pixels) using the Motion JPEG format, with 8bit 4:2:2 chroma subsampling. Having a slightly higher horizontal resolution than UHD 4K, the DCI 4K format records with a 17:9 aspect ratio, and this happens at a crop factor of around 1.3x.
If, however, you choose to record in Full HD (1920 x 1080 pixels), this is recorded at an aspect ratio of 16:9 without any crop factor applied, with the camera using the MPEG4 AVC / H.264 codec instead. Incidentally, it’s not possible to select standard HD (1280 x 720 pixels) or VGA (640 x 480 pixels) recording; Full HD is the lowest resolution available.
4K footage is recorded as a MOV file, at 50fps, 25fps and 24fps when set to PAL. Those recording in NTSC, meanwhile, have 60fps (59.94fps), 30fps (29.97fps) and 24ƒ/23.98fps options available to them. Motion JPEG takes up a fair bit of space next to more modern formats, which means that when set to either the 50fps (PAL) or 59.94fps (NTSC) options bit rate is around 800Mbps. Using the lower frame rates in 4K, meanwhile, causes this drops to around 500Mbps.
When recording Full HD footage, however, the user has the choice of MOV and MP4 recording. Here, the camera records 8bit 4:2:0 footage, with a choice of ALL-I, IPB and IPB Light compression options.
High-frame-rate recording
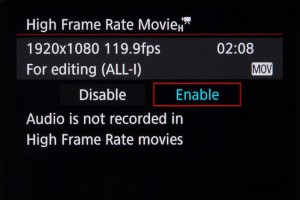
When set to Full HD the camera can capture footage at up to 119.9fps (NTSC) or 100fps (PAL), recording this at 30fps and 25fps respectively (ie a quarter of the speed) for slow-motion results.
This records using the MOV format and ALL-I compression, at a bit rate of around 360Mbps, which should help to maintain better image quality than the IPB options.
As we might expect, audio is not recorded as this happens, while the time limit for individual clips is 7mins and 29secs.
Sensitivity
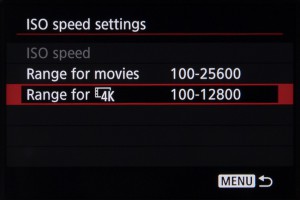
Just as you can set a specific range of available sensitivities when shooting stills, you can do the same for video. The camera provides the option of specifying a range for when the camera is set to its ISO Auto mode and a separate range when manually selecting ISO, and separate adjustment over 4K and Full HD recording is provided.
It’s not possible to select the very lowest ‘L’ option, equivalent to ISO 50, for video recording of any kind, and, similarly, the highest H4, ISO 409-600-equivalent setting is also off limits.
Instead, you can choose a minimum ISO between ISO 100 and H1 (equivalent to ISO 102,400) inclusive, and a maximum limit between ISO 200 and H2 (equivalent to ISO 204,800) inclusive.
Time limits
The camera can record up to three minutes of 4K footage at a time, and up to 29mins and 59secs of Full HD footage. Interestingly, Nikon’s D5 also arrived with the same limitation, although this was later removed through a firmware update. Should you be using an external recorder, however, you can bypass this three-minute cap.
When recording 4K footage in camera, Canon recommends using a CFast 2.0 card – otherwise, it’s possible to record footage to CompactFlash media (up to UDMA 7) as the camera features a slot for each format.
In line with many other 4K-enabled cameras, you can also use the camera’s Frame Grab feature to extract individual frames from 4K footage before saving them as JPEGs in camera. With footage recorded at 4096 x 2160 pixels this equates to a file with a resolution of approximately 8.8MP. It’s not, however, possible to extract images from footage recorded in Full HD.
Autofocus
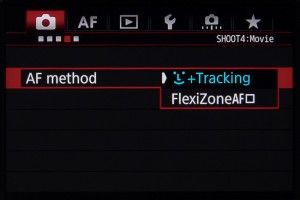 Aside from the availability of 4K recording, one of the main advantages of the new model over the previous EOS 1D X is the inclusion of Canon’s Dual Pixel CMOS AF system. This feature has been included in many models much lower down in the EOS range, although the EOS-1D X Mark II becomes the first full-frame model to employ the system (now joined by the EOS 5D Mark IV).
Dual Pixel CMOS AF provides phase-detect autofocus from the main imaging sensor, something made possible by each pixel having two photodiodes.
This system allows for focus to be acquired quickly and for continuous focus (Servo AF) while recording video, and you can also set the camera to track faces with the Face Detection feature.
 Thanks to the camera’s touchscreen, it’s possible to select the point of focus prior to or during recording by simply pressing the screen. Should you do this while you’re recording, the Dual Pixel CMOS AF system will gently pull focus to the specified point in the scene, much more fluidly than contrast-detect AF systems found elsewhere.
The touchscreen also allows for Servo AF to be stopped and started, thanks to a small virtual button in the bottom left hand corner than responds to touch.
Canon has provided the option to adjust the speed of the AF Servo mode to suit whatever it is you’re shooting. You can set this to focus quickly for everyday footage, where you want the camera to quickly lock onto subjects, or reduce the speed where you want to continue using autofocus for smooth and professional-looking focus transitions.
You can also vary the tracking sensitivity of the AF Servo system over seven levels. This adjusts the focusing system’s behavior in the event that it loses focus of the subject being tracked. “Responsive” will quickly engage the auto focus if your subject is lost. “Locked on” holds the focus position longer even if your subject is obstructed or moves briefly out of shot.
On-screen controls
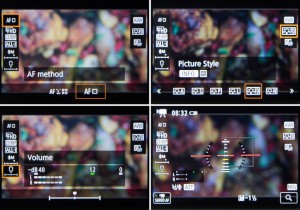
It’s possible to bring up a range of on-screen information when recording videos, from frame rate, white balance and Picture Style to the option of overlaying a two-axis virtual electronic level. You can also bring up a series of different grids to help with both levelling and composition, although this is not maintained once you start recording.
Although video options are split across a handful of screens, you can also group many video-specific options together for quick access using Canon’s My Menu tab.
Physical controls
On default settings, movie recoding requires you to press the Start/Stop button on the rear panel (with the collar around it set to the video option) although you can also configure the shutter-release button to perform the same action through the menu system, should you find this to be easier.
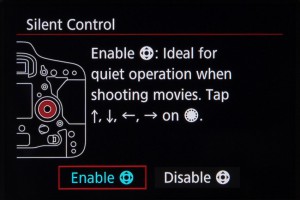 Another useful video-centric feature is the option to control the camera silently whilst recording. When this feature is enabled you can use the touch pad around the Quick Control dial on the back to perform a number of commands. Ordinarily the sounds from pressing buttons and turning dials may be picked up by the camera’s on-board microphone.
The controls available depends on the shooting mode used. In the Manual exposure mode you can control shutter speed, aperture, ISO, audio recording level and the output volume, if using headphones to monitor sound.
Playback and output
The camera has a Type C HDMI mini port on it’s side, which allows for clean (uncompressed) 8bit footage to be output with 4:2:2 chroma subsampling and audio, although only at a maximum Full HD resolution.
Y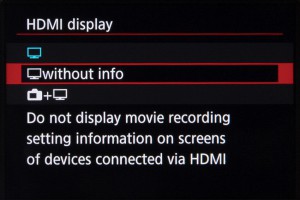 ou can output this to an external recorder, stream it to an external display, or use a unit that combines the two. In fact, you may wish to use an external display anyway, as this can be used to provide features not present on the camera itself, such as focus peaking, false colour and zebra patterning.
Something else the camera allows is for 4K footage to be recorded internally while Full HD footage is output via the HDMI port. Time code can also be appended to recordings output via HDMI.
You can also choose to maintain the feed on the rear display when outputting to an external one, and decide whether the rear display should show shooting information.
Audio
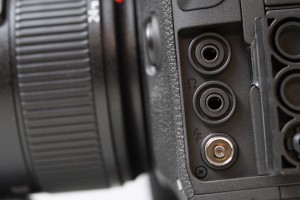
With a built-in microphone, located on the front panel, it is possible record (mono) audio without any external microphones. For better quality audio there is a stereo microphone port available for a range of external microphones.
If you shoot outside and choose to record using the built-in microphone, you can employ the wind filter to help reduce wind noise. The wind filter does not work with external microphones. However, you can use these in conjunction with more effective wind shields such as a dead cat.
There is also an attenuator, which can be used to keep audio balanced should there be any sudden loud noises. As with the wind filter, if this is engaged, an icon will show up on the rear display.
Last but not least, the 3.5mm headphone port beneath allows audio to be monitored during recording, a useful new feature which was not present on the original EOS-1D X.

