Our workshop receives quite a few cameras for repair that don’t actually have anything wrong with them! More often than not, users have inadvertently set custom functions on their DSLRs that disable operations such as AF and shutter release from working correctly.
Of course, if your camera is behaving erratically, it may well have a genuine fault, but it’s definitely worth wiping any custom settings before you send it in to us.
If you’ve been following our Tips & Tricks series, you’ll have seen a post recently that described a simple way of backing up and restoring your camera settings on a spare memory card. This is, of course, a great way of getting your DSLR up & running after a full reset, but make sure you’re backing up and restoring a fully ‘working’ set of parameters!
Fortunately, resetting the camera settings back to a factory standard is a fairly straightforward process.
Nikon
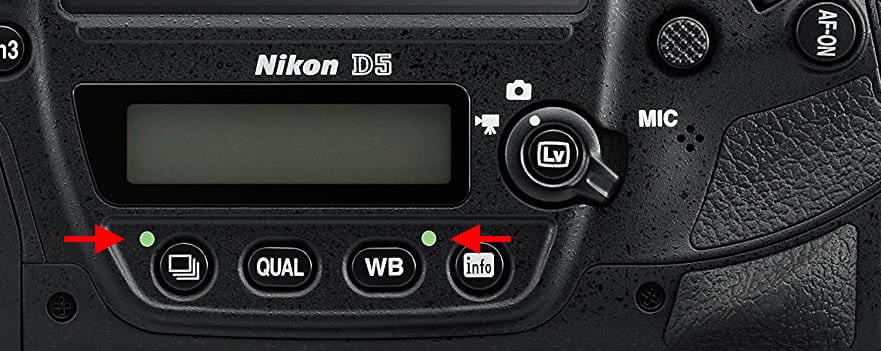
On many Nikon DSLRs, there is handy shortcut accessible from a couple of exterior buttons that are marked with a small green dot. Pressing these two buttons simultaneously for a second or so will reset many of the camera settings back to factory standards. The position of these buttons does vary from model to model though:
D5 The [DRIVE] & [WB] buttons below the smaller rear LCD.
D4, D4s The [ISO] & [WB] buttons below the smaller rear LCD.
D850, D810, D800 & D500 The [+/-] & [QUAL] buttons on the top.
D750, D610, D600 The [+/-] button on the top of the camera and the [ISO] button the rear.
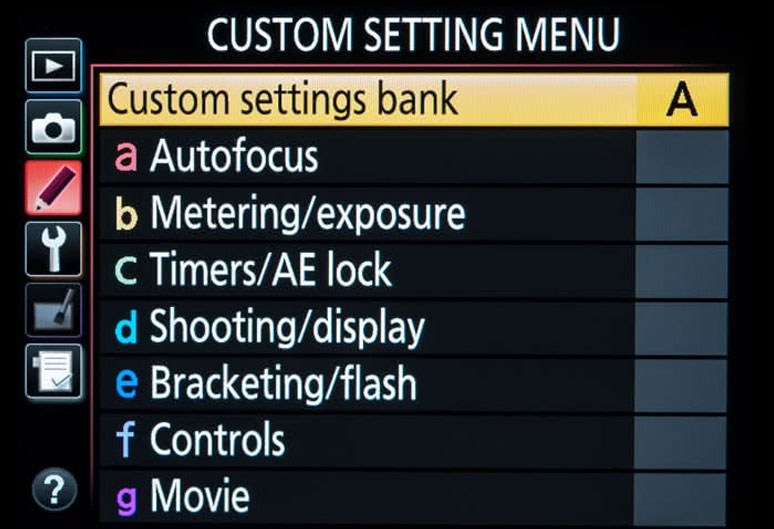
What we tend to find is that any custom functions will not be reset using the above procedure and you’ll need to go into menu to wipe these. Again, it varies from camera to camera!
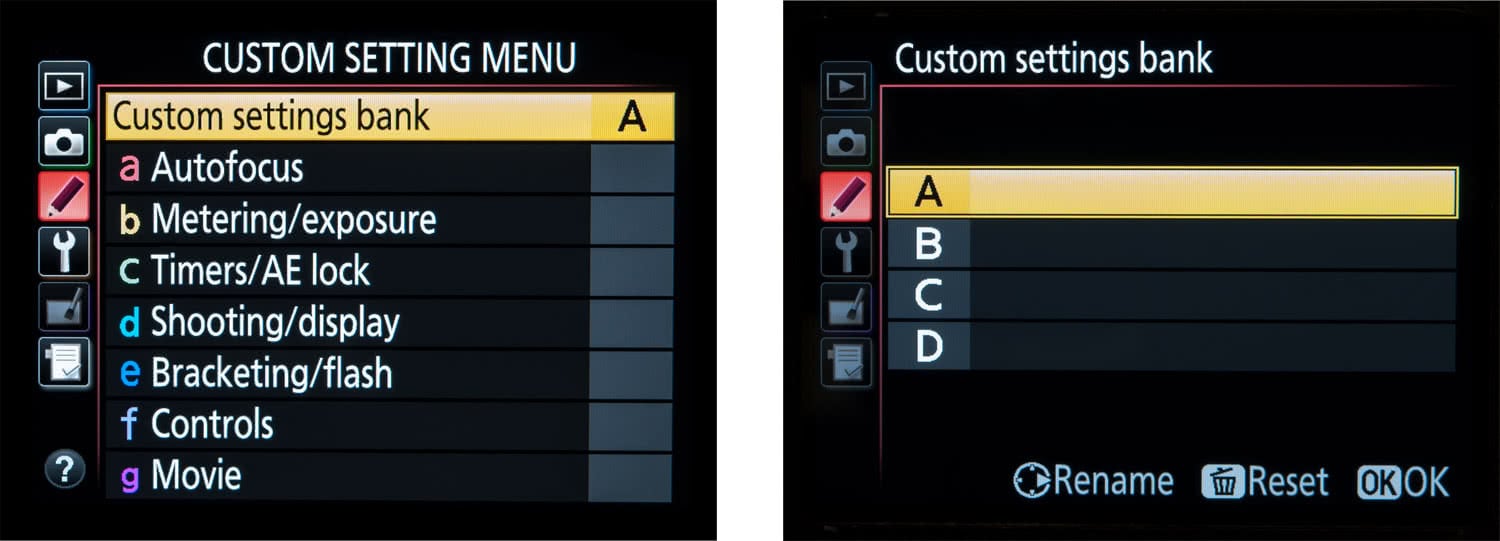
On the high-end Nikons (D800 and above), you’ll need to reset the 4 Custom settings banks individually. Select the [A] bank and press the [DELETE] button. Repeat for [B,C & D] banks.
You’ll also need to reset the 4 shooting banks, following the same procedure as above.
The D750, D610 & D600 only have one custom settings bank so resetting is much easier, and again, only the one shooting bank.
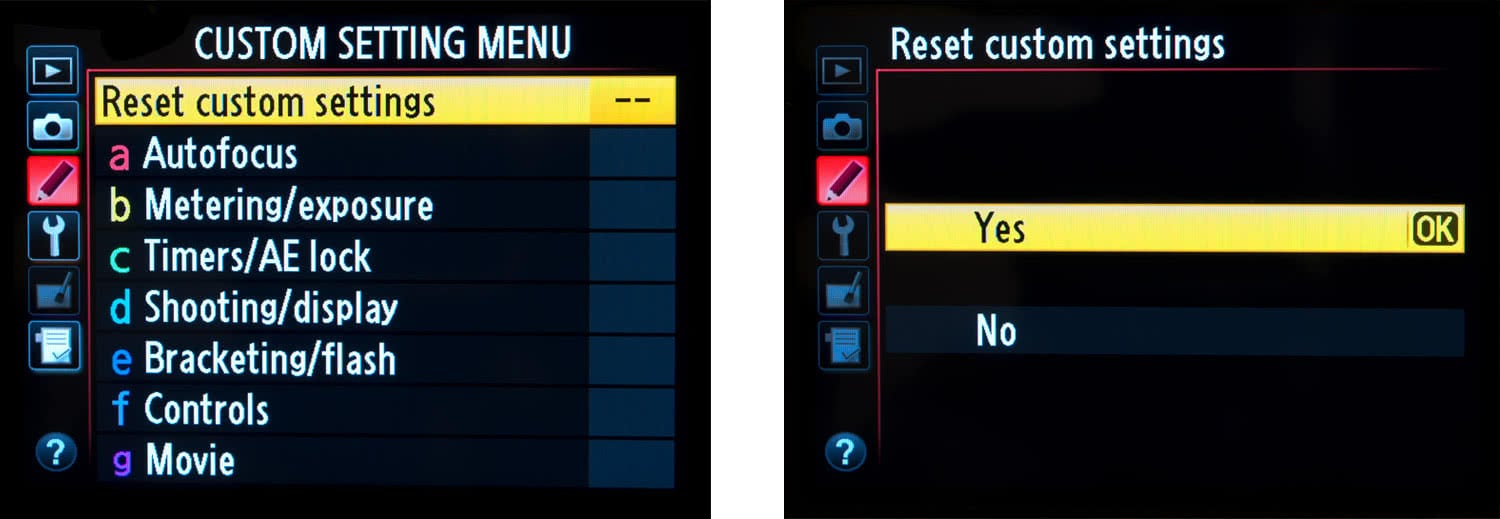
Interestingly, the D5 & D4s seem to be the only cameras with a master reset option in the menu, but again, not all custom settings are cleared.
Canon
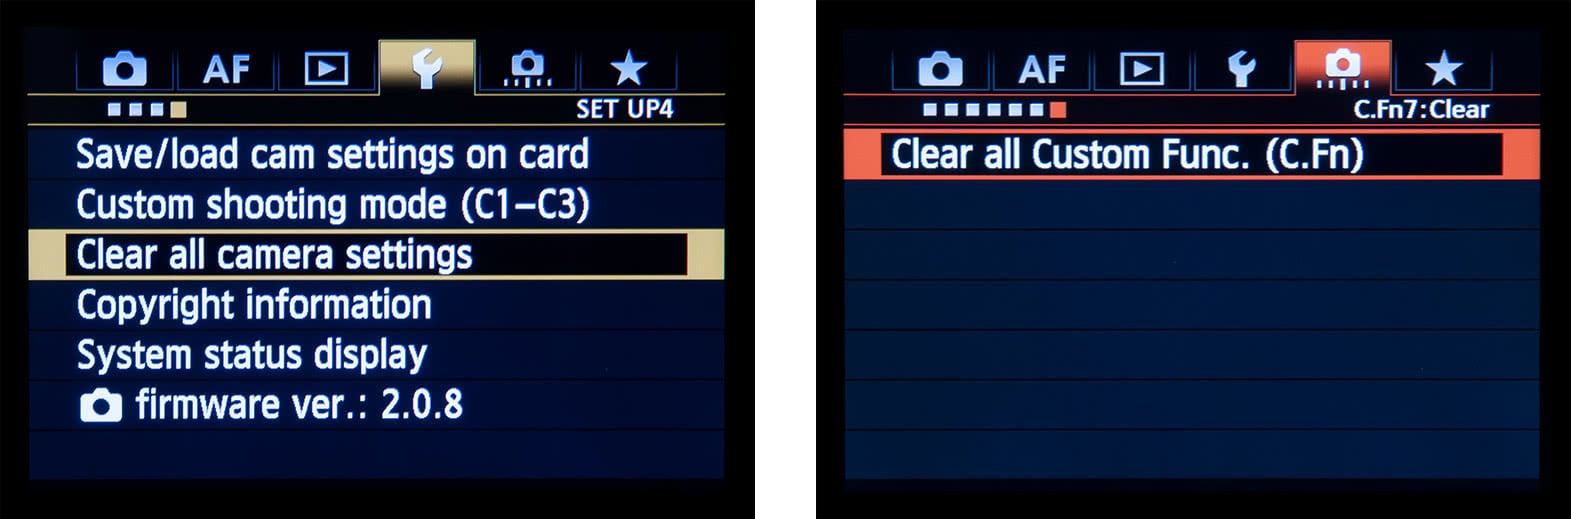
Canon users have it a bit easier when it comes to clearing errant settings. On the majority of professional grade bodies – certainly the 7D upwards – there are just two menu controls to access.
Activating these two options through the menu should return your Canon DSLR to its factory settings.
Sony
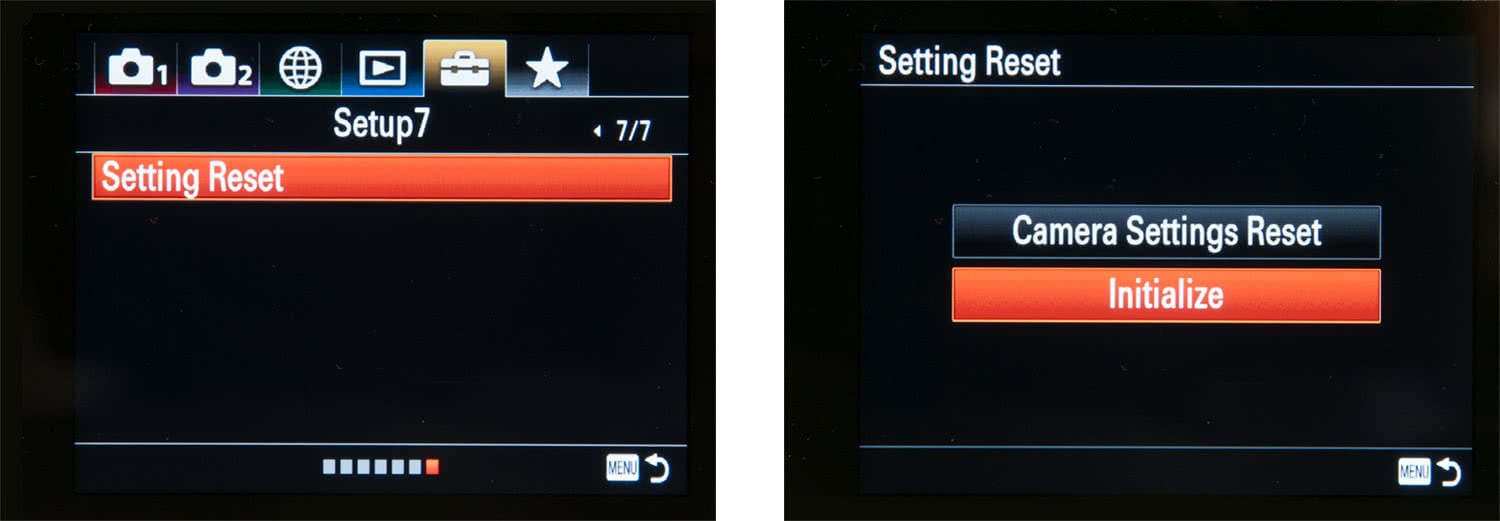
Sony users have it the easiest with the A7 & A9 cameras. A single menu option takes care of either wiping the camera settings, or performing a full factory reset and clearing absolutely every setting back to factory standard.
‘Camera Settings Reset’ will restore the standard shooting menu, whereas ‘Initialize’ will reset the entire camera back to factory standards. Unfortunately, Sony have not yet provided a facility for backing up and restoring settings, so be aware that you’ll have to sit down and go through every parameter, especially if you opted for the ‘Initialize’ option.
If anyone has any further suggestions for performing a camera reset, please feel free to share below.
It’s all too easy to cause accidental camera sun damage. Picture the scene: it’s a lovely day outside, the sun is shining. You’re getting some great photos with amazing natural light. You decide to take a break and grab some food – leaving your camera on the table outside.
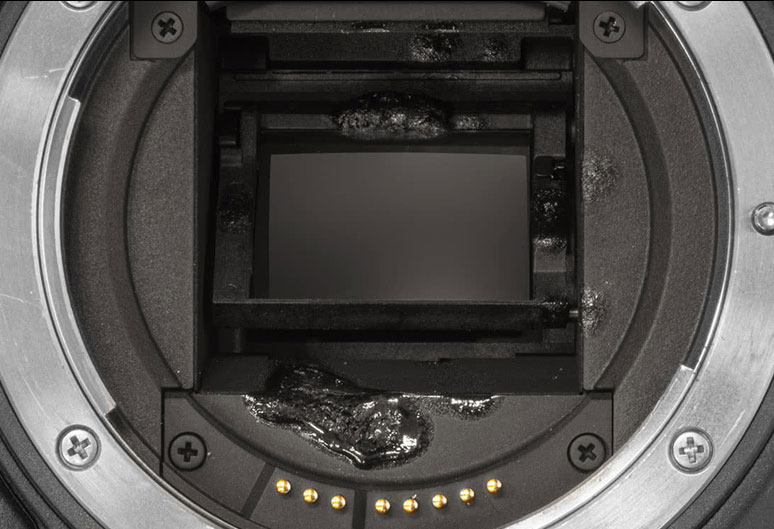
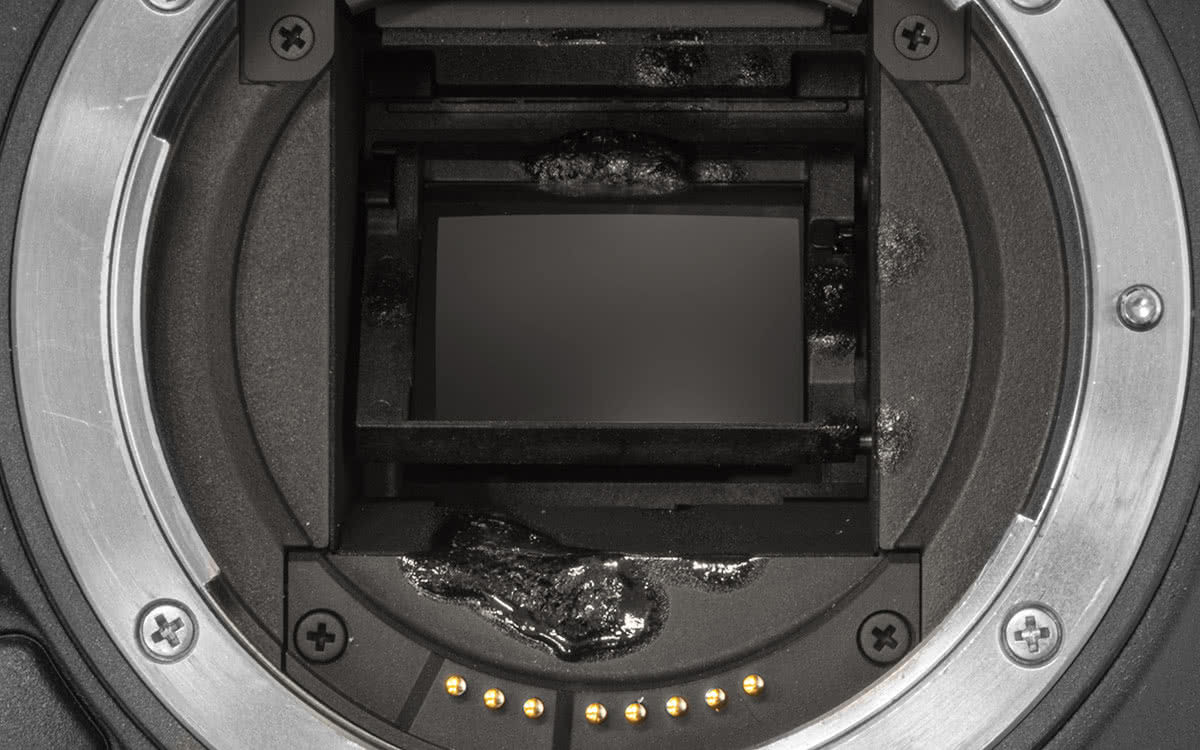
You come back and your camera looks like this:
Luckily there was no damage to the camera sensor; it was the mirror box that took the brunt. The repairs still amounted to around £350, but all things considered the photographer got off lucky. If they’d been using a mirrorless camera, or had left the camera in the sun for longer, the damage could have been significantly worse.
And it could have easily been avoided.
Let me explain the above picture a bit more – and what happens when a camera is left out in the sun.
This digital camera, a Canon EOS 7D Mark II, was left outside with the lens still attached, but no lens cap on. It was left for a few hours in direct sunlight. When the lens was removed, this damage was seen.
Think of it this way. What materials are cameras often made from? Plastic and metal. Plastic may have a high melting point, but it can and will reach this point if it’s left in high heat conditions for long enough. Shutter blades are made from extremely thin metal, and exposure to intense heat can cause them to sag or become twisted, resulting in permanent damage.
Some cameras are equipped with failsafes to prevent overheating in use. If they detect the internals getting too hot, they will initiate a ‘safety shutoff’ to try and reduce the temperature. This is useful to have, but is no defence against prolonged sun exposure, which can damage a camera whether it’s on or off.
Does taking pictures of the sun damage your camera?
This question doesn’t have a straightforward answer. It depends on the camera, how long you’re shooting the sun for, the position of the sun, and numerous other factors. But when it comes down to it: yes, when your camera is pointed directly at the sun, it can suffer damage – especially when the sun is at its highest point. This is because the lens acts as a magnifying glass and multiplies the intensity of the sun, which can be too much for the sensor.
In many cases, aiming your camera at the sun can cause a temporary ‘blooming’ effect – whereby the sensor becomes overloaded, and the light source may seem to give off the image of horizontal or vertical streaks of light.
This is not necessarily causing damage, and usually fades away. However, with older models, it may cause a slightly more permanent effect.
Now, you can take pictures of the sunrise and sunset as much as you want; this won’t cause any damage. However, if you are taking photos of the sun at any other time, try not to point your lens at the sun until you are ready to take the picture. Ideally, make sure your settings are pre-prepared. The longer your lens is pointed at the sun, the longer your sensor is being exposed. Pointing your camera at the sun for half a minute will be significantly safer than pointing it at the sun for a full minute. And when the sun is at its highest, I would avoid taking photos of it completely.
What about the solar eclipse?
A solar eclipse can be incredible, and is definitely photo-worthy. However, even with the moon blocking it, the sun’s rays are still immensely powerful. Shooting an eclipse could cause solar damage to your camera if you focus on it for too long, so it’s worth fitting your camera with a solar filter.
Be aware, however, that using a solar filter does mean that your shutter speeds will need to be slower, especially when using a long focal length. It would therefore also be worth using a tripod for stability. You may have heard some recommend using a neutral density filter, but solar filters are the only filters that are specifically designed to sufficiently dim the sunlight and protect the camera and your eyes from the sun.
On that note, I would avoid looking through the viewfinder if you can, as it may damage your eyes. Use Live View and the LCD screen to compose your image instead.
Ways to protect your camera from the heat
Cameras really don’t like performing in the heat, so you need to get creative in protecting them from it. This is especially true if you’re planning a long, active shoot outdoors. Here are a few quick tips for protecting your camera on an outdoor shoot:
Camera bag: Keep the camera in your camera bag when you’re not using it. This will give it a break from the sun and a chance to recover from the heat.
Towels: If you don’t have a dedicated camera bag, wrap your camera in a towel or a blanket. Even some clothes will do in a pinch! If your camera is just sitting in the car, cover it with some extra protection. Any way you can shelter it from the heat is recommended.
Umbrellas: If you’ve got a big setup and can’t move your camera, it may be worth investing in a couple of umbrellas (the shading kind, not the light modifying kind) to give your camera some protection.
Fight internal heating: Another way cameras can overheat is if they’re pushing themselves to do too much. You can help them with this by using an external battery, or a faster memory card.
To summarise
Cameras can severely struggle with the sun and with overheating, both internally and externally. However, there are many ways you can help with this and protect your camera.
The points to remember are
Try not to point your camera at the sun (but if you have to – be as quick as possible).
Do NOT leave your camera in the sun without protection.
You’d be forgiven for thinking that CamRanger are not that bothered whether you buy their products or not – they have zero presence on Instagram, and haven’t tweeted since 2015, updated their blog since 2016, or been reviewed since 2013.
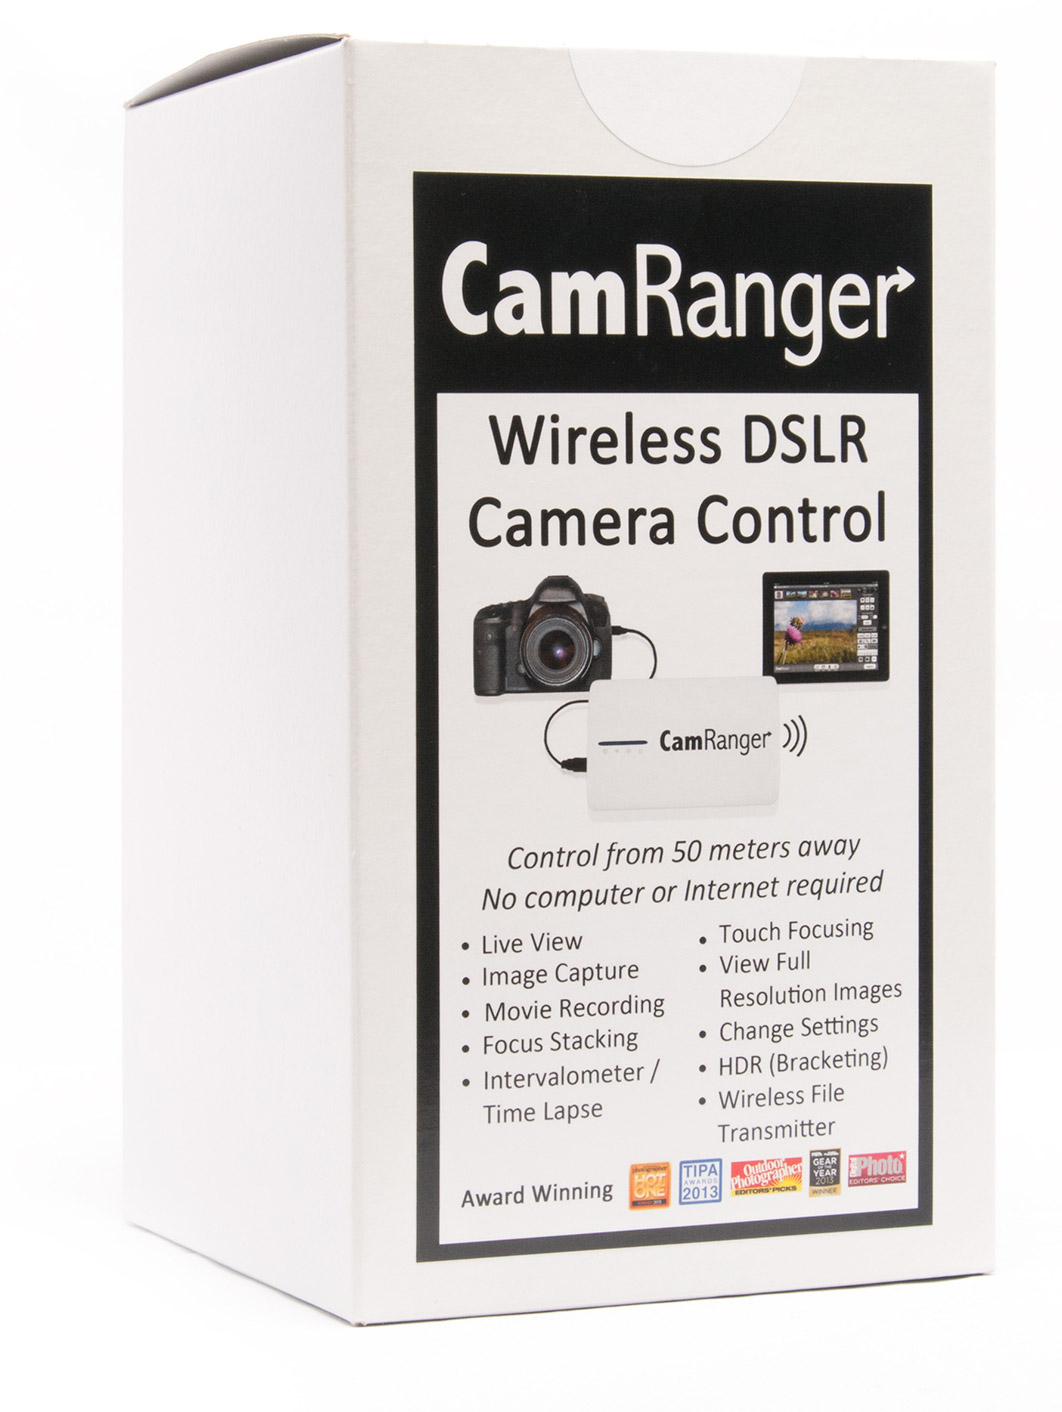
Perhaps you haven’t even heard of them. But then, how would you? Unless of course you’ve been looking to remote trigger your camera from a distance, because that seems to be the sell point on the CamRanger – it’s a wireless control trigger for photographers who want to control their Nikon or Canon from an iOS device. You can view and edit camera settings, record movies, set up timelapse, and capture images all from a remote device. Neat. But the thing they don’t sell you on is the CamRanger’s ability to work as a wireless tethering device. A simple function in many ways, tethering is an incredibly usable function for photographers, and one environmental photographers worldwide, would prefer to be wireless.
Wireless tethering seems to be hard to do well – reliability, connectivity and speed seem to be the hardest functions to excel in and there doesn’t seem to be the perfect solution.
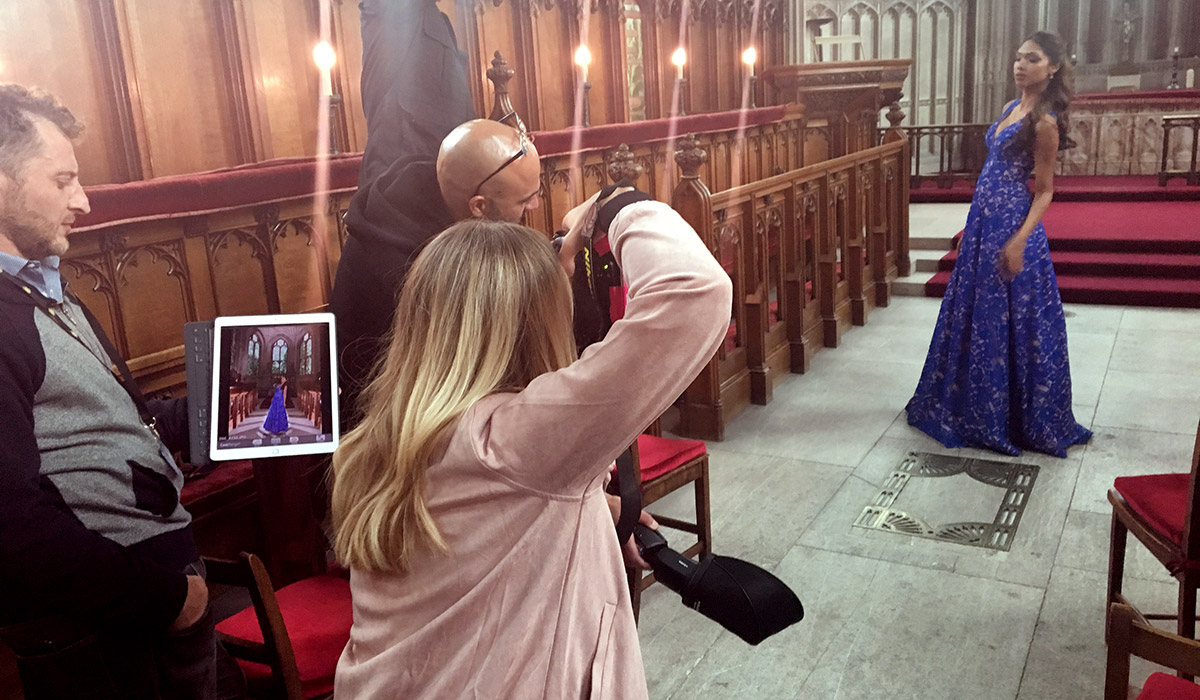
Firstly, let me say what I fan I am of the theory of tethering, the idea is great. Images sent to a large screen where you, your assistant and your clients can woo and wow at your excellent skills OR pick apart every part of your image and make endless suggestions of ways to tweak the shot. But still. Great. Myself and my assistant can check focus, and clients can be assured you’re getting what they want, how they want.
My experience with EyeFi mobiPRO cards has been tenuous. Even wired tethering leaves me short, as Nikon users will know, you can’t view both on screen and camera back when tethering, and camera back is not something I’m willing to sacrifice. Plus, the impracticality of being attached to a computer whilst I’m moving around a location, manoeuvring myself into small corners and standing on furniture makes being connected almost impossible (you want to see more of that, follow me on instagram @holly_wren). And my biggest fear of wired tethering – the potential loss of files, given that if you lose the wire you risk losing all the images – as the files are not being written to the card in your camera whilst attached to the computer. And losing the wire is easy, even jerk stoppers and alike don’t really help.
When most people think tethering, they think Tether Tools. A competitor to CamRanger, who do actually have their shit together – fancy website, nice branding, good product range and a social media presence to the tune of 90,000 Instagram followers. So why pick the very undersold CamRanger? I haven’t used Tether Tools “Air Case” wireless, so I can’t compare these products directly, but I have been told by reliable sources (clears throat, ahem, Fixation team) that the CamRanger is a tried and tested recommendation with other photographers. And looking at their website they seem to have a surprisingly good range of reviews and fans, perhaps CamRanger are just the best kept secret in professional photography?
Picking up the CamRanger, you’ll likely be completely underwhelmed. You’ll wonder what your £200 is paying for – not product marketing (as we established) and certainly not packaging or branding; the sticker looks like a 12-year-old designed it on word and printed it on their home computer. But should you care? No. Because the CamRanger to date provides the best wireless tethering I’ve tried.
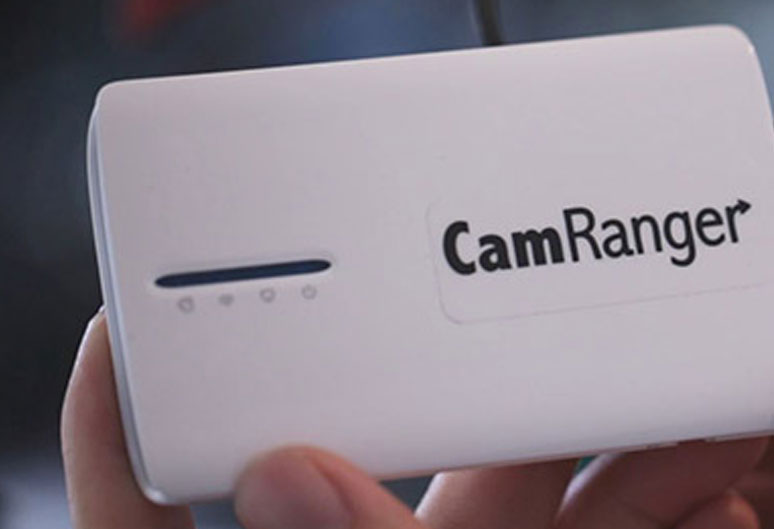
It’s a little white box with some simple slide switches and reassuring green lights, that flash similarly to those on a wifi box. It’s relatively compact and feels sleek (ignore the sticker).
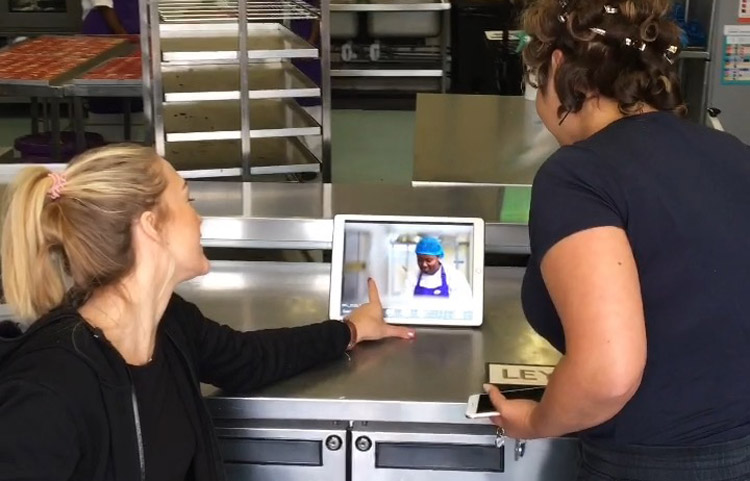
The connection is good, not perfect but almost. The CamRanger works by creating an ad hoc wifi network that your iOS device connects too. Once you get it turned on and connected via wifi (I use my iPad Pro), it’s a simple as firing and waiting for the image to appear – which happens quickly, seemingly only a fraction slower than when physically tethered. You can shoot RAW files + jpeg in camera, and the CamRanger receives only the jpeg. And you can view on your iOS device, but also, thankfully, still on the back of the camera. So no walking to and from the ipad unless you choose. I give the ipad to my assistant, or client, so they can see what I see. Occasionally I just place it in front of me, as an extra check, or show my model to feedback and adjust poses and framing.
The app is free, and you can share to multiple devices by downloading a secondary app – CamRanger Share, which is especially handy if you have multiple parties wanting to see the shots simultaneously – no more huddling around the one computer screen, or fighting with the client to see your own image. It also means you can select the images to share (or not) and use my favourite function “compare” which allows you to show two images side by side, especially useful when doing demonstrations or giving options on shots. By switching into Client Mode in app, you take away the camera controls, and like magic, it then works purely as a tether view tool.
You’re going to want to leave the CamRanger and your camera switched on where you can – otherwise you risk breaking the wifi connection and having to re-establish via settings on your device. A habit I have to get used to, turning my camera off when I’m not shooting is second nature to me in an effort to conserve battery.
Buffering seems to be minimal if you shoot at a steady pace, for my lifestyle work where I sometimes go slightly pap on myself, there is some lag. But there’s lag when I shoot like that tethered by wire. So I’ll take that on the chin.
I also like that nothing is stored on your device, and the session you are shooting on is wiped after a few hours, if you don’t re connect by opening the app. Meaning you don’t take up precious storage space, or have to see libraries of previous shoots when working with different clients (because I never remembered to wipe the last session on my eyefi app when I finished).
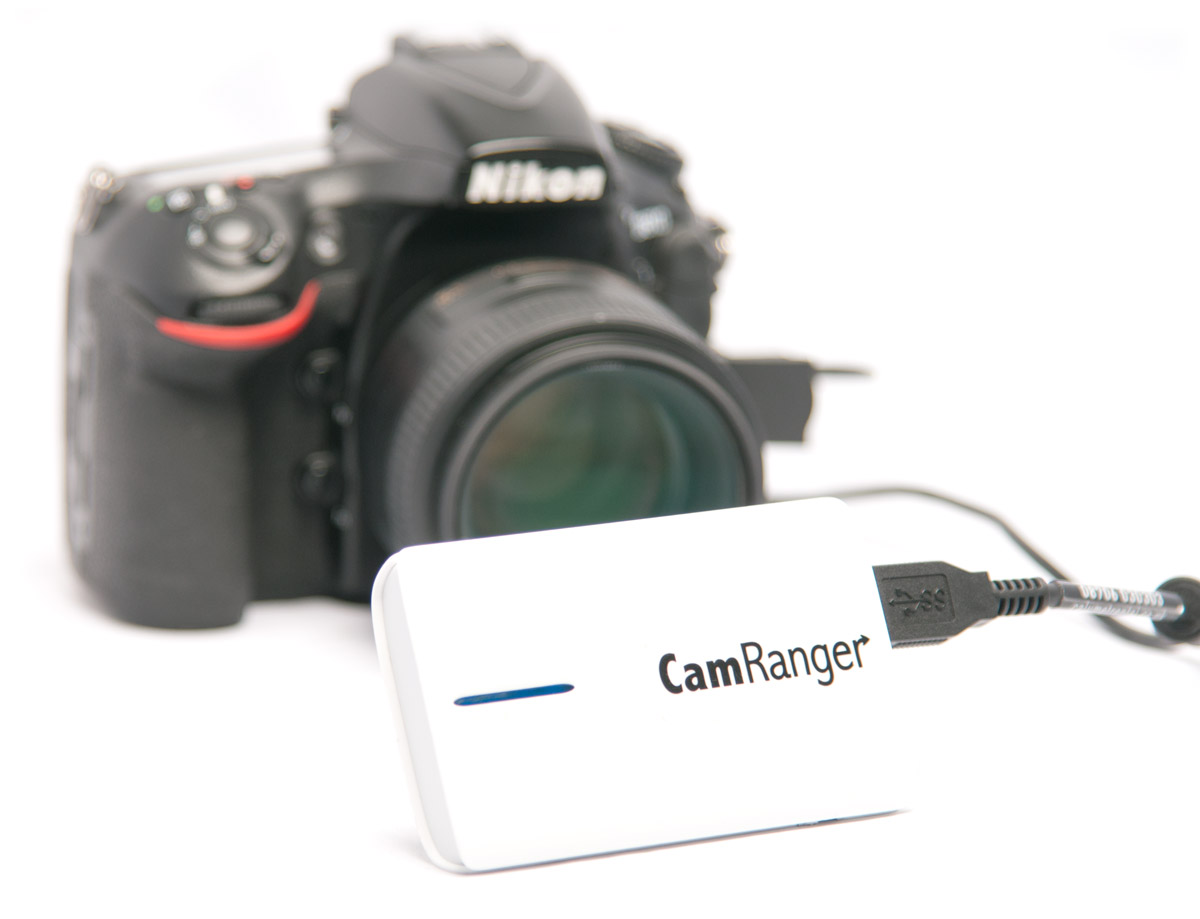
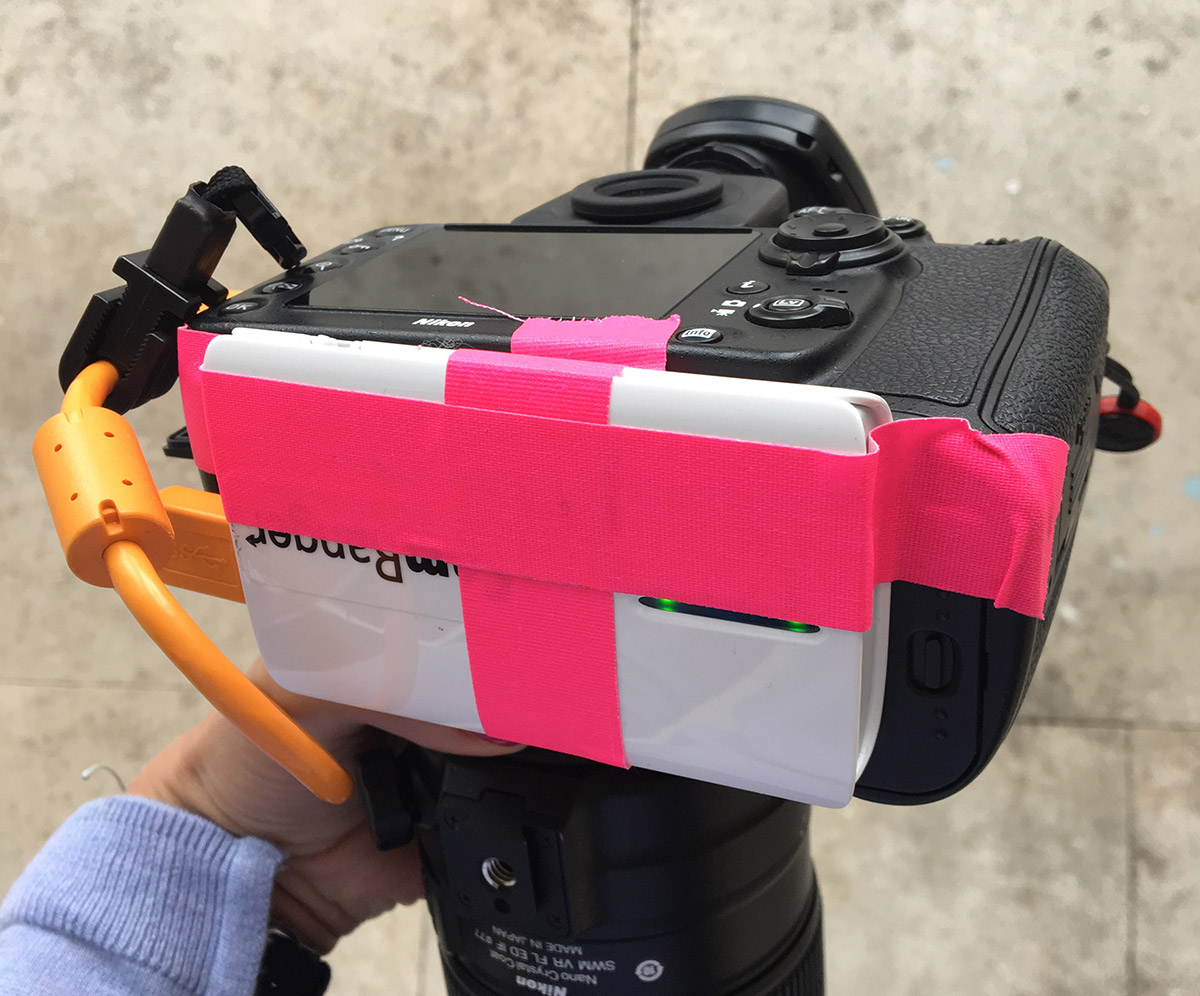
The bummer is, that the CamRanger connects via a USB cable that leaves the problem of where to put it whilst shooting. Others have suggested a longer cable giving you the option to put the small (phone sized) device in your pocket. But for me, that gives too much opportunity for the wire to be disconnected (at least with no risk of losing your images!). So my solution is to tape it to the bottom of my camera, and use the TetherTools Jerk Stopper to add an extra level of protection to the wire. That way, the CamRanger stays held by me alongside my camera. Despite my best efforts to make it look sexy using pink tape, it does not. And it’s not entirely practical – the tape can make it more challenging to change batteries and memory cards. But it’s workable.
What’s that you say? TetherTools have the solution with their AirCase? Well, sort of. There Air Case actually fits in the hot shoe, or dangles from the camera on a string OR sits on an extension bar next to a flash units – but for those of us using Triggers to fire flash, that isn’t even an option. And also puts a bar across your line of view, or a unit dangling in the way of where you grip your camera. So I’m afraid the not-so-sexy solution of taping to camera is the best I’ve found thus far.
The unit runs off a battery, and if you feel the need, you can buy a spare for £30. But it charges fast, and in my experience of using it all day, hasn’t run out. But then I’m generally near-ish to some sort of power socket, and could get it charged quickly and easily. If you’re more paranoid and a little less frugal than me, and extra battery is probably worth the investment.
The CamRanger isn’t perfect, in my experience it can sometimes struggle with speed of connection in some locations, and I can’t tell you why – perhaps something to do with other Wi-Fi networks and connections? Plus, the inability to keep it near the camera without going guerilla style with camera tape doesn’t scream sophistication. But, as far as your choices go for now, it’s the best I’ve found! It’s easy to use, set up, the app is simple, the connection works and it’s portable. I can view back of camera and keep my clients happy. For me, it’s a no brainer. If you’re looking for a wireless tethering solution, this is it.
You can hire the CamRanger from Wex rental – and handily it’s provided with an iPad. Or you can spend your hard earned cash buying one. But don’t even think about getting one direct – they’re not shipping at the moment. As I said, it’s almost like they don’t want you to buy one!
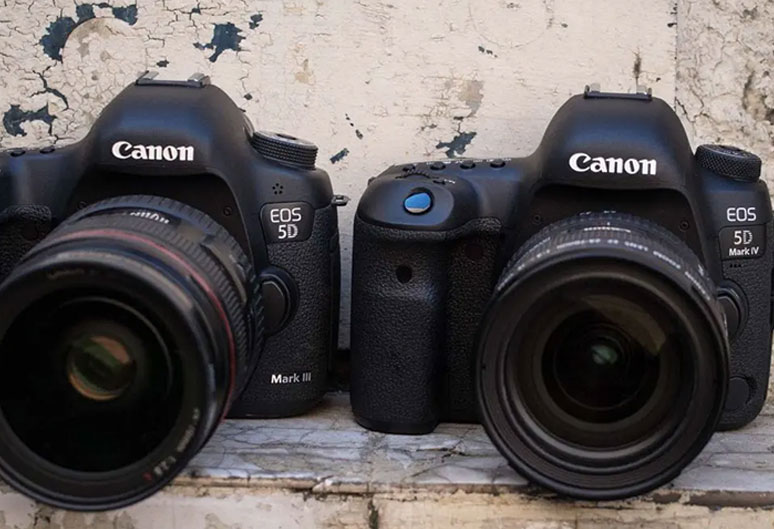
London based portrait photographer Nyla Sammons pitches the Canon EOS 5D Mk IV against her trusty 5D Mk III.
My first substantial investment as a professional photographer was a Canon EOS 5D Mk II, which later I upgraded to a 5D Mark III. I found the upgrade of the 5D Mk II to the Mk III to be a significant difference due to the photo quality, sharpness and adaptability to photos in low light with the increased ISO capabilities. I’ve been impressed with my Mk III for three years now, however the thought of a new camera upgrade will always make my heart skip a beat! Would the Canon 5D Mk IV be a game changer?
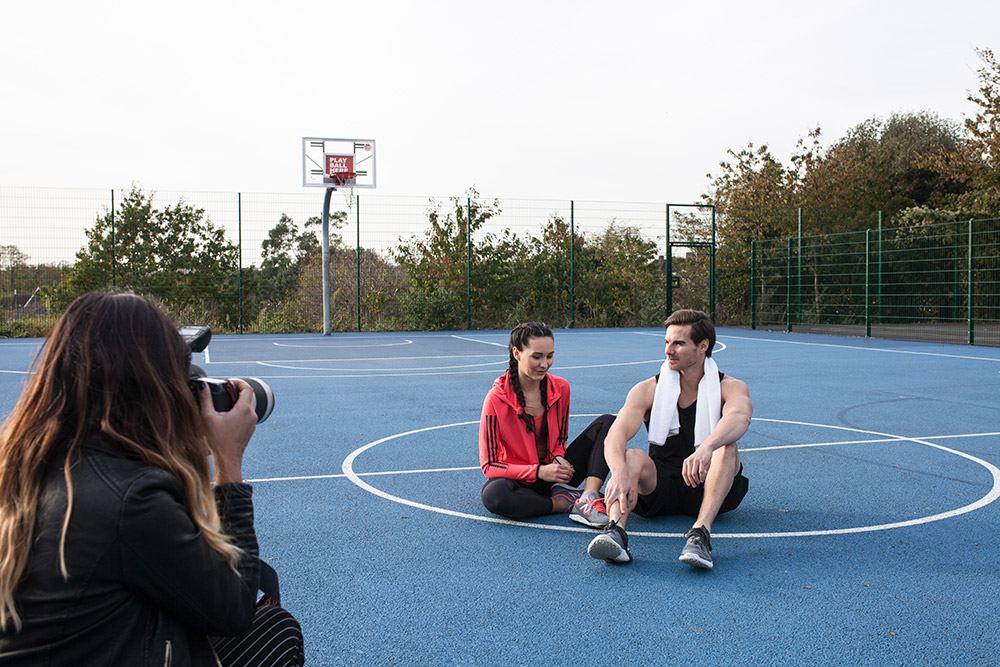
I had a sports shoot lined up and Fixation kindly lent me a 5D Mk IV to test. It looks pretty much the same as its predecessor; the button layout is nearly identical and a lot of the menu options are similar, so it felt comfortable having the camera in my hands. The battery and charger are the same as the Mark III, so no extra expenditure there, if you are upgrading. Music to my ears…
The camera has Dual Pixel AF at 30 megapixel resolution, a noticeable upgrade from 22.3 megapixels, giving you a lot more room to create very large, high-quality prints. Other noticeable improvements include the touch-screen, GPS and built-in Wi-Fi. The video capabilities have also been improved significantly, but I’m a stills photographer at heart, so I was less interested in the improvements there.
With the introduction of Dual Pixel RAW in the Mark IV you can use Canon’s digital photo professional image micro-adjustment to help increase sharpness in detail areas and reduce flare & ghosting. There has been a lot of fuss over this, and at some point I should take a crappy photo and see how well it can be salvaged in post-production.
For those who are interested, the specifications can be seen here
I can’t say that I saw much difference in the final images compared to my Mk III, but what I particularly liked about the Mark IV, is the built-in Wi-Fi. I’ve been on jobs where the client has asked to see some of the photos while on set, which has meant me downloading the images to my laptop, selecting the best ones and then emailing them over to the client. The Wi-Fi capability, allowed me to transfer the images without any fuss, using the Canon Camera Connect app. A huge bonus in my books!
However, one of the downfalls of the Mark IV – and possibly thanks to the WiFi – is the battery life and I found it seemed to drain a lot quicker compared to the Mk III. We all know how essential it is to carry spare batteries and the three I own are always in my camera bag. I would say as long as you own at least three batteries, that should be enough to see you through a day’s shoot; I went through two batteries during my test.
Overall I’m still happy with my Mk III. It delivers clean images, I can shoot in low light and not worry about noise and I can print large images and not lose quality. When I switched from the Mk II to the Mk III I saw a huge improvement in most areas, but nowhere near as significant on the Mk IV. I have my eye on a new lens, so for now I’ll probably stick with my Mk III and invest in the glass. Ask me in six months time, after I’ve bought that ridiculously expensive lens and the answer would probably be yes, my next investment will be the Mark IV. There is no denying the technology has improved both in terms of photography and video capabilities.
The Canon 5D Mark IV is currently available with 24 months interest-free credit. Contact our sales team for more info. It is also available to hire from our sister company Wex Rental
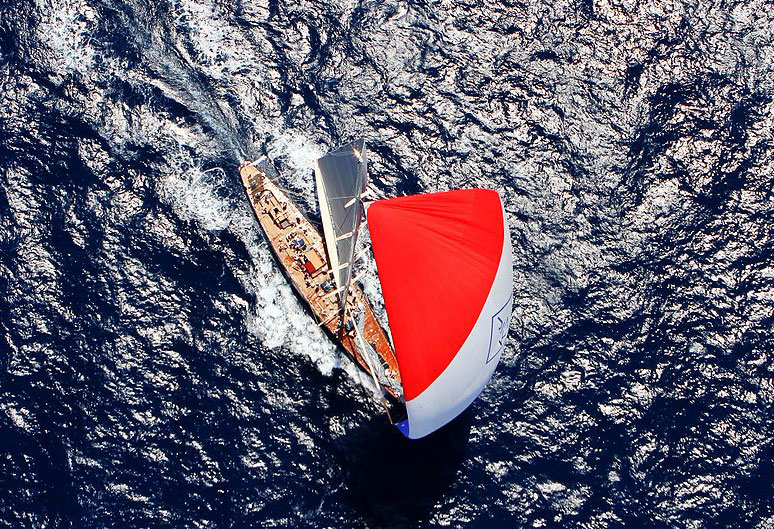
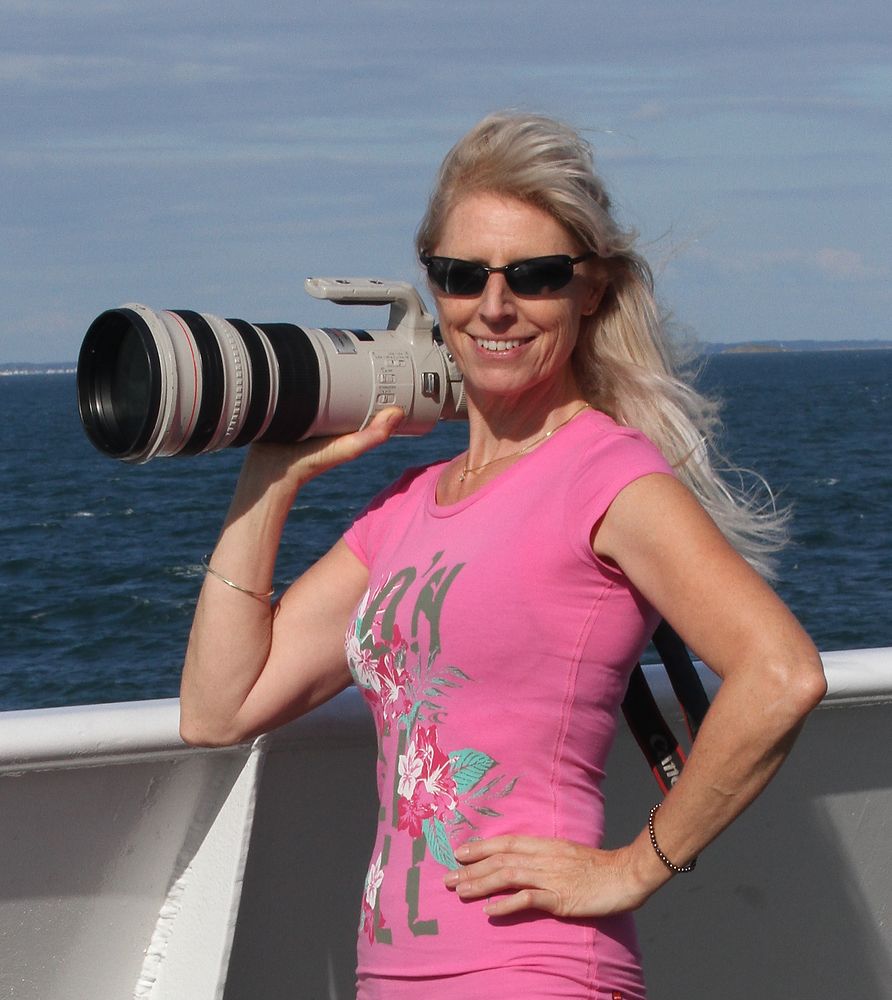
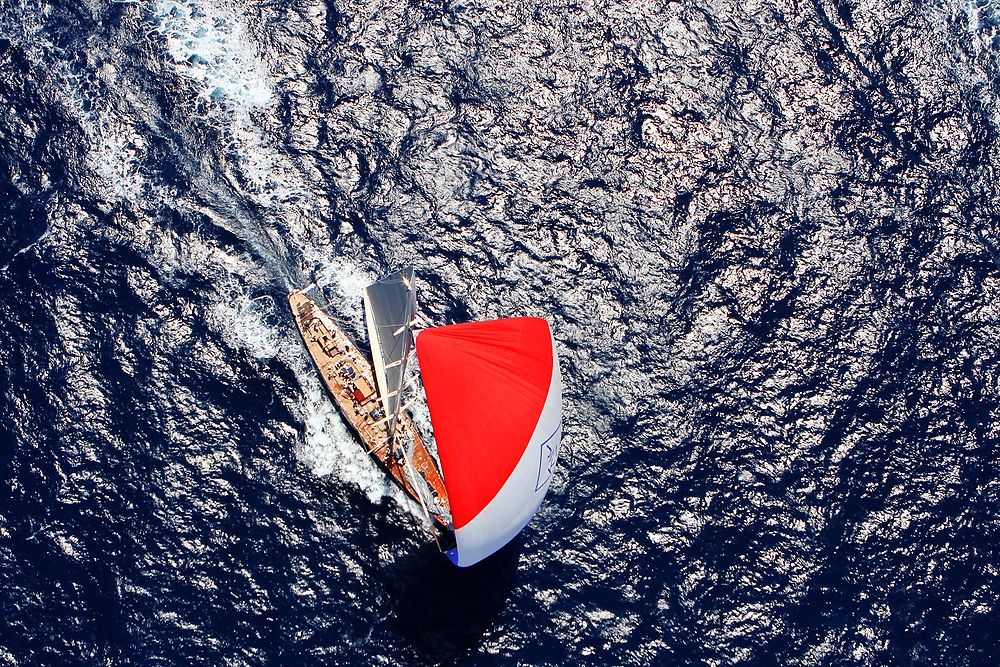
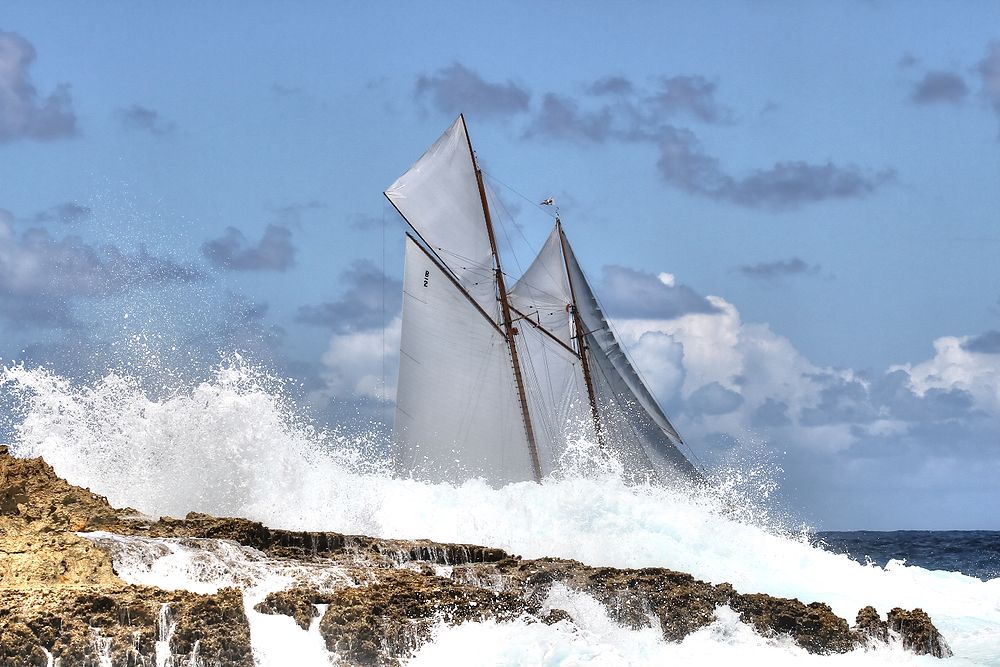
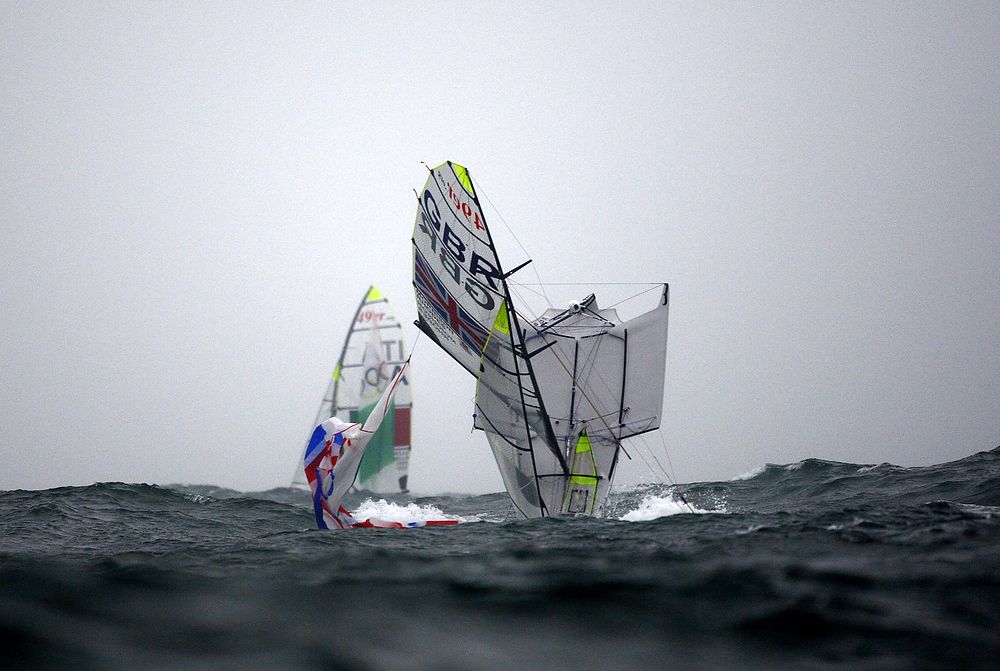
Ingrid Abery is one of the finest marine sports photographers working today. For the last 20 years she has photographed the sailing world’s most famous boat races and her work has featured in major yachting magazines all over the globe. I caught up with Ingrid recently over a coffee to ask her about her work and to find out what keeps her motivated.
Thanks for taking the time to chat to us Ingrid. can you tell us a bit about yourself?
I did a degree in photography and sculpture at Bath Academy before moving to London. I used to sail yachts for pleasure in between my studio photography, and fellow sailors began asking me to photograph their boats. After a while I realised that I much preferred this to sitting in my studio in London so began photographing yachts full time.
I understand you’ve just returned from a big trip. How much planning is involved?
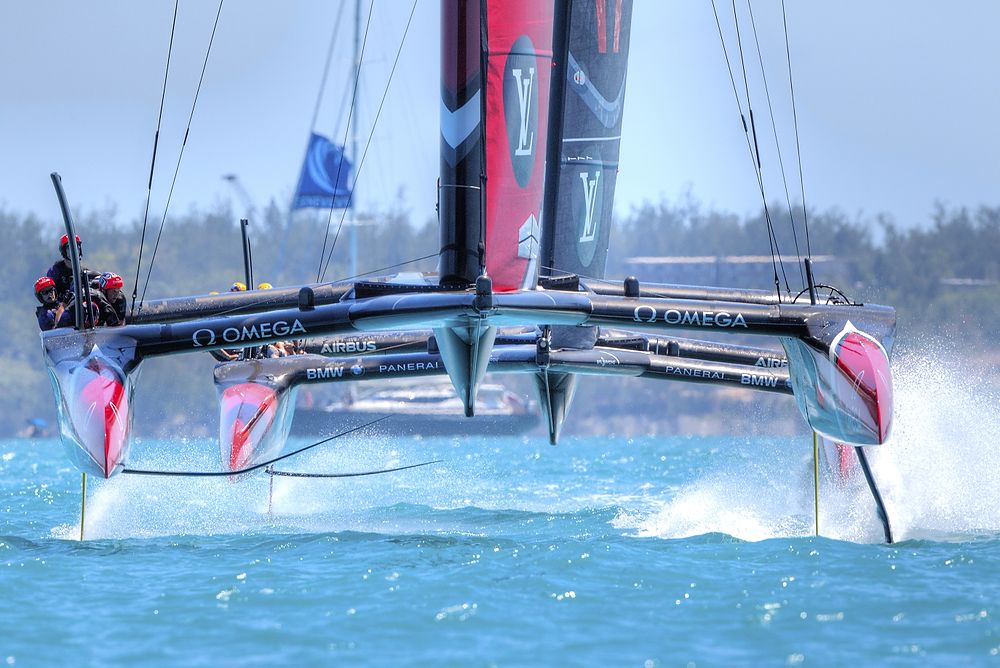
Yes, I’ve just returned from Bermuda, shooting the Americas Cup which is the biggest and most prestigious race in the yachting calendar. The logistics of planning and arranging the travel and accommodation can be time consuming, but I’ve been doing it for years so it’s like second nature. Most importantly I make sure my equipment is in top working order and everything is cleaned and checked thoroughly before going on assignment.
How do you take care of your kit when you’re shooting in such wet conditions? I’ve seen pictures of you with your cameras, surrounded by water and it makes me wince!
Sometimes I use the old Aquatech neoprene housings and in fact, I still use one bought from Fixation probably 18 years ago. Mostly though, I find the housings rather cumbersome so I tend to shoot with nothing around the cameras. I use filters on the lenses where possible and just try and keep the kit away from water as much as possible.
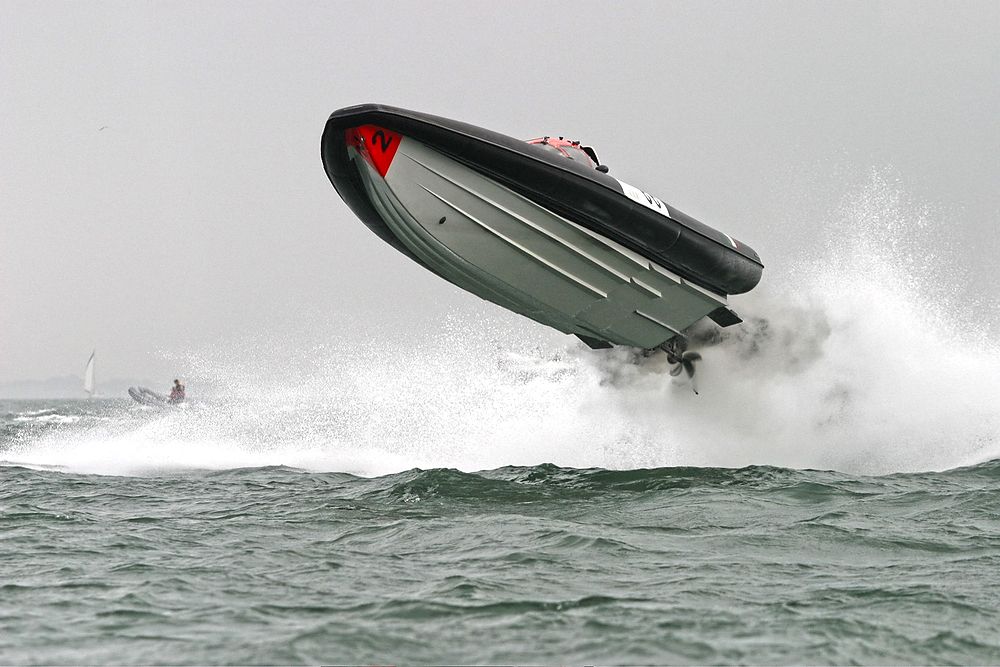
For part of the time, when you’re on a rigid inflatable, chasing a yacht at high speed, hanging on for dear life at speeds of up to 45mph, you go with the motion and can see if a wave is going to come and lift your equipment out of the way. Of course, there are those times you’re on your knees at the back of the boat, Peli case open while you change lenses, and a rogue wave will come over… a quicker reaction is required!
I imagine you’ve killed a few pieces of kit over the years?
(Laughing), Oh absolutely! Although I’d have to say that in 20 years of marine work I haven’t lost that much equipment. Saying that, recalling one occasion – Country Life had asked me to photograph a yacht race in Cowes. I arrived at the club and there was no driver for the chase boat, so they asked the club secretary (who’d served in the Navy and knew the ocean) to step in. We headed out to the start and tied up waiting for the race to start. I was getting a bit anxious as we were running short of time and the driver was enjoying his lunch with a couple of glasses of wine. Eventually we headed out to one particular mark and I managed to grab some shots as the yachts came round. We carried on to a second mark and after I’d photographed again, packed up my kit ready to head back. It was at this point he decided to accelerate and I was hanging on for dear life and then suddenly the boat flipped and I was thrown out! The only problem was that driver wasn’t aware of what had happened and he carried on full throttle towards the finish line about half a mile away. So there was me, given no lifejacket, treading water and holding on to my rucksack which I’d had my hand on when thrown out. My Peli case was still in the boat but I was desperately trying to save the rucksack and could see the fleet going past me at a distance but they were too far away to hear me shouting and at this point starting to think this might go terribly wrong. Luckily, a nearby boat eventually saw me and came over to see if I was okay. In the distance I could see the driver of my boat turn around, presumably to ask me something and realise I wasn’t there! He came pelting back and eventually picked me up. When I was safely back on the boat, unzipped my rucksack and the water just poured out. I’d had a bunch of lenses and a couple of bodies in there, including my brand new digital EOS. When finally back in London, I brought the kit to Fixation and as far as I can recall, everything was ruined apart from three of the lenses which you managed to save. In fact, one of those lenses I still use today. The memory card – luckily – was okay and the pictures eventually made the cover of Country Life.
You must have to take quite a bit of kit with you. What’s in your kit bag?
I try to balance it, depending on where I’m going, but generally have 3 to 4 Canon bodies, plenty of lenses – 24-70mm ƒ/2.8, my trusted 70-200mm ƒ/2.8 which is my favourite, an old 300mm ƒ/2.8 which is very tatty and misshapen but still does the job. I must have bought it over 15 years ago from Fixation. My 500mm ƒ/4 which is a dream, I use a lot and also take an 8mm fisheye for the odd interesting shot.
I shoot everything handheld, and try to wedge myself against the side of the boat for stability. I used to shoot with an old 600mm, which was a very heavy beast, but find the 500mm is much lighter and use it with an EOS 7D. The benefits of the crop sensor make it perfect for when shooting something like the Olympics or the Americas Cup. It’s useful to have a number of bodies around me so as to quickly put down and grab something with a different lens on without having to think. It also helps having strong arms!
It can be, but I wouldn’t have it any other way. To be a good sports photographer, you not only have to have a good eye for composition but speaking a few languages is useful and of course, a good level of fitness.
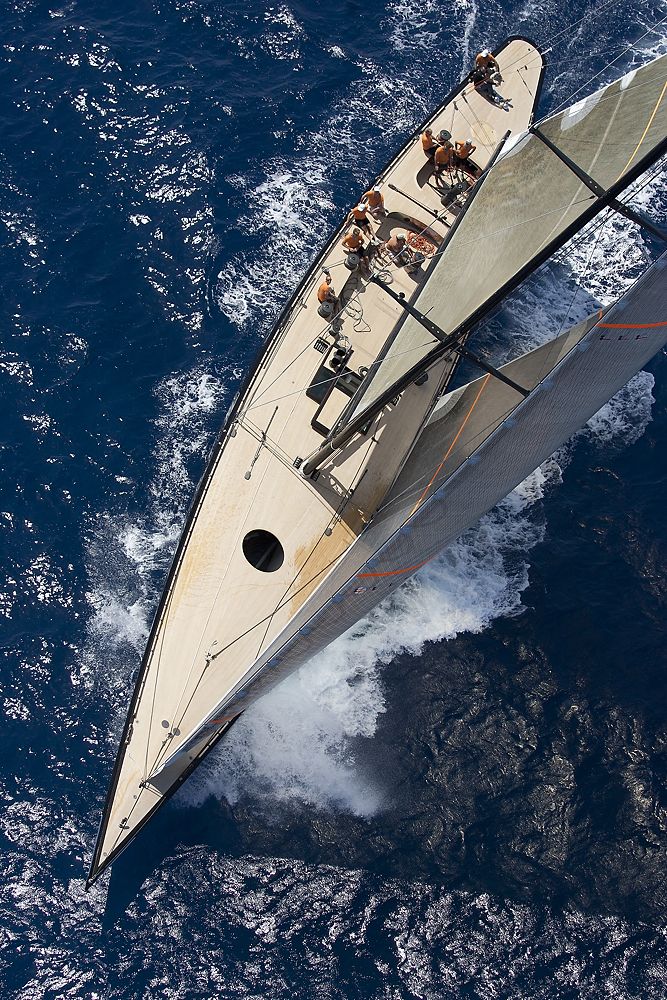
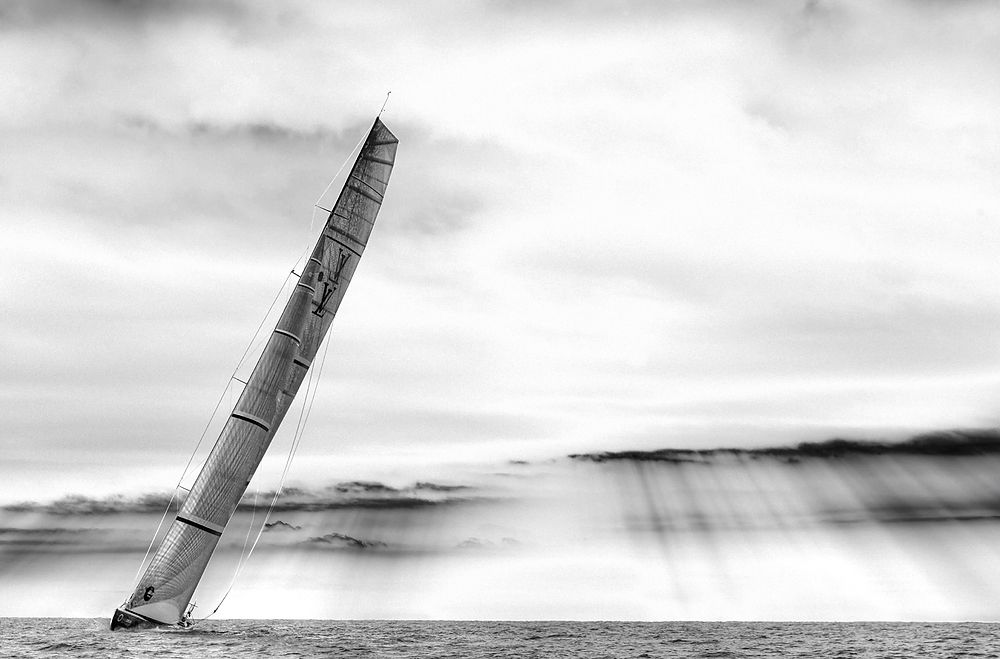
I would have to say it’s the drama, speed, action and intrigue that keeps it interesting for me and the boats are getting faster which makes it all the more thrilling. When you’re hanging out of a helicopter, chasing a yacht that’s going at 26 knots up Sydney Harbour, it’s an amazing feeling. I keep pushing myself and trying new techniques, new kit; as you may have guessed, I love speed so standing still is not an option.
I don’t sail as much as I used to because work takes up so much of my time. I used to try and race in between jobs, and always take a camera with me, but found I couldn’t focus on sailing as I’d always be seeing great missed opportunities because I was in the middle of something else.
Ingrid was talking to Tim Stavrinou. To see more of her work, visit her website: www.ingridabery.com
We use cookies on our website to give you the most relevant experience by remembering your preferences and repeat visits. By clicking “Accept”, you consent to the use of all the cookies.
This website uses cookies to improve your experience while you navigate through the website. Out of these cookies, the cookies that are categorized as necessary are stored on your browser as they are essential for the working of basic functionalities of the website. We also use third-party cookies that help us analyze and understand how you use this website. These cookies will be stored in your browser only with your consent. You also have the option to opt-out of these cookies. But opting out of some of these cookies may have an effect on your browsing experience. We log visitor IP addresses and cookie preferences for due diligence reporting.
Necessary cookies are absolutely essential for the website to function properly. These cookies ensure basic functionalities and security features of the website, anonymously.
Advertisement cookies are used to provide visitors with relevant ads and marketing campaigns. These cookies track visitors across websites and collect information to provide customized ads.
Performance cookies are used to understand and analyze the key performance indexes of the website which helps in delivering a better user experience for the visitors.
Analytical cookies are used to understand how visitors interact with the website. These cookies help provide information on metrics the number of visitors, bounce rate, traffic source, etc.
Functional cookies help to perform certain functionalities like sharing the content of the website on social media platforms, collect feedbacks, and other third-party features.