As celebrated as the traditional strawberries & cream, Wimbledon fortnight is well underway and both the permanent and temporary inhabitants of SW19 are undoubtedly praying for two weeks of dry weather.
Long-time Reuters staff photographer Toby Melville has been photographing at Wimbledon for the last 20 years (missing three occasions thanks to Glastonbury and the World Cup) and we caught up with him between assignments to find out a little more about what goes on behind the scenes at the UK’s most prestigious tennis tournament.
 Toby Melville self-portrait on Court No. 1 | 5th July 2017 | © REUTERS/Toby Melville
Thanks for taking the time to talk to us Toby. I understand you’re currently standing outside No. 10 Downing Street!
Yes, it’s been so busy for the last few weeks. I’ve been covering the election, the attacks in London and the Grenfell Tower fire, so I’m quite looking forward to the relative peace and quiet of Wimbledon.
How much of your work is centred around Sports?
I would guess on an annual basis that around a third of what I shoot is sports oriented, with the rest made up of politics, breaking news and business. At this time of year though, with Ascot, Wimbledon and the World Athletic Championships coming up, that figure goes up to around 75% – providing breaking news doesn’t get in the way! A few years ago I was lucky enough to cover the Australian Open for two years on the trot, but generally speaking, for Tennis I just cover Wimbledon and the ATP Finals.
Can you describe a typical day at Wimbledon?
Even though play doesn’t start until 11.30am, for the first few days I’ll get to the grounds early to capture some feature shots – crowds, stadium shots – that sort of thing and it’s also a good time to get shots of the players warming up. For the first week there are 5 Reuters photographers and we’ll have a team meeting around 9.30am to decide which photographers are covering which games and then we’ll all head to our various courts. We never know what time the games are going to finish; for some matches it could be all over in under an hour in 2 sets, whereas the men’s matches could stretch to 5 sets and last 5 hours. I tend to keep updated through the Wimbledon app on my phone or through a messaging group with my colleagues to see what opportunities have presented themselves. The on-site editor will also be reviewing the images we’ve selected ourselves and wired through, and he’ll advise on where we should move to. The truth is we don’t always know where our colleagues are and sometimes have to move quickly, but by and large the system works very well. For the two show courts – Centre and No. 1 – we’ll have a photographer based there every day until the ‘business end’ of the competition where they’ll usually be two photographers per organisation.
How do you decide which courts a particular photographer covers?
It’s a fairly democratic system and we tend to rotate every day. As I mentioned before, there’ll be a photographer on Centre Court and No.1 Court, and the remaining three will try and cover as many of the other matches as they feasibly can, so it’s only sections of the match – hopefully the beginning and some good action during the match, and the reactions at the finish. The photographers based on the show courts will also help out on the outside courts if their games look like they’re going on for a while.
 The view from Court No. 3 | 4th July 2017 | © REUTERS/Toby Melville
It sounds like you do a lot of running around, especially for the first few days of the tournament! How easy is it to get around the grounds?
It’s pretty straightforward to be honest, even though the grounds are a bit of a labyrinth. You soon learn where the crowded areas are and try and avoid them where possible, but there are some underground tunnels that we’re allowed to use which help getting from court to court quickly. After a couple of days you also learn where the light works best in your favour and makes the action shots a little more creative.
Do you use remote cameras on the courts?
Unfortunately not. The Wimbledon authorities have never been keen on allowing them, at least for editorial photographers, but there are a lot of good working positions courtside, so it’s not too much of a problem.
When I see images from Wimbledon, there’s often a certain ‘look’ that other Tennis tournaments don’t seem to have. Can you think why this might be?
As well as the traditional green, purple and white colours that we all associate with Wimbledon, the ground staff and organisers go to great lengths to ensure the place looks its best for spectators and the television cameras. There’s also a distinct lack of adverts around the courts which certainly makes our job a lot easier, not having to avoid large sections of advertising when framing a shot. Very similar to the Olympics in fact, where generally the only background imagery in the shots are the Olympic rings.
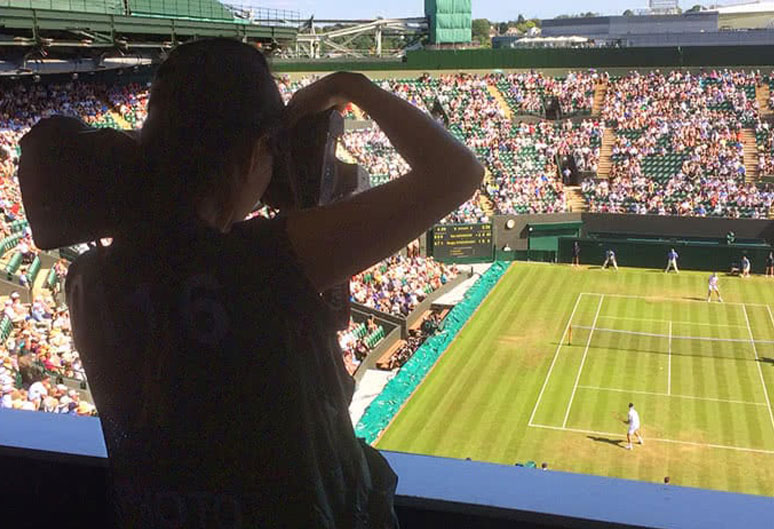
 Shooting from a high spot on Court No. 1 | 5th July 2017 | © REUTERS/Toby Melville
Is there a good sense of camaraderie amongst the photographers?
Absolutely, yes. A few years ago I used to see specialist tennis photographers from overseas who would come to Wimbledon every year and it was a great opportunity for a catch-up, but that happens less and less these days. Regarding the UK based photographers, I pretty much know all my peers quite well, and we all look out for one another, despite the fact that we’re competing against each other most of the time! When you see that a rival photographer, through skill, judgement and a dose of luck, has got the picture of the day, from the match of the day, there’s always room for a pat on the back and congratulations. I’ve been working in London for 20 years and know most of these guys as friends as well as colleagues.
Roughly how many photographers are there at Wimbledon and what are the back-end facilities like?
In total there are around 240 photographers and editors from media organisations, and around 28 Wimbledon staff photographers, so it gets pretty busy in the wire room! In terms of working facilities, I have to say that Wimbledon is brilliant. Even in these days of Wi-Fi, we tend to still use ethernet on the courts, for speed and reliability. The media centre was totally modernised for the 2012 Olympics and the support the photographers get is second to none. At large events like this we tend to make quick selections on the back of the camera and let the the on-site editors take care of final choices. When you get to the semi-finals, the photographers will have their cameras set to auto send all frames at key moments in the match, and the editors have to make some very quick decisions as to which images to run with.
What’s in your kit bag?
I always carry 3 bodies and depending on the court I’m on and the position I’m in, I’ll have a 70-200 ƒ/2.8 on one, a 500mm ƒ/4 or a 200-400mm ƒ/4 on another, and a 16-35mm on the 3rd body in case something happens right in front of me and I need to go wide. I’ll always keep a 2x converter handy if I need to go tight for a particular shot too.
Not wishing to tempt fate, but one last question I have to ask. What do you do when play is rained off?
On Centre court it’s not really an issue these days as the roof means it’s always in operation, but otherwise I grab a few wet weather pictures and catch up on my work expenses!
Toby was talking to Tim Stavrinou.
To learn more about his work, see the feature on Reuters’ website here