TIPS & TRICKS | HOW TO CHECK YOUR SENSOR AT HOME

Tips & Tricks | How to check your sensor at home

Dust spots on photos can lead to hours of extra editing. Sometimes there are motes of dust, oil spots, even fingerprints on a camera sensor. But how can you know before it’s too late?

Dust resting on your Mirrorless or DSLR cameras imaging sensor can show up as black spots or soft grey blobs on your images. Most frequently these UFOs (unidentified foreign objects) on the sensor show up in images with clear skies or plain backdrops when your lens is stopped down to f/8 and lower.

You can do a blue sky test but Blue skies are not always available in the UK. Luckily you can check your sensor quickly at home. Before any important assignment, project, holiday or wedding we recommend checking your sensor to see if it needs a clean. This could save you hours in editing afterwards.

Our technicians clean camera check and clean sensors every day. We asked them the best way to check for dust on an imaging sensor.

Sensor Check Kit List

  • Your Camera
  • A 50mm f1.4 lens (ideally but any standard angle lens will do)
  • Tracing paper or diffusion gel
  • BlueTak
  • a light source or window (do not point your camera at the sun, it can damage cameras and lenses)
  • Image editing software eg. Photoshop Elements

Step 1: Make a blank light source

If you have a lightbox for art, viewing slides or negatives then you are ahead of the game, you can use the lightbox.
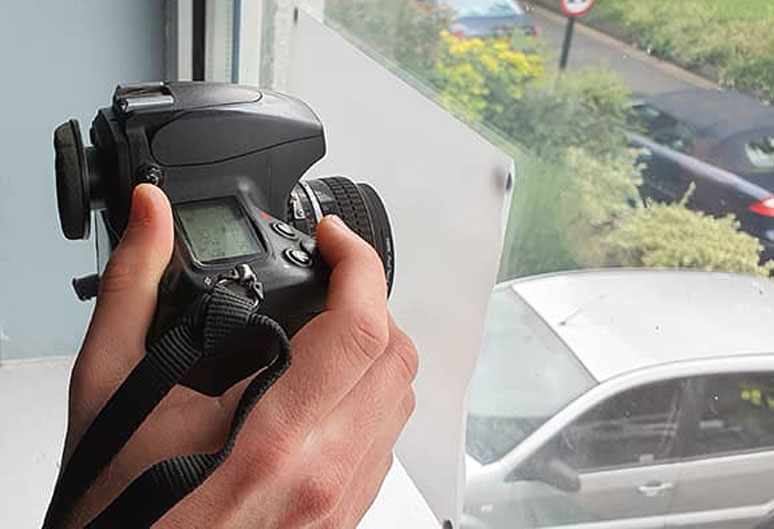
If you don’t, you can make one easily: Just stick some tracing paper, or lighting diffusion gel to a window like below.
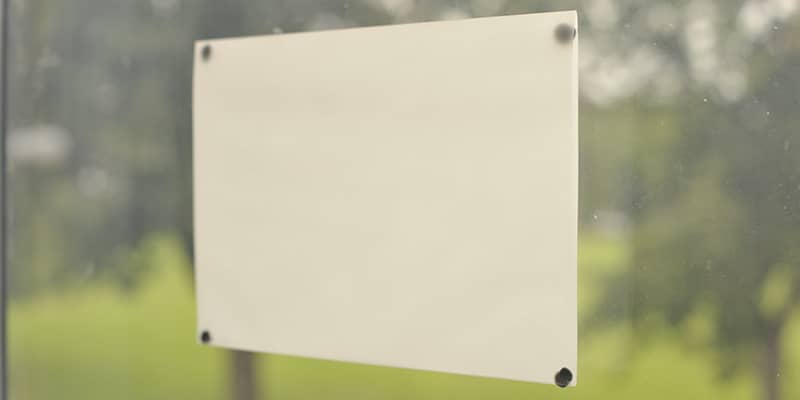
A simple light box: Some tracing paper stuck to a window.

Step 2: Camera Settings

We take a picture with the lens right up against our blank light source using these settings:

Lens: 50mm f1.4 or equivalent
ISO: 200
Image Quality: Jpeg
Focus Mode: Manual Focus / MF
Mode: Aperture Priority
Aperture: F/22
Exposure compensation: 0

Step 3: Take a picture

Put the lens flat against the lightbox or tracing paper, keep the camera pressed against the paper for the while exposure which might be ½ second on a gloomy day. We are making a shilouette of all the dust on our sensor. Since all the dust that affects your images is behind the lens it does not matter how your focus is set.
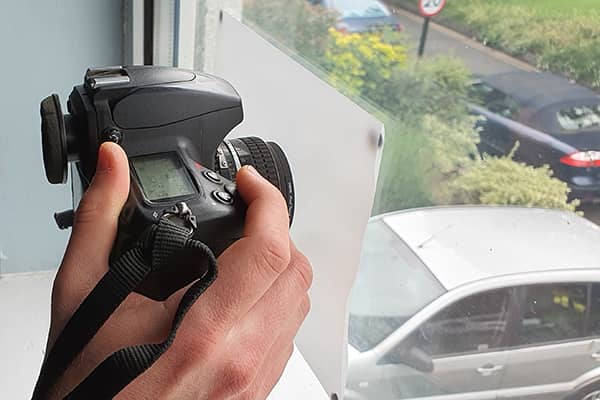
Keep the camera held up to the paper for the whole exposure.

Step 4: Review your image

Download your image to your computer and open your photo in an image editing software, we’re using photoshop. At first your sensor image should look like the one below. To start with the image should look grey and flat, often there is not much dust visible apart from the most serious marks. In the next step much more dust will be revealed.
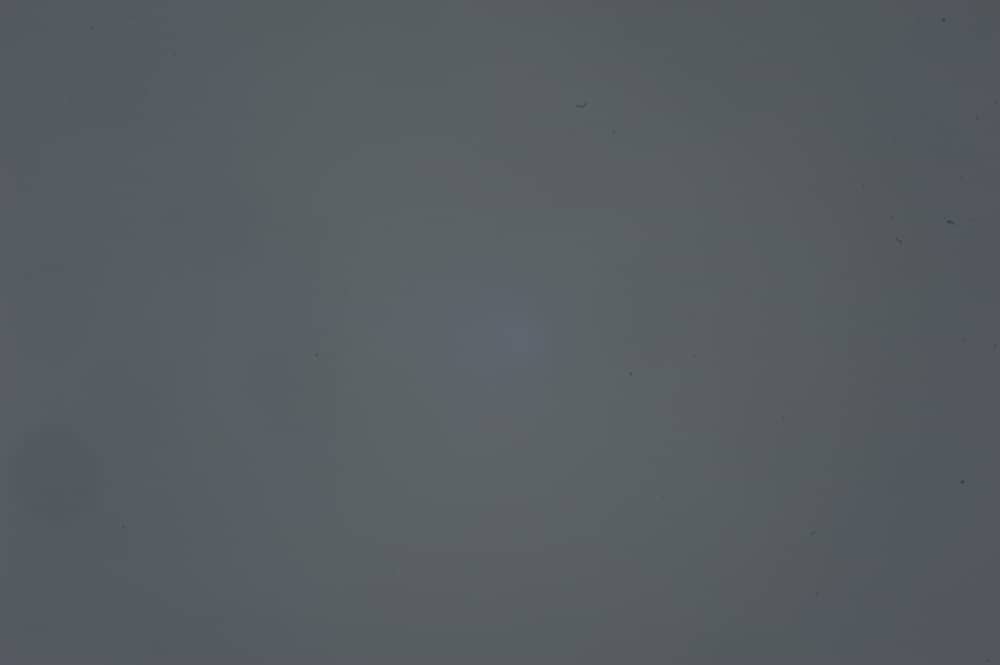
Look closely some dust is already visible

Step 5: Image Adjustments – levels

Open up the histogram or levels adjustment tool (In Photoshop go to Image>Adjustments>Levels or on windows Ctrl + L, on a mac Command + L)

All the image information is in that central spike so bring the edge sliders (black point and white point) in to either side of the histogram to increase the contrast and highlight the dust.
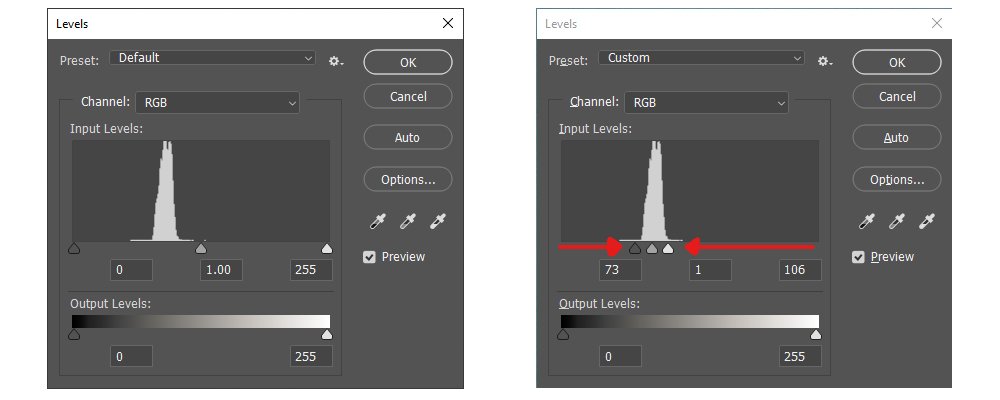
Any dust on your sensor should appear clearly as visible black marks.
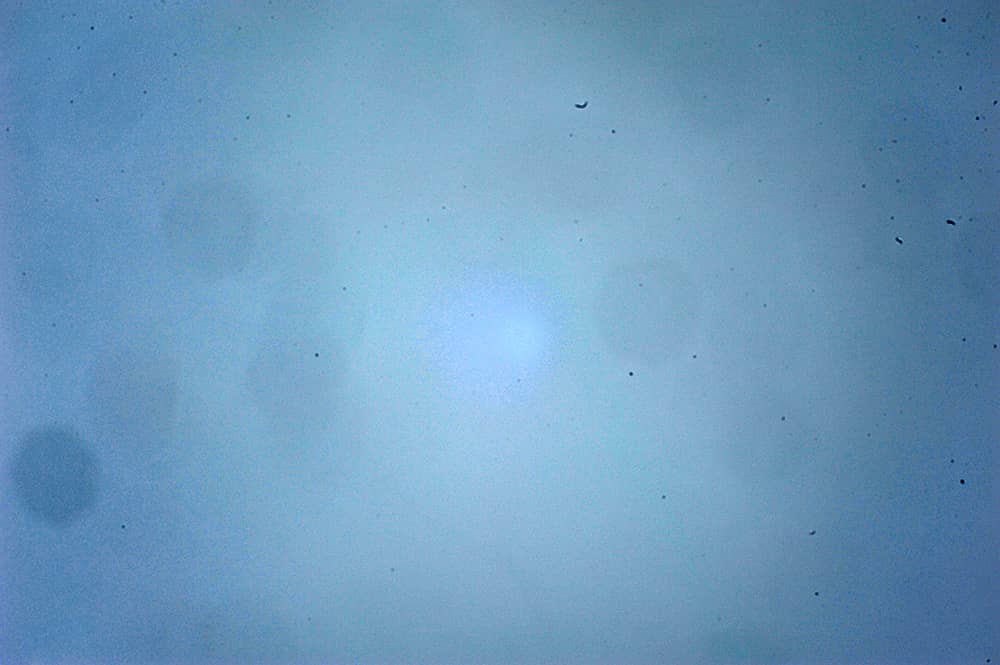
With the contrast raised the dust on the sensor is much more visible.

What to do next

Once you have identified whether or not there are marks on your sensor you will need to decide what to do next, should you clean the sensor yourself? Here are some options

Professional Sensor Cleaning

We can clean your imaging sensor in our London workshop or at our Leeds and Manchester service counters while you wait Monday to Friday. This gives you a really thorough clean not just of the sensor but of the whole camera and mirror box to reduce the risk of dust falling back onto the sensor after the clean.
Find out more about our sensor cleaning service.

DIY Sensor Cleaning

Not for the faint of heart but also not impossible. If you identify there is dust on your images in the middle of a trip then there might be no service-centre nearby. If that’s the case we collected some tips for DIY sensor cleaning in an earlier tips and tricks sensor cleaning article.

Shoot at a wider aperture

We tested the sensor above at f/22 which creates a crisp silhouette of all the dust, oil spots, etc, on the imaging sensor. If we did that test with the lens at f/2.8 much less of the dust would show up. You could test your sensor at various apertures and decide to continue shooting if they are acceptable up to say f/5.6. Also if you are shooting subjects with busy backgrounds many spots will not show up clearly enough to notice.

Ultimately you decide what is best for you and what action will suit your next set of photographs.

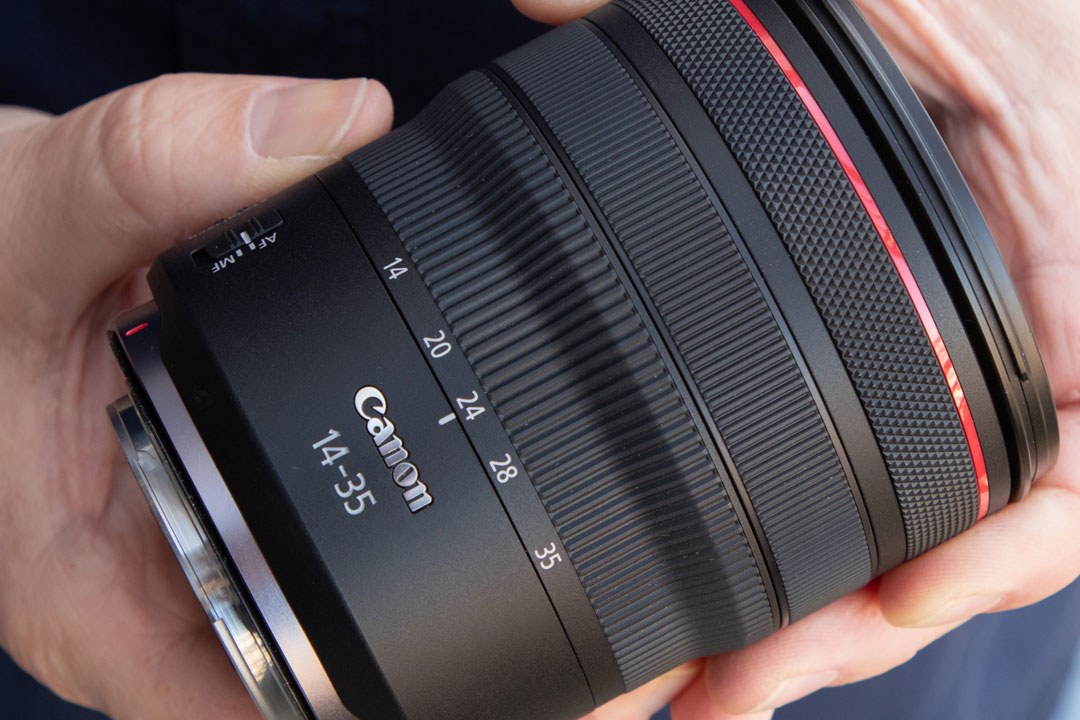
CANON RF 14-35MM F4L IS USM LENS

Canon RF 14-35mm f4L IS USM Lens

The Canon RF 14-35mm f4L IS USM is a new L series zoom lens in the Canon RF range, with a little bit extra at the wide angle. The perfect compliment to the mirrorless EOS R system and a nice alternative to heavier f/2.8 zoom lenses.

The Canon RF 14-35mm f4L IS is £1,749 To pre-order contact our sales team on 0207 582 3294 or email us at sales@fixationuk.com

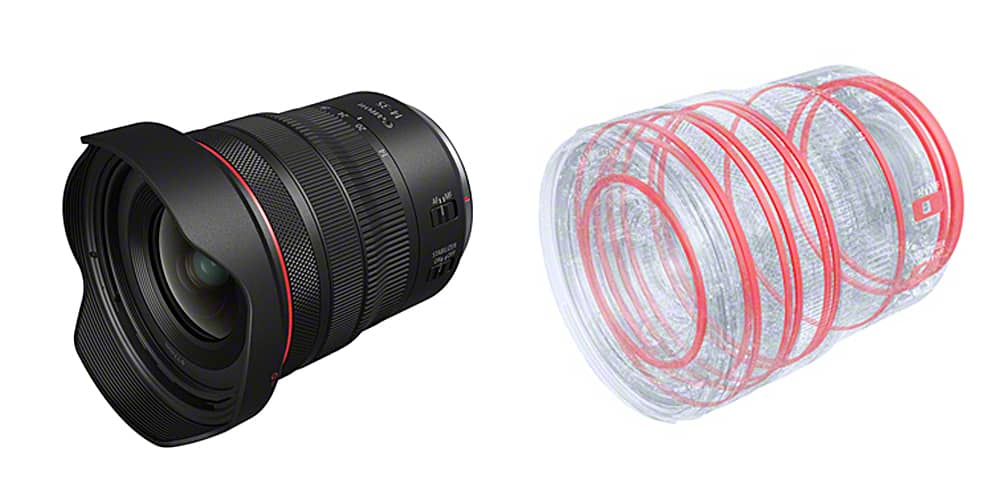
The Canon RF 14-35mm f4 L IS USM, left, and a diagram showing the L series dust and moisture seals, right.
Versatile

Ideal for Architecture, Travel and landscape photography this lens adds an extra 2mm on the wide end vs it EF equivalent the EF 16-35mm f4L IS USM. 14mm provides a much wider angle of view than 16mm: 104° Vs 98° angle of view respectively.

Compact constant f4 aperture

It’s not just the extra-wide angle that makes this lens great for travel and every-day shooting. The f4.0 aperture has allowed a much more compact lens design than if this lens had been built as an f/2.8. The optics are smaller which reduces the weight and size of the lens. In case the F4 aperture is not bright enough to keep your shutter speeds high, the RF 14-35mm f4L IS USM has a 5.5 stop image stabilisation system which will give plenty of tolerance for shooting sharp images hand-held. The IS benefits increase to 7 stops when used with an EOS R system camera with IBIS.

Rugged L series design

Canon L lenses are famous in photography and for good reason. They have long set a benchmark for professional reliability and durability. The RF 14-35mm f4L IS USM lens is no different, pictured above is the weather and dust sealing points to keep you lens operating in challenging conditions. The lens also features a lens control ring that can be customised to adjust ISO, aperture or exposure compensation without taking a hand away from the lens.

Our sales team have years of experience helping photographers find the right kit for them. To pre-order contact our sales team on 0207 582 3294 or email us at sales@fixationuk.com The Canon RF 14-35mm f4L IS is £1,749

NIKON Z FC

Nikon Z fc

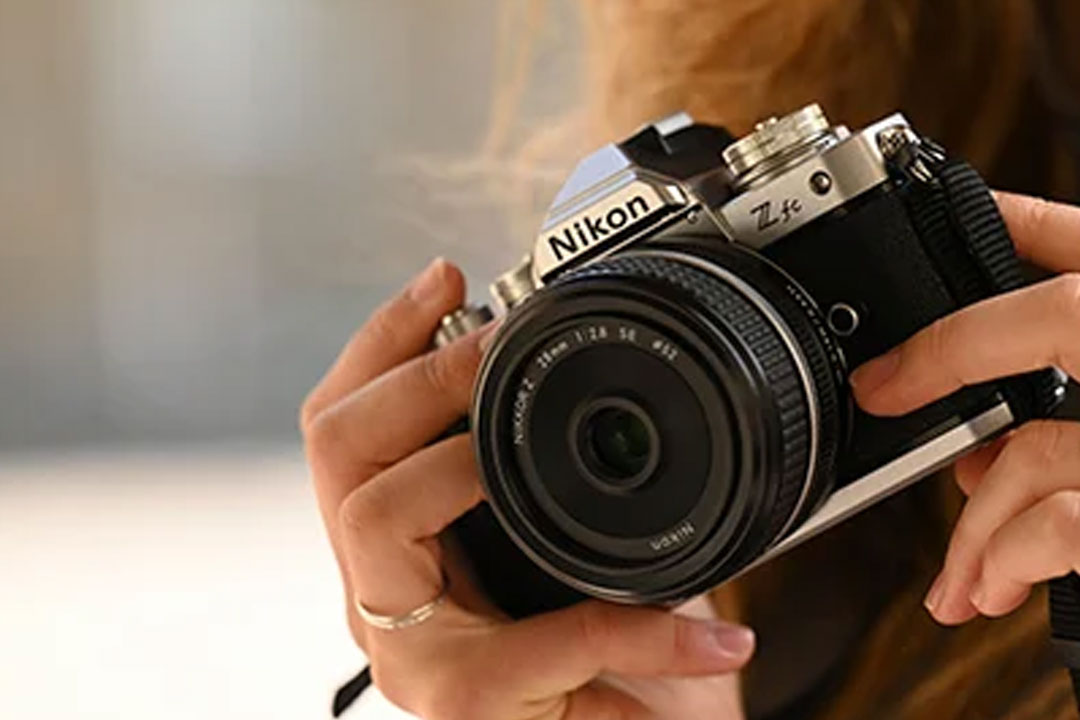
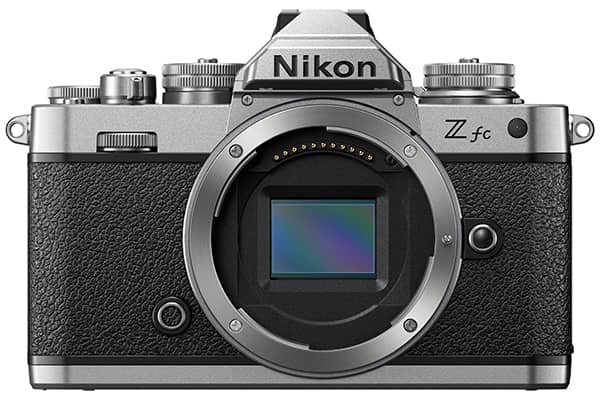
The Nikon Z fc is a mirrorless DX crop-sensor camera built to the dimensions and style of the iconic Nikon FM2 film camera from the early 1980s.
This very nice little camera has launched with a tasty 21 megapixel sensor and full AF tracking capability you would expect from a modern Nikon digital camera including Eye and Animal AF tracking for stills and video.

The Nikon Z fc body-only is £899 sales are expected to start in July. To pre-order contact our sales team on 0207 582 3294 or email us at sales@fixationuk.com

The Nikon Z fc DX mirrorless camera
The Controls

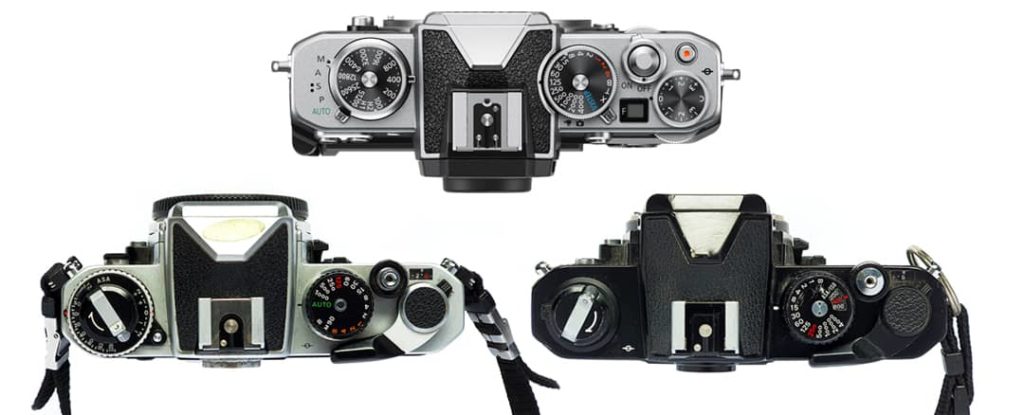
The top cover of the Nikon Z fc has three control dials on the top cover for direct access to exposure compensation, shutter speed and ISO. There is also a display for the aperture read-out and some nifty switches such as on/off, stills / video and an M / A / S / P / Auto selector.
With this array of direct access controls on the top cover and a pedantic mind-set, we reached for some analogue Nikon tech and would contend that the design resembles more a Nikon FE which had exposure compensation and ISO on a separate dial to shutter speed. Have a look at the pictures below and let us know what you think in the comments.

Top cover comparison. Clockwise from top: Nikon Zfc, Nikon FM2n, Nikon FE
Video as well as stills

Despite its heritage look, the Nikon Z fc is a thoroughly modern camera inside with 4k no-crop video recording (the sensor is already a DX crop for stills), higher frame rates for slow-motion, and a wide ISO range of 100-51,200 (extendable to higher levels if needed). There is also a constant focus mode AF-F just for video for smooth tracking of moving subjects during recording.

Lenses and compatibility

All Z series Nikkor lenses are compatible with the Nikon Z fc. Nikon launched two lenses with the Nikon Z fc with some silver retro styling a dedicated DX 16-50mm and a special edition full frame FX 28mm f/2.8 prime lens.
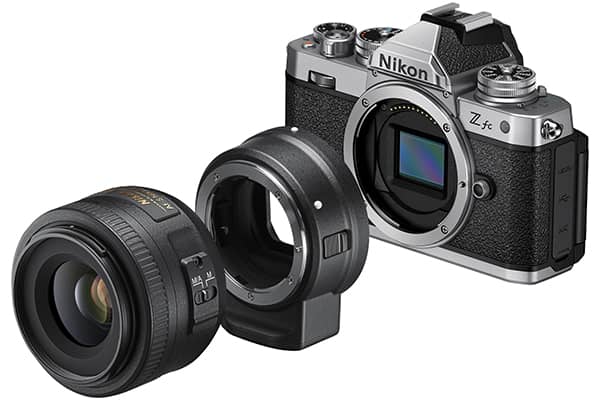
In addition all G series F-mount Nikkor lenses can be used with the Nikon FTZ mount adaptor. The DX cropped sensor may give different results if you are used to shooting full-frame FX format. Full frame lenses on a DX body have a 1.5x crop factor so a 35mm lens will give an angle of view of a 52.5mm lens.

Nikon Z fc exploded view with an F-mount lens and the FTZ mount adaptor

Pre-G lenses such as Nikkor AF-D and manual AF-I lenses are not compatible with the FTZ adaptor.

Vari-angle Rear TFT monitor

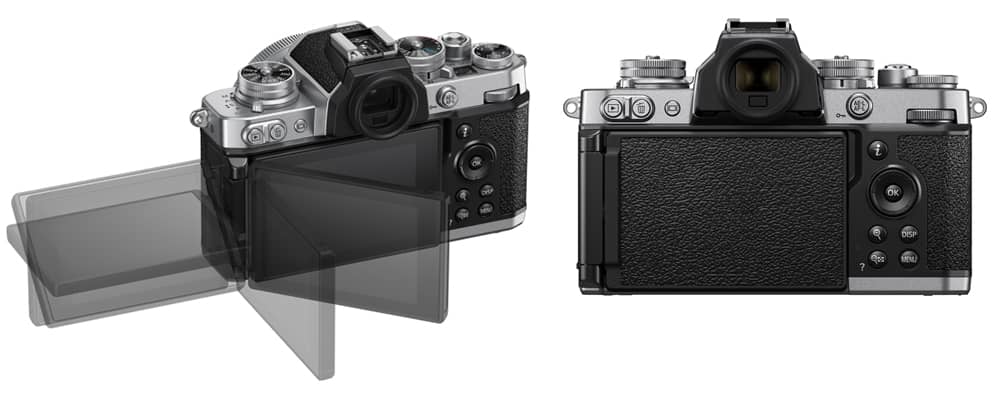
The Rear TFT monitor can be set in multiple positions for waist-level, overhead and selfie shooting. It can also be folded to face inwards taking the rear monitor out of the equation for some authentic, distraction free analogue-esque camera operating (it also keeps the screen safe from scratches).

Monitor options for the Nikon Zfc variable angles and closed.

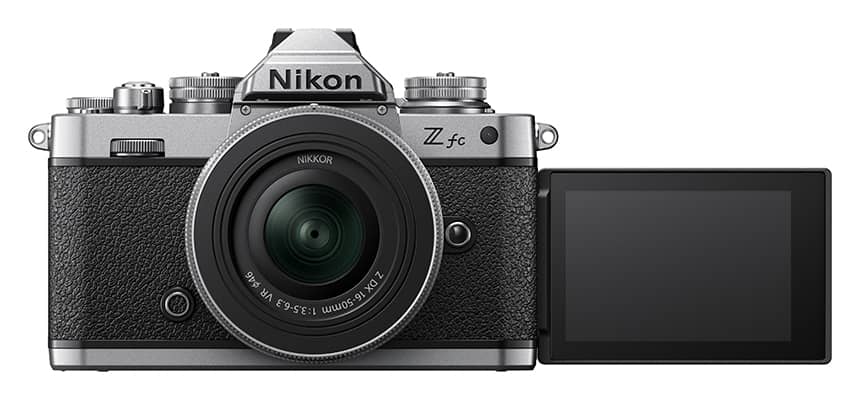
When the screen is set to faces in the same direction as the lens the camera will automatically enter “self-portrait mode” this gives touch control on the screen for shooting or starting / stopping recording.

With the screen front facing the camera automatically enters Self-portrait mode.
SnapBridge Connectivity

The Nikon Z fc is compatible with SnapBridge v2.8 which allows direct transfer of images to the SnapBridge app on Apple and Android devices. There are two SnapBridge options:
• Foreground transfer where images are only transferred while the app is in use
• Background transfer which constantly backs up images and video to a connected device

Our Verdict

For anyone starting out in photography this camera will give you all you need and more. With the accessible, tactile controls for the key settings in photography, the Nikon Z fc may get you out of auto mode faster than starting in other models.

The Nikon Z fc fits a lot of great functions into an attractive, compact design, at a great price. A Nikon digital camera that feels like an FM2 in size will have a huge appeal. We have seen many Nikon analogue cameras through our doors for repairs and servicing and know that the FM2 and FE cameras are well loved by the film community. Analogue style controls are popular already in Nikon with the DSLR Df and outside of Nikon in the popular Fujifilm X system.

A possible drawback is that the camera only sports a DX sensor not the full-frame FX. Lovers of wide-angle photography will have to reach for even wider lenses than they usually would to achieve the angle of view they expect. However DX sensors give an advantage to sport and wildlife photographers who gain extra reach from their long lenses thanks to the crop.

Our sales team have years of experience helping photographers find the right kit for them. If you have any questions or would like to place an order please call us on 0207 582 3294 or email sales@fixationuk.com

Nikon Z fc Prices and Kits
  • Nikon Z fc body only – £899
  • Nikon Z fc kit with Z 28mm f/2.8 SE – £1,129
  • Nikon Z fc with Z DX 16-50mm f/3.5-6.3 kit – £1,039
BPPA ASSIGNMENTS

BPPA Assignments 2021

Fixation and Canon are proud to sponsor the the British Press Photographers Association annual exhibition Assignments. After a two-year break we are pleased to see Assignments return with an exhibition set for August at the Bargehouse gallery in London.

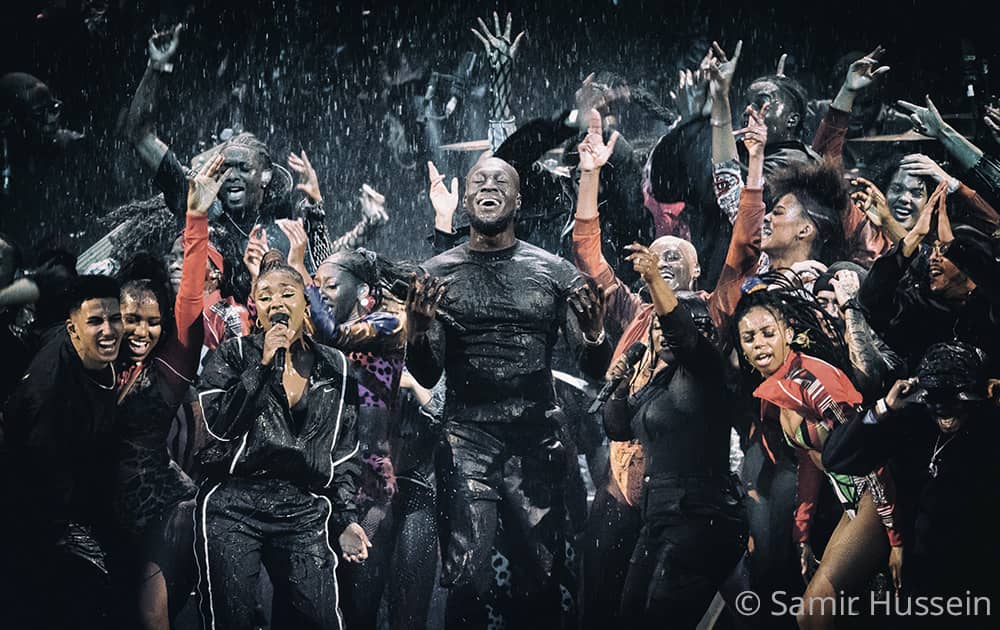
Stormzy performs at the 2019 BRIT Awards in London. 18 February 2020. © Samir Hussein

Assignments 2021 celebrates the best of British press photography from the BPPA members. Curated by five leading industry figures, this year’s exhibition covers stories from April 2019 and will include a mix of sport, celebrities, royals, protests and global events such as the pandemic as seen through the eyes of the association’s photographers.

The exhibition is an edit of 100 entries printed and framed, filling the Bargehouse London gallery across 4 levels.

Admission Free 11am-6pm daily. 27th August – 5th September

Bargehouse
Oxo Tower Wharf
Bargehouse Street
South Bank
London, SE1 9PH

Assignments 2021 Events Program

Activities and seminars running at the Assignments 2021 Exhibition. Booking is essential.

Hands on | Canon EOS mirrorless sessions

Canon EOS Mirroless digital cameras and lenses
Try the latest gear for yourself. Canon Tech Guru Justin will walk you through the features of the latest EOS R system cameras and lenses.

  • Friday 27th August
  • Tuesday 31st August
  • Wednesday 1st September
  • Thursday 2nd September


Assignments Seminar | Heathcliffe O’malley and Jack Hill

Tuesday 31st August, 13:00
Join two leading newspaper photographers as they deliver talks about their work over the last two decades.

Assignments Seminar | Marc Aspland

Wednesday 1st September, 13:00
The Times Chief Sports Photographer Marc Aspland talks about how he captures the most important moment of a sporting event creatively. He will also show you the Times Unseen project which often shows images that have never been published and which sometimes shows a different side to the sport.

Assignments Seminar | Dan Kennedy

Celebrity photographer Dan Kennedy shares valuable insights plus tips and tricks on how he creates magazine cover portraits.
Thursday 2nd September, 13:00

Assignments 2021 Curators

Each year different curators are selected from within the news and press industry. This year’s Curators are:

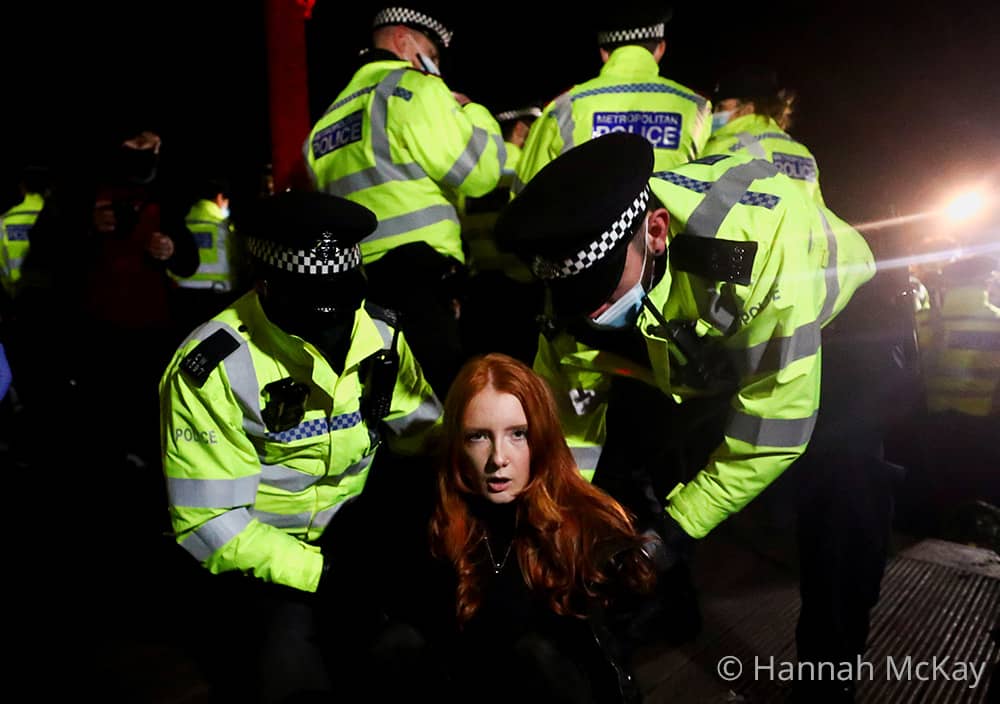
Police officers detain Patsy Stevenson as people gather and protest at a memorial site in Clapham Common Bandstand, following the kidnap and murder of Sarah Everard, in London. 13 March 2021. © Hannah Mckay
Police officers detain Patsy Stevenson as people gather and protest at a memorial site in Clapham Common Bandstand, following the kidnap and murder of Sarah Everard, in London. 13 March 2021.
© Hannah Mckay

Wimbledon display at Fixation

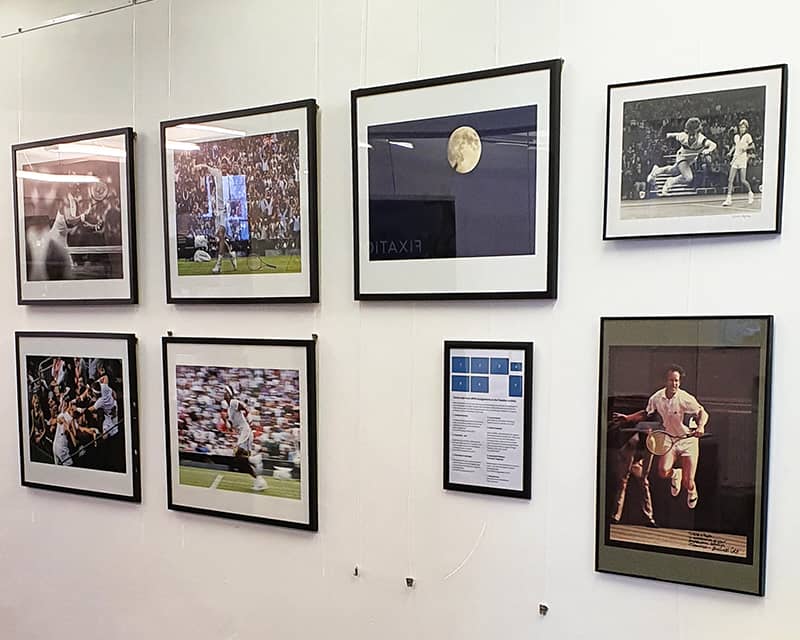
We are displaying some of our favourite BPPA images from past year’s Assignments exhibitions in the Fixation Showroom. It is Wimbledon Championships fortnight so we are displaying some superb Tennis images of Serena Williams, Rafal Nadal, Andy Murray and more.

For us the photographers are the stars of the show so come along to see Wimbledon from the unique perspectives of Lindsey Parnaby, David Levenson, Andy Rain, Heathcliff O’Malley and Facundo Arrizabalaga.
If rain stops play, pop up to see us: Find Us London

Find out more about the BPPA Assignments exhibition and about the BPPA on the BPPA website.

the BPPA logo

TIPS & TRICKS | DON’T LIVE VIEW A SOLAR ECLIPSE

Tips & Tricks | Don’t live view a solar eclipse

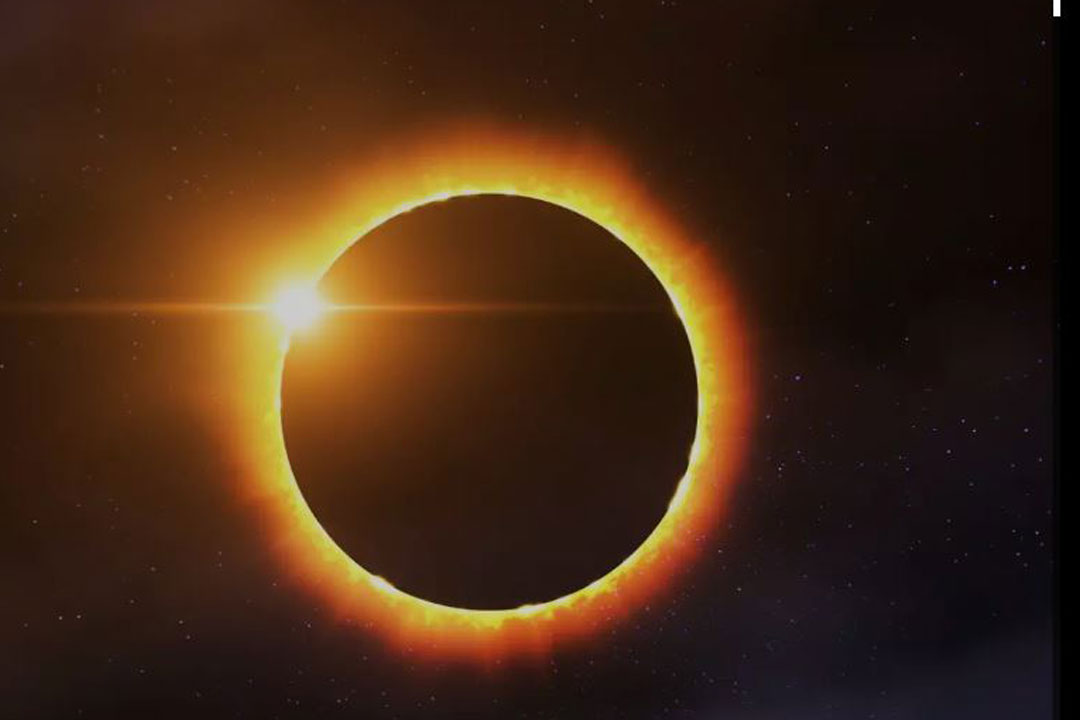
A solar eclipse is definitely a photo-worthy event but, just like looking into the sun, pointing your camera at the sun can have damaging consequences.

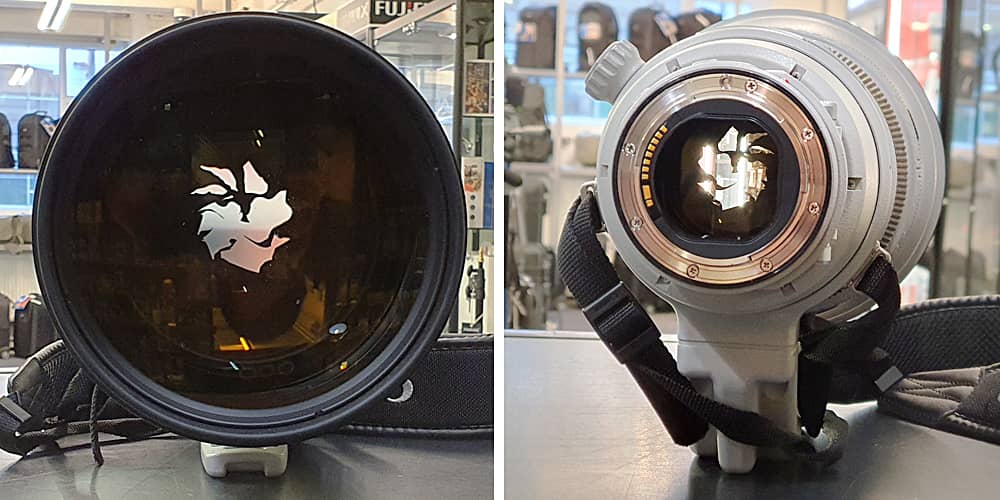
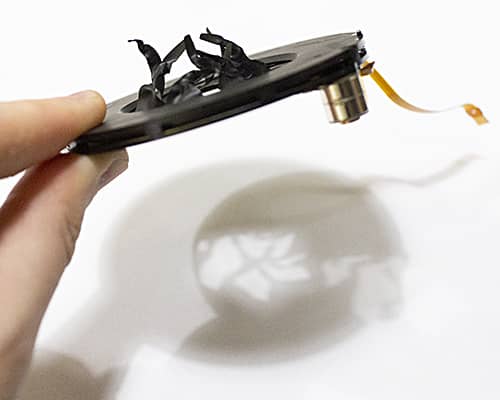
After a partial eclipse we received a Canon EF 400mm f2.8 L II IS lens with an Error 01. On closer inspection the aperture blades were bent and twisted. We have treated sun-damaged cameras in the past but this time the lens was damaged. We called the photographer to find out what had happened.

To protect their eyes the photographer had decided to use Live-View to get the sun in frame and wait for the right moment for the exposure. To cut the amount of light reaching the CMOS imaging sensor the lens was stopped right down to f/22.

In live view shooting the aperture stops down as you change the setting, so when f/22 is set the aperture blades close and stay closed while you view the image on the rear monitor.

The lens was pointing at the sun for approximately 2 minutes with the aperture stopped down and absorbing most of the light. This was enough to heat and warp the thin aperture blades in a way that we had never seen before in our workshop.


Luckily it was the aperture mechanism alone that was damaged and our technicians were able to replace that with a new part from Canon for under £300. The lens is otherwise in full working order however this repair could have been avoided.

How to photograph the sun

First we must stress that you should never look directly at the sun through lenses, cameras or optics. Doing so could cause permanent damage to your eyes. Even the filters below are for photographing the sun and are designed to protect electronic equipment, not eyes.

Tip 1: Use a solar-filter

Lenses with filter threads: Use a Lee or screw-in solar filter. Unlike ND filters, specially made solar filters block UV and Infra-red light as well as the visible spectrum. This protects your lens and camera from a much wider range the radiation that could otherwise damage your lens and sensor.

Telephoto lenses: use Solar Foil. Large aperture telephoto lenses like the 400mm above do not have filter threads at the front of the lens. Solar foil comes in A4 sheets which can be fitted over the front element or lens-hood of a super-telephoto lens.

Tip 2: Keep your lens covered

Once your image is composed, use a lens cap to stop all light entering your lens until you are ready to shoot. This keeps your lens and camera cool and able to function better when it comes to making the exposure.

If you have any questions about shooting difficult subjects or in unusual environments we have decades of experience supporting photographers working around the world and are happy to help.

Hi, how can we help?