The Ultimate vlogging guide - Nikon

The Ultimate Vlogging Guide | Nikon

Want to start vlogging with Nikon cameras? You’ve got plenty of choice in the mirrorless Nikon Z system, with everything from beginner-friendly APS-C models to powerful full-frame cameras capable of achieving professional-quality results. There are also lots of terrific Nikon vlogging lenses available, so we’ve put together this guide to help you craft your ideal setup for vlogging on Nikon.

We’ve kept this guide to Nikon’s newer mirrorless Z system. While the range of Nikon F-mount DSLRs of course includes a number of cracking cameras, we reckon that vloggers specifically are going to get much better bang for their buck with the Z system. The fact that you can easily mount F-mount lenses onto Z-mount cameras via the FTZ adapter and still get full functionality of features like autofocus and stabilisation pretty much seals the deal.  

So, without further ado, here is how to get started vlogging with Nikon. 


Best Nikon vlogging cameras

The Ultimate vlogging guide Nikon cameras

Rather than overwhelming you with a huge list of cameras (many of which wouldn’t really be that suited to vlogging, if we’re being honest), we’ve kept this list to just three Nikon cameras we reckon are well-suited to the vlogger. We’ve got an affordable option for beginners and a camera that sits slightly more in the mid-range – both of which use APS-C sensors. Finally, for those who want the luxurious quality of a larger sensor, we’ve included a full-frame Nikon camera for vlogging. 


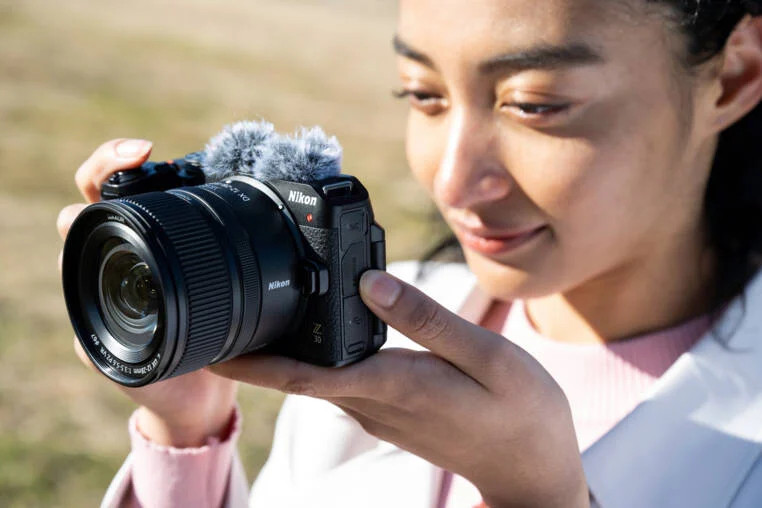
Best Nikon vlogging camera for beginners: Nikon Z30
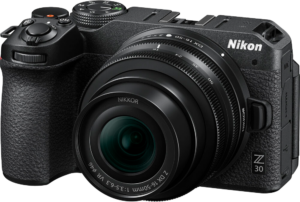
Nikon Z30
Nikon Z30

Key specs:

  • Mirrorless camera
  • 20.9MP APS-C sensor
  • Nikon Z lens mount (DX)
  • 4K 30p, Full HD 120p
  • Ports: Micro HDMI, 3.5mm mic input, USB-C

This is the Nikon Z vlogging camera. While it’s very similar to Nikon’s other APS-C mirrorless cameras (which we’ll come onto shortly), the Nikon Z30 has been designed from the ground up for the vlogging market, much like Sony’s ZV cameras. As such, it’s got a fully articulating LCD screen that can flip-out sideways, and does away with a viewfinder for a more lightweight build.

The Nikon Z30 shoots 4K video at up to 30p – gloriously uncropped, using the full width of the sensor, which makes it easier to get the wide angle of view that’s useful for vlogging. It has plenty of external physical buttons and controls, many of which can be customised to the user’s preferred functions, and there’s a 3.5mm input for attaching an external mic. There’s no headphone output sadly, but otherwise, the Z30 really does tick a lot of boxes for vloggers. One thing to note though is that there’s no sensor-based stabilisation, so you may want to invest in a gimbal if you’re going to be doing a lot of run-and-gun filming. 

Nikon’s video autofocus generally performs pretty well, with solid Face and Eye detection. There’s also the handy option to shoot in Nikon’s ‘Flat’ colour profile, with low contrast and low saturation, designed to maximise dynamic range for greater ease in colour grading. This isn’t quite a Log profile, but it’s a simple, easier-to-handle equivalent that is realistically going to be good enough for a lot of vloggers – many of whom are more concerned with being able to process video efficiently than they are with spending hours getting the colour grade exactly right.

As an APS-C Nikon Z camera, the Z30 shares the same issue all its siblings do – the fact that there are relatively few crop-sensor lenses for the system. There are a few good ones for vloggers, which we’ve listed in our lens section further down this post. However, we would like to see this range expanded with more options as the system continues to mature.

Pros:

  • Lightweight, affordable camera
  • Excellent 4K 30p video uses full width of sensor
  • Good control layout with customisable buttons

Cons:

  • No headphone output
  • Limited lens selection


Best Nikon vlogging camera with a viewfinder: Nikon Z fc
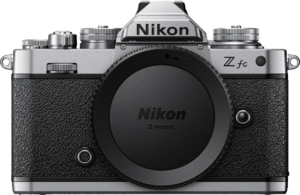
Nikon Z fc
Nikon Z fc

Key specs:

  • Mirrorless camera
  • 20.9MP APS-C sensor
  • Nikon Z lens mount (DX)
  • 4K 30p, Full HD 120p
  • Ports: Micro HDMI, 3.5mm mic input, USB-C

In many ways, the Nikon Z fc is a very similar prospect to the Nikon Z30. It uses a 20.9MP APS-C sensor, and also sports a flip-out LCD screen that’s useful for vlogging. This is the key difference between these two cameras and their third APS-C stablemate, the Nikon Z50, which only has a tilting screen. So, why might one opt for the Nikon Z fc rather than the cheaper Z30?

The first big difference is that the Nikon Z fc offers an electronic viewfinder, whereas the Nikon Z30 does not. Yes, we’re all told that vloggers don’t care about viewfinders, and that’s why the Z30 doesn’t have one. But there are many reasons you might at least want the option to use a viewfinder instead of solely relying on the LCD screen. If you shoot stills in addition to video, or incorporate stills into your vlogging in some way (e.g. you vlog about photography), then you’ll appreciate having a viewfinder – and even some pure vloggers prefer to use one from time to time!

With a retro SLR-styled body and plenty of manual controls, the Nikon Z fc is an intuitive and satisfying camera to operate. Like the Z30, it also has a high-speed USB-C connection that can be used for hot-charging or streaming.

While the Z30 offers better value for money for pure vloggers and beginners, the Nikon Z fc has a lot to recommend on its own terms, and is especially well-suited to hybrid creators who mix in a little photography with their vlogging.

Pros:

  • Stylish design with great control layout
  • Electronic viewfinder
  • Flip-out screen

Cons:

  • Pricier than Z30, and offers identical video quality


Best full-frame Nikon vlogging camera: Nikon Z6 II
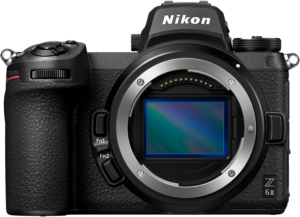
Nikon Z6 II
Nikon Z6 II

Key specs:

  • Mirrorless camera
  • 24MP full-frame sensor
  • Nikon Z lens mount (FX)
  • 4K 30p (4K 60p with crop), Full HD 120p
  • Ports: Mini HDMI, 3.5mm mic input, 3.5mm headphone output, USB-C

One of Nikon’s more affordable full-frame mirrorless cameras, the Nikon Z6 II offers an all-rounder feature set with plenty to tempt the serious vlogger. It shoots clean and punchy 4K 30p video, which can be bumped up to 4K 60p if you don’t mind a minor crop. One thing we also like is how intelligently the settings are laid out, with stills and video nicely separated. It’s an easy camera to pick up and use.

If you’re an outdoor or travel vlogger, you’ll appreciate the Z6 II’s weather-resistant body, constructed from magnesium alloy with rubberised coverings to protect the ports. The mini HDMI (more robust than micro HDMI but not quite as bulky as full-size) allows for hooking up an external recorder, which introduces more options such as capturing 10-bit footage. Having sockets for both headphones and a microphone is very welcome, as are the dual card slots with CFexpress and UHS-II SD compatibility.

Unlike the APS-C models, the Nikon Z6 II benefits from 5-axis in-body stabilisation, which is fantastic for keeping footage smooth while shooting handheld on the move. The video autofocus is fast and responsive, even when the light gets low, and the Z6 II benefits from Eye and Face Detection modes. 

Something we should acknowledge – no, the Z6 II does not have a fully articulating screen that can be flipped around to face the front. This is just a fact of life with full-frame Nikon Z cameras. You can argue that Nikon missed a bit of a trick given how well-specced the Z6 II is for video, but in any case, it’s not necessarily a deal-breaker – it’s not like anyone was going to be holding this full-frame camera at arm’s length to record themselves. 

Otherwise, the Z6 II provides a pretty optimal balance between performance and price in the Nikon full-frame range. Any of the more expensive models like the Z7 II, Z8 or Z9 would mostly just give you a load of features that as a vlogger you probably don’t need, and the cheaper Z5 is really a stills-oriented camera, hampered for vloggers by its single card slot, vicious 4K crop and pernicious rolling shutter. 


Best Nikon vlogging lenses

The Ultimate vlogging guide Nikon lenses

Whether you’re shooting full-frame or APS-C, the Nikon Z system has plenty of lenses to kit yourself out with for vlogging. If you’re going to be shooting in different locations and situations, then you’ll probably want at least one standard zoom and one fast prime to cover yourself for all eventualities. We’ve picked out a selection here, with options for all different budgets. 


Nikon Z 12-28mm f3.5-5.6 DX PZ VR
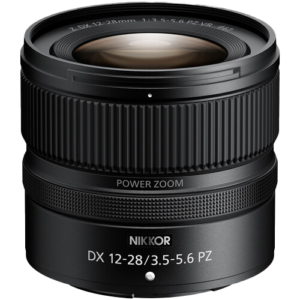
Nikon Z 12-28mm f3.5-5.6 DX PZ VR

This Power Zoom lens is designed for DX-format (APS-C) cameras like the Z30 and Z fc. It provides an equivalent focal range of 18-42mm, providing a wide enough perspective for vlogging purposes, and the Power Zoom functionality means that zoom transitions are smooth, and can be triggered remotely. The optical design of the lens includes extra-low dispersion and aspherical elements, ensuring top-notch sharpness throughout the zoom range 


Nikon Z 16-50mm f3.5-6.3 DX VR
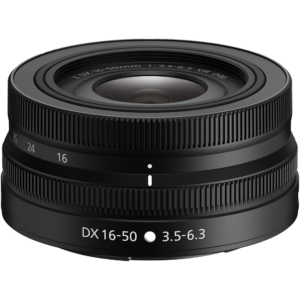
Nikon Z 16-50mm f3.5-6.3 DX VR 
Nikon Z 16-50mm f3.5-6.3 DX VR

This capable lens for DX-format cameras is equipped with Nikon’s stabilisation technology, Vibration Reduction (VR). Given the fact that Nikon Z APS-C cameras don’t have built-in stabilisation, this can be a real lifesaver in a handheld shooting situation. The Nikon Z 16-50mm f3.5-6.3 DX VR is a slim ‘pancake’ lens that adds very little footprint to your camera, and it focuses quickly and quietly. The maximum aperture drops quite sharply as you zoom in – but as a vlogger, you’ll probably mostly be favouring the wide end anyway. 


Nikon Z 50mm f1.8 S
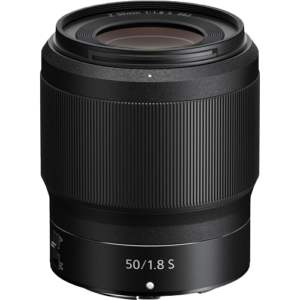
Nikon Z 50mm f1.8 S
Nikon Z 50mm f1.8 S

You can’t go wrong with a nifty fifty. The Nikon Z 50mm f1.8 S is a cut above some of the cheaper 50mm primes available for other mounts – as evidenced by its status as an ‘S’ lens, which is the letter Nikon uses to denote its premium optics. However, this fast prime is still fairly reasonably priced, and makes for a terrific all-purpose lens to deliver a naturalistic shooting perspective. If you’re a travel vlogger, this is a useful lens to have in your back pocket, especially if you’re going to be shooting in low light. 


Nikon 24-120mm f4 G AF-S ED VR
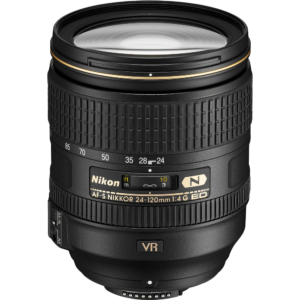
Nikon 24-120mm f4 G AF-S ED VR

Remember – you don’t have to be restricted to native Z-mount lenses! The Nikon F-mount system offers a number of fantastic lenses that can be picked up at a great price, particularly if you’re willing to shop second-hand. The Nikon FTZ adapter allows these lenses to be used in most cases with full functionality of stabilisation and autofocus. One of our favourites from the older system is this versatile zoom, which runs the gamut from wide 24mm to a telephoto 120mm, and is ideal for shooting in situations where you don’t know what to expect. The optical quality is also top-notch, with absolutely superb edge-to-edge performance right the way through that zoom range. 


Nikon Z 24-70mm f2.8 S
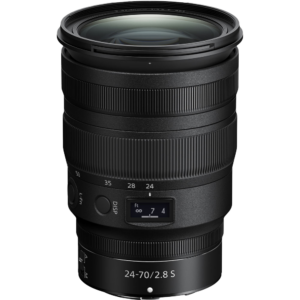
Nikon Z 24-70mm f2.8 S

This professional S-line zoom lens delivers absolutely superb performance from edge to edge, just as you’d expect. The Nikon Z 24-70mm f2.8 S pairs brilliantly with the Z6 II for outstanding full-frame imagery, and its weather-sealed body is also protected from dust and moisture. The control ring is customisable, so you can set it to your preferred function, and with a minimum focus distance of 38cm, it’s a great lens for getting in close.


All the images used in this blog post are courtesy of Nikon.

A How-To Guide on Photo composition tips

A How-To Guide on Photo composition tips

Photo composition is a huge, broad subject, with many differing opinions out there. There is of course no single ‘correct’ way to compose a photograph, and every photography situation merits a different approach. 

With that said, there are a few key concepts in photo composition that are worth getting your head around. These are tried-and-tested ways to compose a photo, and if you have at least a working knowledge of these ideas, you’ll find much more success in your compositions. We’ve put together this guide to help you start thinking about how to compose a good photograph.


Photo composition: Key concepts

We’re going to go through many of these concepts in more detail later in this guide, but in the meantime, here is a quick overview of the key concepts of composition.

  1. Choosing the focal point. The focal point of an image is its main subject. It’s the thing that’s in focus, the main subject of your picture – fundamentally, it’s what you’re taking a photo of. As such, the first thing to do in any composition is to select the focal point of your image. You can be specific here – in a portrait, for instance, the focal point is not just the model, but specifically their eyes staring at the camera. 

Remember that the focal point should be the main point of interest in the image, but it should also work in harmony with the rest of the elements in the scene. This is the real art of composition – and to get you thinking on compositional lines, here are some key concepts to keep in mind. 

  1. Rule of thirds. This is one of the first compositional tenets you’ll hear in photography. ‘Rule’ is arguably a bit of a misnomer, as using the rule of thirds certainly isn’t obligatory for every image, but it is a reliable and well-loved composition technique, 

This rule involves dividing the frame into thirds both horizontally and vertically, resulting in nine equal squares. The main subject of the photo is then placed along one of these lines, or at one of the points at which they intersect. This creates a balanced and aesthetically pleasing composition, with the main subject slightly off-centre.

  1. Leading lines. These are lines that help guide the viewer’s eye through the photo towards the main subject, creating a sense of depth and narrative in the image. Leading lines can be anything from a road or a path to a row of trees or buildings. It’s a good idea to train your eye to look for leading lines out in the world, and think about ways they can make your compositions more effective. 
  1. Framing. Finding natural ways to frame your subject within an image can create a sense of context and add interest. You can use naturally occurring objects such as tree branches or man-made structures like stone arches to frame a subject for greater visual impact.
  1. Balance. Creating balance in your composition can help create a feeling of harmony and stability. Balance can be achieved by placing objects of equal visual weight on opposite sides of the frame.
  1. Depth of field. By altering the aperture setting on your lens, you can change the depth of field of an image. The greater the depth of field, the more of the image is in focus. A shallow depth of field, achieved with a wide aperture setting, is great for isolating a subject from the background – it’s popular in portrait photography for this reason. Larger depth of field, achieved by stopping the lens down to a narrower aperture, is a good way to create a sense of depth and scale in an image, and is common in landscape photography.
  1. Symmetry. Symmetry can be a powerful compositional tool, creating a sense of balance and order. A good way to create symmetry is to look for reflections, whether in water, mirrors or glass. In a symmetrical composition, you’ll want your subject placed nice and centrally – though sometimes off-centre symmetry can be very visually striking. 
  1. Colour and contrast. Using contrasting colours or tones can help make your subject stand out, while looking for complementary colours can give an image a sense of harmony.

Remember that composition is subjective, and what works for one photo may not work for another. Experiment with different techniques and find what works best for your style and subject matter.


How to find the right angle for a photograph

A good way to vary and change your compositions is to experiment with different angles. Rather than simply holding your camera at head height, you can vary the angle from which you shoot for more interesting and creative results. Here are a few tips for finding the right angle for your images. 

  1. Change your perspective. This is a simple step to take, but it’s a good way to start thinking differently about your compositions. Try shooting from a high or low angle relative to your subject, or just from a different angle than you normally would. Examine how it affects the look of the image, and the elements you’re able to include that you wouldn’t be otherwise. 
  1. Consider the subject. Varying the angle of your image should have intentionality to it, and be done for a reason. You should choose an angle that will complement your subject. For example, if you’re shooting a portrait, shooting from eye level or slightly above will avoid unflattering distortions. If you’re shooting a flower, you may want to use a low-angle to produce an unusual perspective, or to get in the sun for a powerful backlight.

If you’re shooting a building, you may want to back off and shoot at a straight angle from a distance to capture the entire scene. Alternatively, you may want to get close and shoot upwards to convey an exaggerated sense of height. 

  1. Experiment with focal lengths. Using a different focal length – either by zooming in or out, or by changing lenses – can help you explore different angles. A wider lens can help capture more of the scene, while a longer lens can help isolate your subject.
  1. Move around. Don’t be afraid to move around when trying different angles. Walk around your subject. Crouch down, or stand on something to gain a higher perspective. You may look a bit silly, but that’s a time-honoured part of being a photographer – and it’s worth it if you bag that killer shot!

Remember that finding a good angle can take some experimentation and practice. Take your time when approaching a subject, and don’t be afraid to play around until you find the angle that works best for your composition.


How to use leading lines

As we’ve already discussed, leading lines are a powerful compositional tool that can help guide the viewer’s eye through an image and create a sense of depth and movement. Here are some tips for using leading lines effectively.

  1. Look for natural lines. The first step of using leading lines is always going to be finding them, so it’s a good idea to train your eye to look for them. Leading lines can be found in a variety of natural and man-made elements, such as roads, paths, rivers, bridges, trees and much more. Look for lines that draw the eye towards your subject.
  1. Place your subject strategically. When using leading lines, it’s important to place your subject strategically in the frame. The subject should be placed where the lines converge or at a point where the lines create a natural frame around it. The two need to be working together for a harmonious image.
  1. Pay attention to perspective. The perspective from which you shoot can greatly impact the effectiveness of leading lines. Think about everything we’ve discussed already regarding shooting angles – shooting from a low perspective can make lines appear longer and more dramatic, while taking a high angle can make lines appear shorter.
  1. Use diagonals. Diagonal lines can add energy and movement to an image. Placing your subject along a diagonal line can create a sense of tension and action.
  1. Experiment with different focal lengths. Different lenses can change the way leading lines appear in your image. A wide-angle lens can exaggerate lines and create a sense of depth, while a longer lens can compress the lines for a more subtle effect.
  1. Don’t overdo it. While leading lines can be a powerful tool, it’s important not to overuse them. Too many lines can create a cluttered and confusing image, and using lines too often can make your portfolio feel repetitive. Instead, choose one or two prominent lines to lead the viewer’s eye towards your subject, and remember that not every image needs leading lines in order to work.

In that vein, it’s important to remember that leading lines are just one tool in your compositional arsenal. Experiment with different techniques and find what works best for your style and subject matter.


How to use symmetry in photography

Symmetry can be a powerful composition tool in photography that can create visually pleasing and balanced images. Like all compositional techniques, it’s not something you’ll want to use every time, but when judiciously deployed, symmetry can be hugely effective.

Here are some tips on how to work with symmetry in photo compositions.

  1. Look for natural symmetry. Start by looking for naturally occurring symmetry in your environment. These might be reflections in water or glass, or they might be more intentionally designed forms of symmetry as commonly seen in architecture. Symmetry also commonly occurs in nature, even in something as small as the pattern of a leaf.
  1. Remember the rule of thirds. This might seem counter-intuitive – surely symmetry demands a central composition, with perfect balance? However, using the rule of thirds to off-set the line of symmetry along one of the vertical or horizontal thirds lines can result in a more interesting and dynamic image.
  1. Play with angles and perspectives. Just because there’s symmetry in an image, that doesn’t mean you have to shoot it dead-on. Changing your angle or perspective can alter the way symmetry appears in your image. Try shooting from a different height or angle to see how it affects the symmetry and the overall composition.
  1. Use a mirror. Mirrors are a simple and effective way to create symmetrical compositions. Mirrored windows can be a gift for creating interesting symmetrical compositions in street scenes. 
  1. Use editing tools. Itf you’re shooting out in the world, it’s likely that you won’t one hundred per cent nail the symmetry on your first try shooting an image. That’s okay! If you find that your symmetry is slightly off, you can use editing tools to correct it in post-processing. Many photo editing programs have features to help you achieve perfect symmetry, whether it’s straightening lines, cloning out distracting objects or correcting lens distortion.

Remember, symmetry is not the only way to create an interesting and balanced composition. It’s important to experiment with different composition techniques and find what works best for your subject and shooting situation.

The ultimate vlogging guide: Sony

The Ultimate Vlogging Guide | Sony

With a dedicated line of cameras built entirely around making vlogging easy, Sony is making no secret of courting the YouTube generation. Whether you want to shoot on a fixed-lens compact, a lightweight APS-C mirrorless camera or a pro-spec full-frame mirrorless model, Sony’s vlogging range has options for you. We’ve put together this guide to help you find the right one.

We’ve also looked at the best Sony vlogging lenses, for both APS-C and full-frame cameras, to help you put together your perfect vlogging setup. We’ve made sure to factor in price when making our picks, as we’re aware that many vloggers are operating on quite a tight budget. So, whether you’re starting fresh on a vlogging journey, or are looking to upgrade your kit to the next level, here’s all the best Sony kit to buy…


Best Sony vlogging cameras

Best Sony vlogging cameras

While Sony’s various mirrorless and compact cameras have been popular with vloggers for a considerable amount of time, since 2020 the firm has been explicitly targeting this type of user with an entirely separate line of cameras. The ZV series – initially also known as the ZV Vlog cameras, though this naming convention has mostly been dropped – comprises a selection of compacts and mirrorless cameras specifically designed to appeal to vloggers.

The ZV cameras aren’t a radical departure from Sony’s previous cameras; the mirrorless models still use the E mount, so you’ve still got a huge selection of lenses to play with. They are more a refinement of the form, offering a suite of video options with useful features like built-in three-capsule microphones, real-time Eye AF and fully articulated LCD screens. 

Here are our picks for the Sony vlogging cameras to buy right now…


Best beginner vlogging camera: Sony ZV-1F

Sony ZV-1F
Sony ZV-1F

Key specs:

  • Compact camera
  • 20.1MP 1-inch sensor
  • 20mm (equivalent) f/2 lens
  • 4K 30p, Full HD 100/120p
  • Ports: Micro HDMI, 3.5mm mic input, USB-C

The Sony ZV-1F is the cheapest member of the ZV family, and is the ideal platform for a beginner vlogger to learn the ropes. It’s a compact camera, meaning it has a fixed lens, and it pairs a 20.1MP 1-inch sensor with a 20mm equivalent f/2 lens, giving you a nice and wide perspective that’s ideal for general-purpose vlogging. It shoots 4K at 30p, and Full HD at up to 120p, which is pretty much what you’d expect for a camera at this price point.

The appeal of the ZV-1F lies in how easy it is to use. Sony’s obvious priority with this model is making vlogging as simple as possible, and there are tons of features designed to help you out while shooting. Sony’s peerless Eye Autofocus is one of the stars of the show here, able to doggedly lock focus on a person’s eyes while shooting and ensuring a human subject never drifts out of focus. Sony’s Face-detection and tracking is also second to none.

Slim but solidly built, the ZV-1F is a camera that’s easy to take everywhere with you. It’s the kind of camera you can just pull from your pocket and start recording within seconds. There are plenty of obvious, clearly labelled buttons on the body for activating different settings. Digital stabilisation is also available for shooting handheld on the move, though this will crop into your footage – it’d be better to use the camera with a gimbal if your budget allows. 

Though the ZV-1 II has a prime lens, you’ll notice a zoom rocker on the front. This activates a 5x digital zoom function, which while best used sparingly, will allow you to get a little closer to a subject when necessary. There’s a port for a mic as well, though the built-in mics do a pretty decent job. While the ZV-1F is quite a simple proposition, it’s a very effective and usable starter vlogging camera. 

Pros:

  • Easy to pick up and use
  • Good quality from 1-inch sensor and 20mm lens
  • Exceptional Eye AF and Face Detection
  • Digital stabilisation works well

Cons:

  • Digital zoom only
  • No built-in ND filter


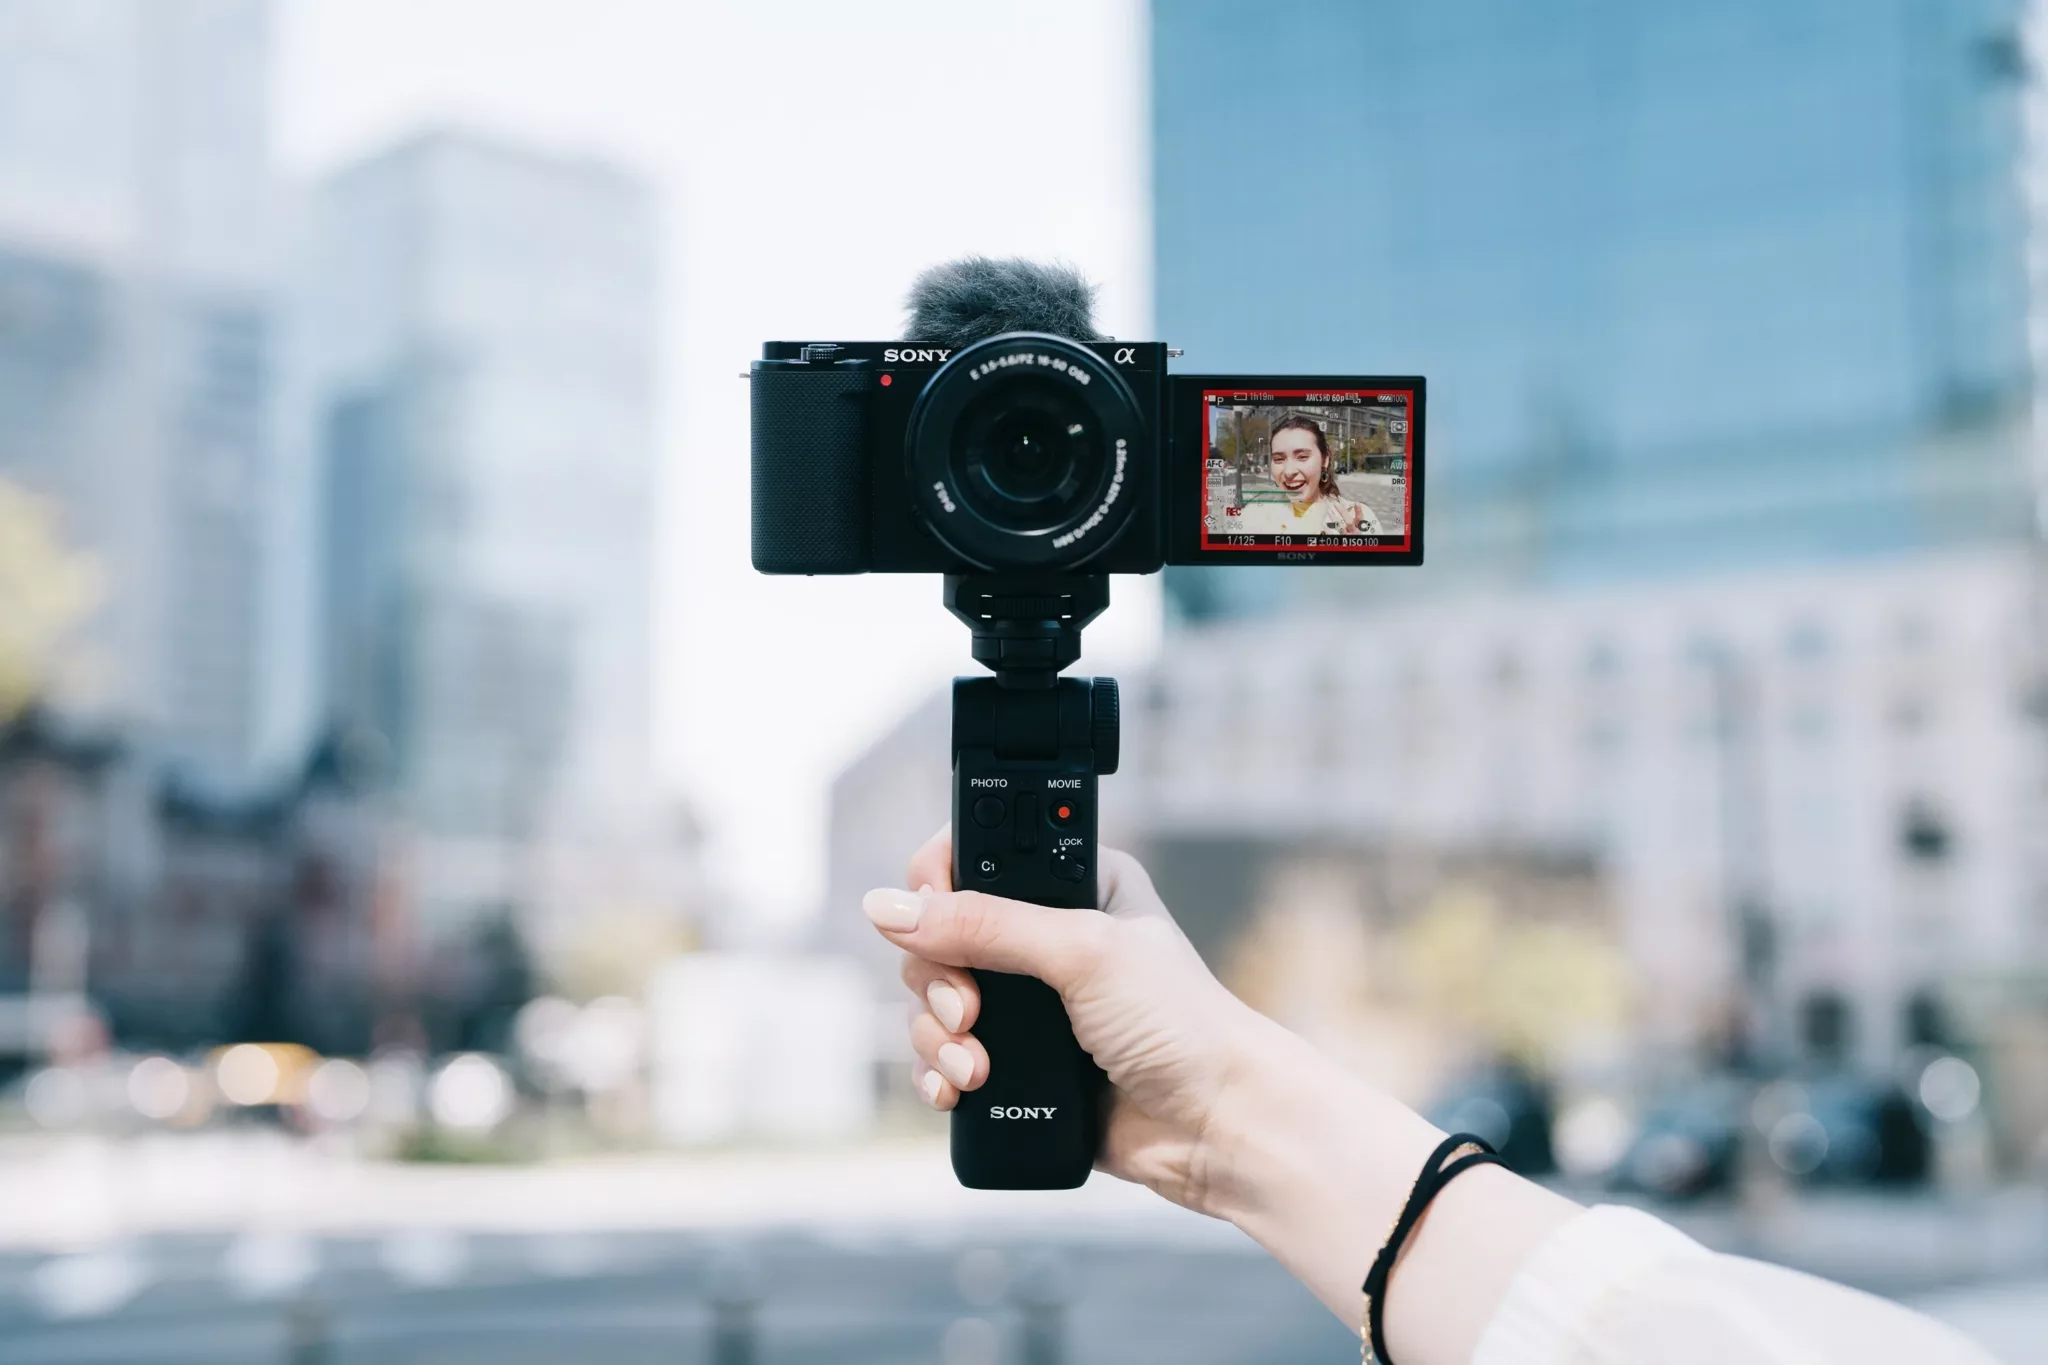
Best vlogging camera with zoom lens: Sony ZV-1 II

Sony ZV-1 II
Sony ZV-1 II

Key specs:

  • Compact camera
  • 20MP 1-inch sensor
  • 18-50mm (equivalent) f/1.8-4.0 lens
  • 4K 30p, Full HD 100/120p
  • Ports: Micro HDMI, 3.5mm mic input, USB-C

As you might expect from the name, the Sony ZV-1 II is the second iteration of the original ZV-1 camera – which was the first to arrive in the new vlogging line. According to Sony, the main piece of feedback that video shooters offered with regard to the first ZV-1 was that they wished its 24-70mm equivalent lens could go just a little wider. And lo, Sony waved its hand, and it was so – the Sony ZV-1 II is equipped with an 18-50mm equivalent lens, hitting a wider focal length that’s handy for general-purpose vlogging.

At that wide end, you can also take advantage of the f/1.8 maximum aperture for low-light shooting and working with shallow depth of field. This is great to have – just be aware that it does drop precipitously once you start to zoom in, reaching f/4 by the time you’re at 50mm. Elsewhere, this tiny camera makes for a superb vlogging companion – it’s barely the size of a pack of cards, and delivers video quality that’s a demonstrable step up from that of a smartphone. The three-capsule mic once again impresses, delivering audio quality good enough that you’re unlikely to want to increase the footprint of the tiny ZV-1 II by attaching a mic (though, of course, you can).

Elsewhere, Sony has also added an improved touchscreen that’s extremely intuitive to use. Autofocus algorithms have been tweaked for peak performance, and users can also take advantage of the Cinematic Vlog modes to create share-worthy clips straight out of camera.

Pros:

  • Useful wide-angle zoom lens
  • Great video and audio quality
  • Very slim, pocketable dimensions

Cons:

  • Max aperture drops at tele end of lens
  • Doesn’t zoom in as far as original ZV-1


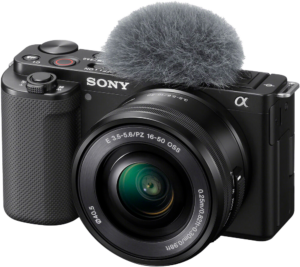
Best mirrorless vlogging camera: Sony ZV-E10

Sony ZV-E10
Sony ZV-E10

Key specs:

  • Mirrorless camera
  • 24MP APS-C sensor
  • Sony E lens mount
  • 4K 30p, Full HD 120p
  • Ports: Micro HDMI, 3.5mm mic input, 3.5mm headphone output, USB-C

Once the ZV compacts started arriving, it didn’t take long for vloggers to start wondering when we were going to get a mirrorless entry into the ZV series. That wish was handsomely granted with the ZV-E10 – a capable, lightweight mirrorless vlogging camera, essentially modelled on the Sony A6100 but stuffed with features designed to appeal to vloggers.

The addition of a vari-angle, freely moving LCD screen is a big one, making it much easier to flip the screen to face forward for self-taping without interfering with tripods, microphones or other accessories. Like all ZV cameras, the ZV-E10 also includes a built-in three-capsule microphone (and comes with a clip-on windshield accessory), significantly improving the quality of recorded audio. To bump it up still further, you can also use the 3.5mm port to attach an external mic. 

A lightweight and well-balanced camera, the ZV-E10 is well suited to one-handed use and balances nicely with E-mount lenses (see the bottom of this post for our recommendations of lenses to pair with it). Once again, Sony’s autofocus proves itself as one of the best systems in the business. Eye AF, as ever, is unerringly good, and the Face Detection acquits itself well. Video quality is consistently excellent, with 4K topping out at 30p, and we also like that the ZV-E10 provides the option to livestream. 

Well priced and simple to use, the Sony ZV-E10 is one of the best mid-range vlogging cameras around, and will suit anyone who wants the convenience of a ZV compact camera, but with the flexibility of interchangeable lenses.

Pros:

  • Lightweight and portable
  • Loads of E-mount lenses available
  • Excellent autofocus, as ever

Cons:

  • No built-in stabilisation


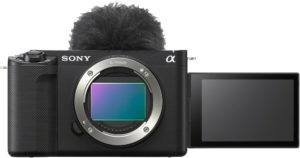
Best full-frame vlogging camera: Sony ZV-E1

Sony ZV-E1
Sony ZV-E1

Key specs:

  • Mirrorless camera
  • 12MP full-frame sensor
  • Sony FE lens mount
  • 4K 120p, Full HD 240p
  • Ports: Micro HDMI, 3.5mm mic input, 3.5mm headphone output, USB-C

The Sony ZV-E1 was something of a surprise on release, and certainly sticks out in the ZV line-up – not least because it’s more than double the price of any of the other models in the series. It’s certainly going to be more than most casual vloggers need, but for those looking for a professional, fully equipped vlogging camera, the full-frame ZV-E1 will fit the bill exactly.

While it looks like a ZV camera – and bears the name – the ZV-E1 inherits a lot of its tech from Sony’s professional Alpha and cinema cameras. The 12MP full-frame back-side illuminated CMOS sensor is borrowed from the FX3 and A7S III, and given that the ZV-E1 also shares the BIONZ XR image processor, it follows that it’s just as much of a beast in low light. With an extended ISO ceiling of 409,600, the ZV-E1 can more or less turn night into day.

Video quality is all around excellent, with 4K available at up to 120p, and most modes supporting 10-bit colour sampling at 4:2:0 or 4:2:2. Sony’s flat Log profile is available for those who like to maximise dynamic range before colour grading their footage in post. However, if you want to speed things up a bit, we quite like S-Cinetone, a pre-graded profile that gives you good-looking footage straight out of camera. 

So, if the Sony ZV-E1 inherits the guts of pro cameras like the A7S III and FX3, and is a good deal cheaper, you might be wondering what has been cut out to make that possible? There are a few features missing – the first one you’d notice just from looking at the body is the lack of an electronic viewfinder; Sony is making the bet that vloggers won’t need it. There’s also no option to shoot RAW video, and the FX3 is more geared towards professional cinema use with a supplied handle equipped with XLR inputs. Again, Sony is betting that most vloggers won’t miss these features – and we think they might just be right.

Pros:

  • Superb low-light capabilities
  • Cine-quality features for a great price
  • Effective stabilisation and autofocus

Cons:

  • At the expensive end for vlogging cameras


Best Sony vlogging lenses

Best Sony vlogging lenses

If you’re opting for a Sony mirrorless camera for vlogging, you’ll need to pick up a lens or two to go along with it. The Sony E-mount has a considerable advantage over mirrorless rivals like Canon and Nikon in that it has simply been around quite a bit longer, so there’s a lot of choice out there. Here are our picks of Sony vlogging lenses to get you started, whether you’re shooting on full-frame or APS-C. 


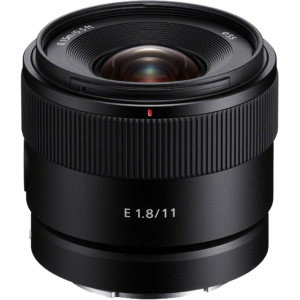
Sony E 11mm f/1.8

Sony E 11mm
Sony E 11mm

 This wide-angle lens for APS-C camera is specifically pitched towards vloggers. Delivering an equivalent focal length of 16.5mm due to the crop factor of APS-C sensors, this lens sits pretty much perfectly in the focal range for general-purpose vlogging and doing pieces to camera. Its wide f/1.8 maximum aperture also lets you make the most of available light and experiment with shallow depth of field. With two linear stepping motors, the autofocus is quick, efficient and virtually silent, and the lens delivers impressive edge-to-edge sharpness even when used wide open at f/1.8

Be aware that the lack of built-in stabilisation may be an issue if you pair the Sony E 11mm f/1.8 with a camera that also doesn’t have stabilisation, such as the ZV-E10. 


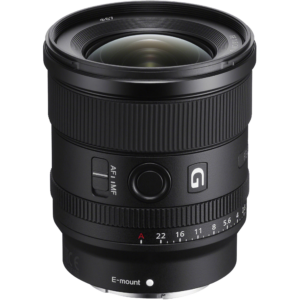
Sony FE 20mm f/1.8 G

Sony FE 20mm
Sony FE 20mm

A full-frame prime delivering a wide field of view, the Sony FE 20mm f/1.8 G borrows its dual Linear XD motors from the premium G Master lens series (more on which further down), meaning it offers exceptionally fast focusing action. With a nine-bladed aperture, the FE 20mm f/1.8 G lets you make the most of its f/1.8 aperture for beautiful bokeh in the defocused areas of images. 


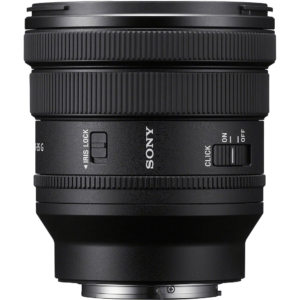
Sony FE 16-35mm f/4 G PZ

Sony FE 16-35mm
Sony FE 16-35mm

Power Zoom (PZ) lenses are specifically optimised for video. The term means that the zooming function of the lens is powered and controlled electronically by a series of linear motors, rather than by the operator physically turning the lens. This is particularly useful for video for a number of reasons – it allows for smooth zoom movements without the jerkiness often introduced by manual movements, and it means the zoom mechanism can be triggered remotely – great for vloggers who are operating solo. The Sony FE 16-35mm f/4 G PZ also offers built-in stabilisation, edge-to-edge quality and a moisture-resistant build, making it a terrific all-around zoom for vloggers on E-mount.


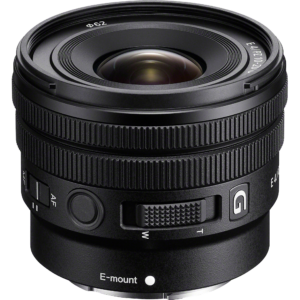
Sony E 10-20mm f/4 G PZ

Sony E 10-20mm
Sony E 10-20mm

This Power Zoom lens is built for Sony’s APS-C cameras – meaning it’s super-compact, and balances very well on smaller cameras. The Power Zoom mechanism itself is not just beautifully smooth, but also entirely internal, so the balance of the lens doesn’t change when it zooms in and out. Focusing action is reliably fast. The Sony E 10-20mm f/4 G PZ is also well-suited to outdoor shooting, with a dust- and moisture-resistant design. For travel vloggers, this lens is definitely worth picking up.


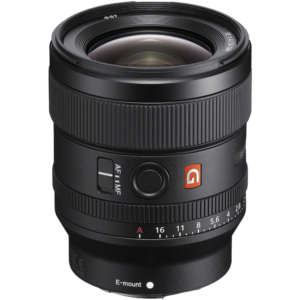
Sony FE 24mm f/1.4 G Master

Sony FE 24mm f1
Sony FE 24mm f1

For a premium vlogging lens to make the most of high-end cameras like the ZV-E1, you can’t go wrong with a G Master. These are Sony’s top-flight lenses, delivering optical brilliance in a robust, professional-standard body. The best bet for vloggers is the Sony FE 24mm f/1.4 G Master, a truly optically stunning lens that delivers a superb image from corner to corner. With an f/1.4 maximum aperture, it’s well equipped for low light, too.


All the images used in this blog post are courtesy of Sony.

The Ultimate Vlogging Guide | Fujifilm

The Ultimate Vlogging Guide | Fujifilm

If you want to start vlogging on Fujifilm kit, you’ve got an embarrassment of riches to choose from. While Fujifilm is generally more popular among photographers for its retro-styled cameras with dial-led controls, the X series offers a number of cameras that are also great for video, including multiple models that are specifically tailored to vloggers. This guide is here to help you find the right ones for you.

Fujifilm X-mount cameras all use APS-C sensors – smaller than full-frame, and significantly larger than the sensors found in smartphones. They tend to sit in the mid-range; there aren’t really any ultra-cheap beginner Fujifilm cameras, and there also aren’t any that cost as much as the top-tier flagships from the likes of Canon, Nikon or Sony. With that said, there’s plenty of variability in the series, so here we’ve nominated a range of excellent Fujifilm vlogging cameras and lenses for a range of budgets…


Best Fujifilm vlogging cameras

The Ultimate vlogging guide Fuji cameras
Best Fujifilm vlogging cameras

There are a fair few Fujifilm X-mount cameras, and many are tailored to quite specific purposes. For vlogging therefore, it pays to do a little research and make sure you get hold of one that’s going to give you all the features you need. Here are the Fujifilm X cameras we’d recommend for vlogging right now – including budget and second-hand options as well as the top-tier models. 


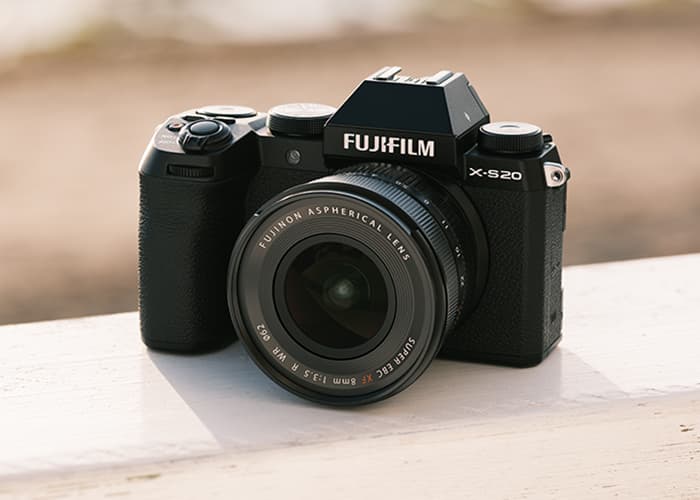
Best Fujifilm vlogging camera overall: Fujifilm X-S20

Best Fujifilm vlogging camera overall: Fujifilm X-S20
Fujifilm X-S20

Key specs:

  • Mirrorless camera
  • 26.1MP Fujifilm X-Trans IV APS-C sensor
  • Fujifilm X lens mount
  • 6.2K 30p, 4K 60p, Full HD 240p
  • Ports: Micro HDMI, 3.5mm mic input, 3.5mm headphone output, USB-C

A long-awaited update that arrived in 2023, the Fujifilm X-S20 is unquestionably the best Fujifilm camera for vloggers right now. There are more affordable options available, and there are cameras with more advanced video features, but in terms of the balance it strikes between performance and price, as well as the range of video options it puts at the user’s fingertips, it’s the best you can buy.

The X-S20 has a simplified design compared to other Fujifilm cameras, with fewer of the distinctive dials that characterise the firm’s photo-focused offerings. This has helped keep the weight of the X-S20 down – at 490g, it’s not going to feel like a brick around your neck, and it’s generally a good camera for keeping out of the way. It has a fully articulating screen that flips around to the side, and a 3.5mm input for attaching a mic. All music to the vlogger’s ears.

Of course, all this was also true of the previous X-S10, which arrived in 2020. What marks the X-S20 out is its upgraded video capability. Whereas the previous camera could shoot 4K video, the X-S20 captures glorious 6.2K 30p video in 4:2:2 10-bit format, using the full, uncropped width of its sensor. There’s also the option to shoot in Fujifilm’s flat F-Log profile, and if you hook up an external recorder, the X-S20 can also output Apple ProRes RAW or Blackmagic RAW. This is an impressive suite of options for a camera at this price.

The main dial of the camera has a specific ‘Vlog’ setting, which activates a dedicated vlogging mode designed to put all the relevant key functions at the user’s fingertips. You’ll have immediate access to the stabilisation, the eye/face detection, high-speed recording, and specialist modes like ‘Product Priority’, which will make the autofocus prioritise objects held towards the camera. 

Pros:

  • High-end suite of video options
  • Impressive stabilisation
  • Improved battery life

Cons:

  • Not weather sealed


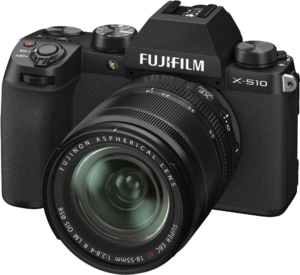
Best affordable Fujifilm vlogging camera: Fujifilm X-S10

Best affordable Fujifilm vlogging camera: Fujifilm X-S10
Fujifilm X-S10

Key specs:

  • Mirrorless camera
  • 26.1MP Fujifilm X-Trans IV APS-C sensor
  • Fujifilm X lens mount
  • 4K 30p, Full HD 240p
  • Ports: Micro HDMI, 3.5mm mic input, USB-C

While this is the previous generation of Fujifilm’s vlogging camera, the X-S10 is still a highly capable mirrorless option for vloggers, especially if your budget doesn’t quite stretch to the X-S20. You’ll make a good three-figure saving if you opt for the X-S10, and it can be bought as part of a vlogger’s kit with a lens, miniature tripod, SD card and shotgun microphone. No one could argue with a setup like that for a prospective vlogger.

The X-S10 was one of the first Fujifilm cameras to offer built-in stabilisation, and while it isn’t up to the standards of subsequent systems (including the one on the X-S20), it still works pretty well and will make you much more mobile as a vlogger. Video quality is as excellent as you’d expect given that this camera shares its sensor with a bunch of other premium Fujifilm X cameras. The 4K 30p footage looks great – some vloggers might wish they had 4K 60p, but that’s the kind of sacrifice you make when buying a cheaper camera that’s a few years old. We suspect a lot of vloggers will be able to get by without it.

The X-S10 lets you plug in a mic, and also offers USB-C connectivity as well as a micro HDMI port. There’s also an option to adapt a pair of headphones to the USB-C port if desired for audio monitoring. One thing to note is that the body is not weather-sealed, so you will need to be careful in wet conditions. Though bear in mind that the X-S20 isn’t either (some users were surprised Fujifilm neglected to add this upgrade in the sequel). 

While the price hasn’t come down perhaps as much as you’d expect for a camera that’s three years old with an updated version also on the shelves, that’s a testament to the X-S10’s enduring popularity and how much Fujifilm got right with this design. It’s a terrific camera for vloggers (if you can live without 4K 60p).

Pros:

  • Excellent video quality from X-Trans sensor
  • Fully articulated screen and mic socket
  • In-body stabilisation

Cons:

  • No weather-sealing
  • Tops out at 4K 30p


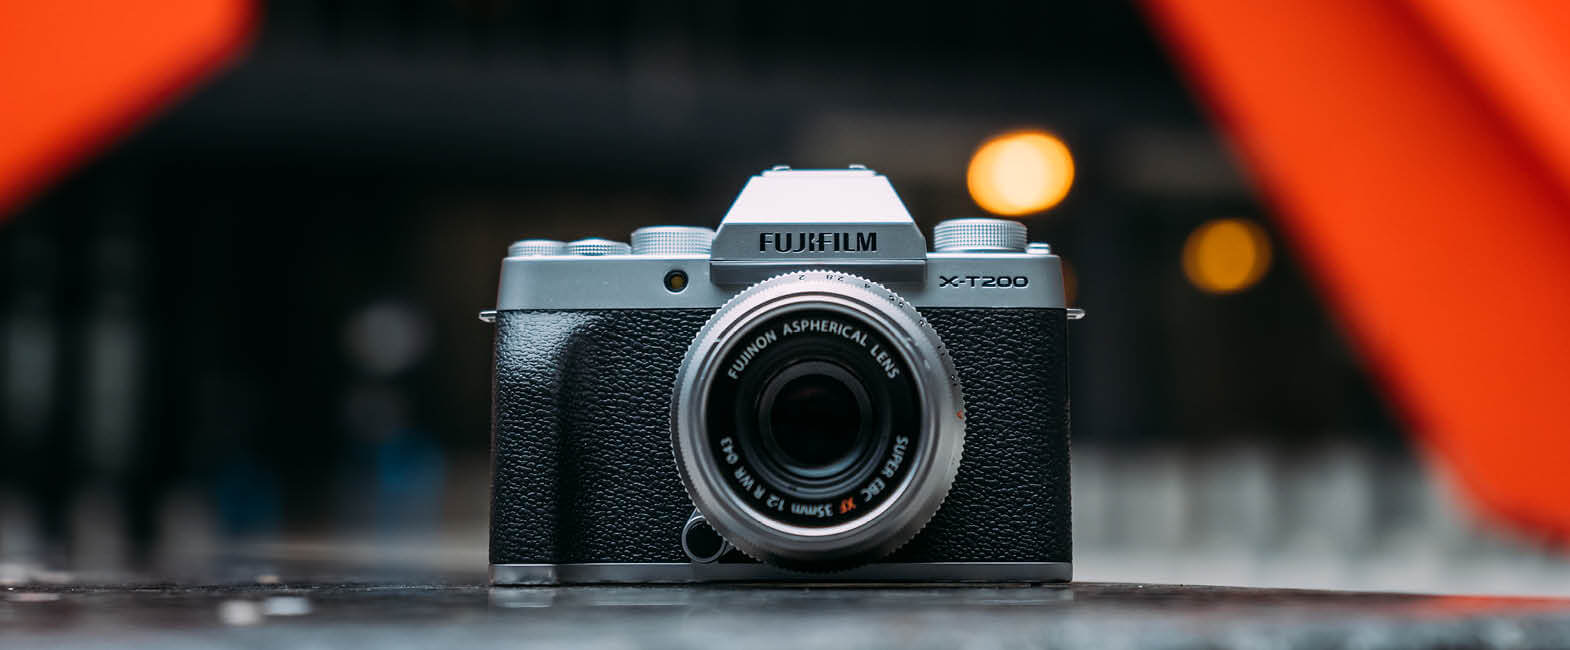
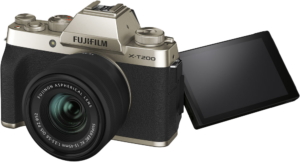
Best second-hand Fujifilm vlogging camera: Fujifilm X-T200

Best second-hand Fujifilm vlogging camera: Fujifilm X-T200
Fujifilm X-T200

Key specs:

  • Mirrorless camera
  • 24MP APS-C sensor
  • Fujifilm X lens mount
  • 4K 30p, Full HD 120p
  • Ports: Micro HDMI, 3.5mm mic input, USB-C

The Fujifilm X-T200 is an entry-level mirrorless camera. It’s now discontinued, which is a shame as Fujifilm doesn’t have many cameras down the low end of the price scale, but the good news is that you can pick it up relatively cheaply on the second-hand market, and it makes for a solid starting point for vlogging.

The first X-T100 is even cheaper, but it was something of a misfire with a few key features missing, and for a vlogger, we’d say it’s definitely worth getting this upgraded version. The X-T200 can shoot 4K 30p video (it was 4K 15p on the X-T100), it has a large 3.5-inch 16:9 rear LCD display that’s high-resolution and fully articulating, and it even offers the ability to trim video clips in-camera. The X-T200 boasts a deep grip that feels secure and comfortable in the hand, and the autofocus offers Face and Eye detection modes. All good stuff.

This entry-level series is notable for using a standard 24.2MP APS-C CMOS sensor rather than the flagship X-Trans sensors that are featured in Fujifilm’s premium cameras – though it still does an excellent job, and at low-ish resolutions like these the differences aren’t going to be too pronounced. A feature you might miss more as a vlogger is optical stabilisation, which the X-T200 doesn’t have. There is a digital ‘gyroscope’ that’s supposed to help stabilise footage, though it doesn’t really hold a candle to a proper IBIS system – and in any case, it doesn’t work in 4K.

The X-T200 is a capable vlogging camera, if slightly limited. For the second-hand prices it’s currently commanding, it represents solid value for money, and makes for an enticing gateway drug for the X series. 

Pros:

  • Good value for money
  • Large, sharp, articulating rear screen
  • Lightweight and portable

Cons:

  • No optical stabilisation
  • Battery life not the best (though can be topped up via USB-C)


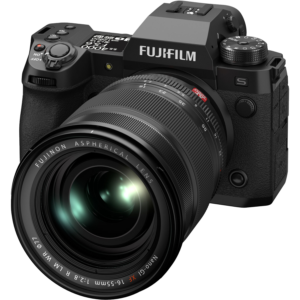
Best Fujifilm camera for videography: Fujifilm X-H2S

Best Fujifilm camera for videography: Fujifilm X-H2S
Fujifilm X-H2S

Key specs:

  • Mirrorless camera
  • 26MP X-Trans APS-C stacked sensor
  • Fujifilm X lens mount
  • 6.2K 30p, 4K 60p (120p with crop), Full HD 240p
  • Ports: HDMI, 3.5 mic inputs, 3.5 headphone output, USB-C

The Fujifilm X-H2S is the manufacturer’s most advanced video camera right now – as well as, frankly, possibly the most advanced APS-C cameras ever made. Equipped with a stacked and backside-illuminated 26MP APS-C sensor, it’s a true hybrid of a camera, capable of blistering photo speeds and sublime video quality.

Let’s get the spec out of the way – the Fujifilm X-H2S can capture 6.2K video at 30p, as well as 4K and Full HD at a variety of high frame rates, and it can do it all in 4:2:2 10-bit colour. The full-size HDMI port can be used to output Apple ProRes RAW or Blackmagic RAW, and there’s the option to shoot in Fujifilm’s flat F-Log profile for up to 14 stops of dynamic range. The X-H2S also has the must-have feature of cameras from the past few years – subject-detection autofocus that can automatically recognise and lock onto specific subjects like humans and animals. What’s more, this can be used in video recording mode. 

Video recording times have been a stumbling block for more than a few high-flying mirrorless cameras over the past few years – if a camera can’t go for more than 20 minutes without overheating, is it a tool fit for a professional? Fujifilm negotiates the X-H2S around this with an optional (sold separately) accessory, the FAN-001. Attaching to the back of the camera in the slot left vacant by the folded out LCD screen, the cooling fan allows you to keep recording for longer, even in high ambient temperatures. Is it a particularly sleek or stylish arrangement? No, it is not. But it works!

The Fujifilm X-H2S is one of the most expensive APS-C cameras ever made, and is probably out of budget for most vloggers. Unless you really need the features it’s offering, you don’t need to spend this much money. However, if you’re looking for the best Fujifilm video shooter money can currently buy, then here it is. 

Pros:

  • Superb high-resolution footage
  • Can extend recording times with use of fan accessory
  • Subject-detection autofocus works in video mode

Cons:

  • Expensive for APS-C


Best Fujifilm vlogging lenses

Best Fujifilm vlogging lenses

Though Fujifilm’s X cameras are truly excellent pieces of kit, there’s an argument to be made that the real strength of the system is in its lenses. Fujifilm’s X-mount lens system is not the most well-populated out there, but has gained a reputation for housing a stunning range of primes and zooms for all kinds of shooters. Fuji has a particularly strong line in producing lenses that produce fantastic bokeh at shallow depths of field, with lenses full of character and expression. Here are our picks for vloggers…


Fujifilm XF 16-80mm f4 R OIS WR

Fujifilm XF 16-80mm f4 R OIS WR

This capable zoom lens is an absolute standout. If you can only buy one lens for vlogging on Fujifilm, we’d say make it the Fujifilm XF 16-80mm f4 R OIS WR. Running an equivalent focal gamut from 24mm to 120mm, it’s a versatile zoom that will do an excellent job in just about any shooting situation. The optical stabilisation is class-leading, and the sophisticated optical construction delivers premium sharpness; field curvature and aberration are exceptionally well-controlled throughout the zoom range. Focusing is fast and near-silent, and the lens is pretty reasonably priced to boot. Not sure what to buy? Start here. 


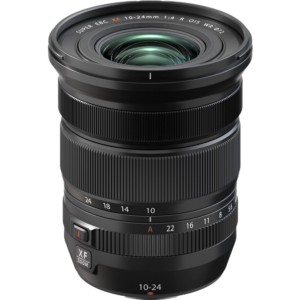
Fujifilm XF 10-24mm f4 R OIS WR

Fujifilm XF 10-24mm f4 R OIS WR

The APS-C format of the X series means that genuinely wide lenses are in short supply, so this wide-angle zoom is definitely worth considering for vloggers. Intelligently designed with a sophisticated optical construction of 14 elements in 10 groups, the Fujifilm XF 10-24mm f4 R OIS WR produces terrific image quality with great control of aberration and distortion. It’s thoroughly weather resistant with a tough outer chassis, and also has effective built-in stabilisation for run-and-gun filming. 


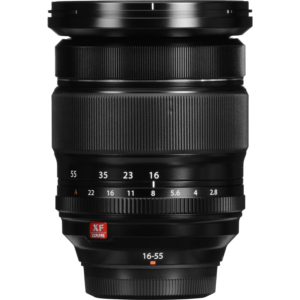
Fujifilm XF 16-55mm f2.8 R LM WR

Fujifilm XF 16-55mm f2.8 R LM WR

An enduringly popular lens among Fujifilm enthusiasts, the Fujifilm XF 16-55mm f2.8 R LM WR delivers a generous zoom range with a constant aperture of f/2.8 running right the way through it. This means you have real compositional flexibility even when the light gets low, and can achieve aesthetically pleasing shallow depth-of-field effects. Hardy and weatherproof, this is a solid choice of lens for travel vloggers. 


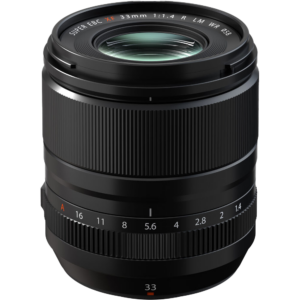
Fujifilm XF 33mm f1.4 R LM WR

Fujifilm XF 33mm f1.4 R LM WR

A gorgeous, well-balanced prime lens, the Fujifilm XF 33mm f1.4 R LM WR produces a field of view roughly equivalent to that of a 50mm lens mounted onto a full-frame camera, and as such, it’s great for general-purpose vlogging where you want a naturalistic perspective. It’s a cut above the kinds of cheap nifty fifties that are commonly available for most systems, both in terms of its optical quality and its f/1.4 maximum aperture that gives you a little more latitude in low light. The bokeh is, of course, gorgeous – this is Fujifilm, after all.


All the images used in this blog post are courtesy of Fuji.

Fixation Terms and Conditions Banner

Terms & Conditions

Terms & Conditions of Repairs & Services

In any communication please quote the job reference number.

Conditions of repair

These conditions apply to any agreement between Fixation and any customer (individual or organisation) entrusting us with goods for evaluation or adjustment.

Fixation is a trading name of Warehouse Express Limited, 13 Frensham Road, Norwich. NR3 2BT. Company registration number 03366976. The Fixation London workshop and showroom is located at 250 Kennington Lane, London, SE11 5RD. The Fixation Manchester repair counter is located within Wex Photo Video Unit 4, Downing Street Ind Est. Charlton Place, Manchester M12 6HH

Important Note: All repairs/services are thoroughly checked before release but it is expected that a final check of the equipment be made by the user. Customers are asked to check that their camera has been restored to their preferred settings before use. Fixation cannot accept any liability for consequential loss due to failure of repair or delayed return.

Manufacturer’s Warranty

Any claim under the manufacturer’s warranty must meet the terms and conditions set out by the maker. Claims must be accompanied by the appropriate paperwork. As a minimum this means an acceptable proof of purchase; an applicable warranty certificate may also be required. Failure to provide the correct documentation may result in a chargeable repair. Be aware that warranties on digital products may be regional and therefore only valid in the designated area in which the manufacturer intended it to be sold. Grey imports and overseas purchases may therefore be exempt.

A warranty claim will also be refused if examination shows the cause is anything other than a manufacturing fault, including but not necessarily limited to:

  • Improper use, damage or defects caused by incorrect storage, impact, excessive shock, liquid damage or damage by foreign substances.
  • Repairs, modifications, tampering carried out by an unauthorised third party
  • Damage caused by incorrect voltage input
  • Use of spare parts or software not compatible with the product.
  • Damage in transit.

Estimates

The estimates we provide are based on examination and diagnostic tools. Estimates may be subject to later revision if the internal condition of the equipment is not as anticipated (e.g. unforeseen damage or third party tampering), or if on further examination we find additional work is required. In these circumstances we will provide a re-estimate of the work and costs.

Our estimates should be suitable for insurance purposes, we would advise contacting your insurer for their policies and claim procedures. If additional letters are required further charges may apply.

Estimates are valid for 30 days from the date of the estimate.

Please note: Fixation may need to change your camera settings during the estimate process. Fixation advises customers to back up any data before sending the equipment to our workshop. Please note that Fixation does not accept any responsibility for any damages or loss of data.

Refusals

No refusal charge is incurred, but Fixation has insufficient storage space to hold items indefinitely and the return of the goods must be arranged within 4 weeks.  Applicable arrangements include collection, payment of dispatch charge (£10 + vat for standard, overnight delivery by courier) or authorisation to dispose of the goods on site.  In the absence of such arrangements, a recorded letter or email will be sent and, in accordance with the Disposal of Uncollected Goods Act, the uncollected item will be disposed of after 3 months.  We may charge storage fees if extended storage is requested. Fixation cannot accept any liabilities for disposed items after the 3 months notification.

Sensor cleaning

While performing the sensor cleaning, Fixation may change your camera settings to adjust quality and resolution to ensure cleaning has been successful. Fixation advises customers to back-up any data before sending the equipment to our workshop. Please note that Fixation does not accept any responsibility for any damages or loss of data. Customers are responsible to ensure that the camera settings are set after the cleaning service.

Due to the nature of the equipment usage, and the variability of storage conditions from each customer, that may increase the chance of fungus, debris, and dust in the equipment, no warranty is provided for sensor cleaning.

Firmware updates

If you request a firmware upgrade or if we need to update the firmware during the service, please note that the updates may change the settings of your equipment and turn it back to the original setting. Fixation advises customers to do a back up of any data before sending the equipment to our workshop for firmware updates. Please note that Fixation does not accept any responsibility for any damages or loss of data.

Repair Times

All effort will be made to minimise turnaround time. Actual times will fluctuate according to demand and technician availability, but estimated turnaround times are updated on our website.

Any dates quoted by Fixation for completion of repair work are approximate and not guaranteed; we cannot accept liability for any consequential loss suffered as a result of a delayed repair. Some delays may occur whilst we await supply of spare parts required to complete a repair. Every effort will be made to keep the customer informed of progress, but such delays are beyond Fixation’s control and influence. 

Payment

Repaired items will only be released on receipt of payment, where applicable.  Payment is expected within 4 weeks of notification that the repair is complete.

Payment may be made in person upon collection of goods, or by telephone when arranging dispatch.  We accept payment by cash (collection only), debit/credit card or Bank transfer (goods will only be released when funds have cleared into our account).

For card holders’ own security when taking telephone payments, anti-fraud checks are made based on matching the address of the registered card-holder.  For this reason, we reserve the right not to accept payment by cards registered to non-UK addresses and in these circumstances a Bank transfer may be required.

Where, despite documented reminders (by email and letter), items are not collected or paid for after three months, in accordance with the Disposal of Uncollected Goods Act, this equipment shall be disposed of in order to retain from the proceeds of such sale any amount sufficient to defray costs of repairs and expenses incurred in attempting to trace and notify the customer. The customer will be entitled to any balance, but no interest shall be payable on any amount retained by the company.

Repair Warranty

All repair work is guaranteed for a period of 6 months from the date of invoicing. Should any customer not be satisfied with work carried out, they must contact Fixation within a period of 3 months from the time of collection/dispatch.  All repairs are thoroughly checked before being released, but it is expected that a final check of the equipment be made by the user. Non-use of the equipment does not extend the guarantee period. Fixation shall not be responsible for any consequential loss or damage whatsoever claimed by reason of repairs carried out, or subsequent failure thereof.

The re-repair guarantee covers failure under normal operating conditions of previously repaired/replaced components and the associated labour.

All re-repairs are subject to inspection and at the discretion of the technician. Rejection of any claim (for example if the camera has suffered any physical damage or the subsequent fault is unrelated to the previous repair) will result in a new estimate and return shipping charges will apply. 

Shipping charges may also apply if the camera proves to be working to specification with no further repair necessary. 

Repairs covered by our repair guarantee will be returned via standard shipping at our expense (other shipping methods will be chargeable).

Goods in transit

We can advise on likely delivery dates, but these may not be 100% guaranteed. We cannot accept liability for any consequential loss arising from delayed deliveries .Consignments dispatched via our main shipping options are insured and a signature will be required upon delivery.

Should the equipment appear to be damaged upon unpacking, please retain the item and the packaging (even if unmarked) and notify the Service Department immediately to initiate the claim procedure.

Terms & Conditions of Courtesy Equipment Loan

These terms and conditions are raised in addition to and should be read in conjunction with our standard Hire Terms and Conditions.  They apply to any courtesy loan of equipment for whatever reason. The term “hirer” refers to the customer who is being loaned the equipment by Fixation.  Acceptance of Courtesy equipment is taken as acceptance of these Terms and Conditions, whether or not this document is signed where indicated by the hirer.

Circumstances

Fixation may agree to loan courtesy equipment under certain circumstances, including but not limited to the following:-

a. Where a customer has purchased new Nikon or Canon equipment from Fixation and suffers a failure of the equipment during the warranty period, which is not due to customer misuse or abuse.  If Fixation is satisfied that the fault is a valid warranty claim, and is unable to complete satisfactory repairs within two working days of the equipment being submitted to Fixation for inspection, then Fixation will issue loan equipment for the period until repairs are completed.  Whilst Fixation will endeavour to provide replacement with the same model, if this is not available for whatever reason, we will supply the next most appropriate model. 

b. Fixation may agree to loan courtesy equipment where a customer believes that a repair carried out by Fixation’s own workshop has not been satisfactorily completed.  Fixation reserves the right to inspect the equipment before issuing a loan to verify the customer’s claim.  Whilst Fixation will endeavour to provide replacement with the same model, if this is not available for whatever reason, we will supply the next most appropriate model. 

c. If a customer suffers a service failure due to an oversight or error by a member of Fixation staff, or by an agency outside of our business through no fault of the customer, if appropriate, we may, without prejudice and as a gesture of goodwill, offer to loan alternative equipment to enable the customer to continue their business activities.

In all circumstances, if the customer requests a replacement unit to be sent before Fixation have satisfied themselves of the fault or error, then such equipment will be issued on a chargeable basis, and may be altered to courtesy loan subsequently if circumstances meet the necessary conditions.

Shipping or Courier charges

Fixation will bear the cost of sending Courtesy equipment to the customer.  The cost of returning the equipment to Fixation shall be borne by, and be the responsibility of the hirer.

If Fixation is sending equipment out, we reserve the right to request proof of address for non-account customers, and we will only ship to this address.

Period of Loan of Courtesy Equipment

It is a strict condition of this agreement that the period of loan expires 48 hours after Fixation has informed the customer that their repair is completed and ready for collection.  Fixation will make all reasonable effort to contact the customer by email, telephone, text message or any other means at Fixation’s disposal to inform the customer that their repair is complete.  If the customer fails to return the Loan equipment within 48 hours, the loan will become chargeable at our normal rates.

All other normal terms and conditions relating to Liability, Deposits, Insurance, Loss and Damage, Availability, and Accessories also apply to this agreement.

Hi, how can we help?