Close up | Sony a9 focus modes image

Close up | Sony a9 focus modes

With its Alpha series of mirrorless cameras, Sony is playing a calculated game of wooing different types of DSLR user over to its system. The Alpha 7R cameras, for instance, boast the kind of high megapixel counts favoured by landscape and studio shooters, while the Alpha 7S series are seriously impressive low-light machines designed to appeal to those who work in video (which they have done very successfully).

Until last year, there wasn’t much in the Sony stable to seriously tempt sports and action photographers. These are the kind of people who prize speed and accuracy above all else, the vast majority of whom you would find using cameras like the Canon EOS 1D X Mark II or the Nikon D5. That has now all changed with the arrival of the Sony a9.
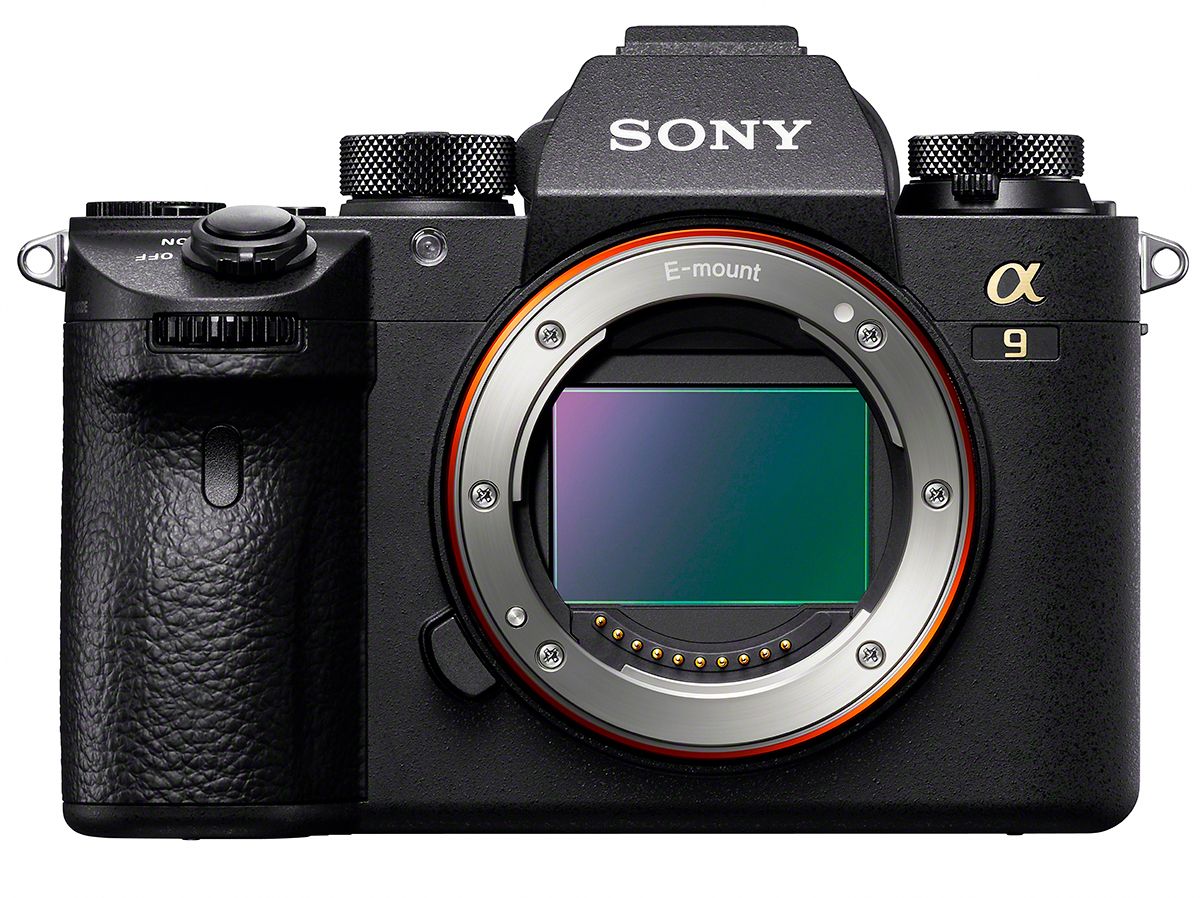
The Sony a9 is available to buy from Fixation UK Ltd

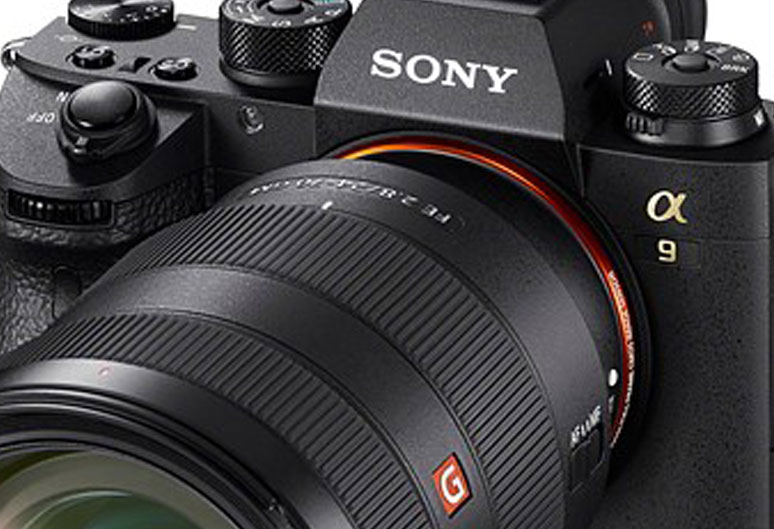
If you’re reading this, you’re probably at least somewhat familiar, so we’ll keep the recap brief. The Sony a9 is a speed demon, able to shoot continuously at up to 20fps with no viewfinder blackout, a feature complemented by its beast of an autofocus system that comes sporting 693-point focal plane phase detection points and is able to handle up to 60 AF/AE tracking calculations per second. All this is complemented by additional speed-oriented features such as a generous image buffer (241 Raws, 362 JPEGs), maximum shutter speeds of 1/32,000s, dual SD Card slots, and 5-axis in-body image stabilisation that provides a shutter speed advantage of up to 5 stops.

As you can see, the Sony a9 is a fearsome, complex tool for speed shooters. And like any complex tool, in order to get the most out of it, you have to know how to use it. That’s why we’ve put together this helpful guide to its many different focusing modes. We’ll give you an overview of each mode, and suggest some situations in which it could be put to good use.


Basic focus modes

[gdlr_row]
[gdlr_column size=”1/3″]Sony a9 focus modes[/gdlr_column]
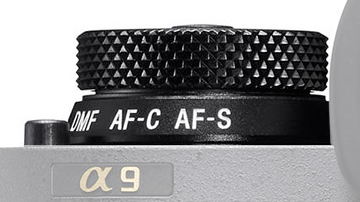
[gdlr_column size=”2/3″]Let’s quickly get the basics out of the way. The Sony a9 carries four general focusing modes, most of which you’d find on any camera of its class. They can be set using the marked dial at the top, and are as follows:[/gdlr_column]
[/gdlr_row]


[gdlr_row]
[gdlr_column size=”1/2″]

AF-S (Single-shot AF)

Focus locks in place once acquired. Useful for still subjects.

[/gdlr_column]
[gdlr_column size=”1/2″]

AF-C (Continuous AF)

The camera continues to focus when the shutter button is half-depressed. Useful for moving subjects.

[/gdlr_column]
[/gdlr_row]


[gdlr_row]
[gdlr_column size=”1/2″]

MF (Manual focus)

Focus is set manually by the user. Focus peaking can be turned on or off in the settings menu, providing a graphical representation of the focusing accuracy, and photographers can also make use of MF Assist, which provides a zoomed-in view of a selected focus point on the LCD screen and thus allows for even finer adjustments.

[/gdlr_column]
[gdlr_column size=”1/2″]

Direct Manual Focus (DMF)

A combination of auto and manual focus, DMF allows users to acquire focus with the AF system and then fine-tune it manually. No one would be using this on any subject that moves, but it can be very useful for applications like macro shooting, striking a nice balance between expediency and precision for situations where the photographer needs the plane of focus to be incredibly precise.

[/gdlr_column]
[/gdlr_row]


Back Button Focusing
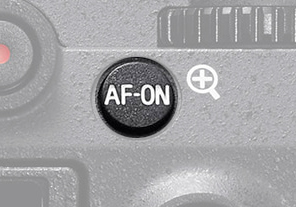
Sony a9 rear AF buttonOne thing that’s also worth noting before we delve into the autofocus modes is that if you don’t want to set focus with the shutter, you can set up the Sony a9 to perform back button focusing, i.e. using one of the rear buttons as the trigger for acquiring focus. This requires delving into the menus to turn off Shutter AF and then heading to the button customisation options to assign focusing to your button of choice.

While it is a bit of a pain to set up, it can be extremely useful to get to grips with Back Button Focus if you’re going to be photographing moving subjects – which, with your Sony a9, you probably are. It’ll mean your camera won’t automatically attempt to refocus if you accidentally lift your finger a little from the shutter release, and that you can recompose without losing your subject.

Autofocus

Stills shooters using a Sony a9 probably won’t be using its manual focus functions a whole lot. The camera is a speedster first and foremost, best for tracking fast subjects whipping across the frame, and that means that the vast majority of the time a stills photographer will be using autofocus.

To that end, Sony has provided an abundance of autofocus modes that cover the frame in different ways, and if you’re going to use the camera effectively, it’s very important to have a solid grasp of what these different modes do and when it’s most appropriate to use each one.

Let’s run through them.

Wide

This is the standard mode, the broadest focusing mode available. Putting the a9 on this setting tells it to use its autofocus system to search the entire frame to find a subject to focus on.

You’re going to want to use this in situations where you simply don’t know what’s going to happen – you have an unpredictable subject that’s moving erratically. However, you ideally also need this subject to be the only thing in frame, moving against a fairly uniform background. A single runner on a track, a bird in flight – these are good examples of when you might use the Wide mode. In any more complex situation than that, Wide may not hone in on what you want it to.

Zone

This is a more targeted mode. Here, the photographer uses the touchscreen or joystick to specify a rectangular segment of the frame where they want the camera to acquire its focal point. It’s useful for giving the camera a clearer idea of your intentions for a busy scene – say you want to get the player further away from you who’s likely to shoot, not the more prominent but less immediately interesting player who happens to be closer to you.

Centre

The camera uses a small, fixed rectangle in the centre for focusing. This is useful for when you’re firing off shots and simply need to focus and recompose.

This mode can be customised in the settings menu, with the option to switch on Center Lock-on AF. With this switched on, once the system acquires focus on the central point, it’ll continue to track that subject even if it moves to a different part of the frame.

Flexible Spot

This is a versatile, flexible focusing mode, and it’s well worth investing the time into getting comfortable with using it. With this mode, the photographer freely specifies the precise point where it wants the camera to focus. This can be done with the joystick, but is so much more fluid and intuitive when done on the touchscreen – simply tap the point in the frame where you’d like the focusing rectangle to go, and you’re set. Once you get comfortable with it, you can quickly focus, shoot and refocus with incredible precision. The size of the Flexible Spot can also be adjusted, with three settings available: Small (S), Medium (M) and Large (L).

This mode can also work with Lock-on AF, allowing you to track the subject that’s been acquired using the Flexible Spot.

Expand Flexible Spot

This is the same as Flexible Spot, but with a wider target area that’s designed to be a little more forgiving. It’s useful if your subject is difficult to pick out against its background.

Detection modes

The Sony a9 also comes with some focusing modes designed to make it easier to photograph people.

Face Detection

This is the standard face detection mode that comes on most sophisticated cameras (and smartphones) these days, and it can be turned on or off in the settings menu. The Face Detection modes can track faces its detected – once there’s a lock, it’ll follow the face around the frame.

What’s interesting on the Sony a9 is that it comes with a Face Registration system, which allows the user to teach the camera to recognise and prioritise specific faces in crowds. Wedding photographers in particular likely sat up a little straighter upon reading that – simply grab a quick pose from the bride, groom and other key players at the start of the day, and you’ve got some assurance that the camera will hone in on the most important people in every scene.

It’s worth noting, however, that Face Detection will not override other focus modes, so if it detects a face outside of the point you’ve specified with Flexible Spot or whichever mode you’re using, it’ll register that face (and mark it on your LCD), but won’t focus on it unless you move your point to cover it. This is useful for maintaining a degree of control over what the camera is doing. If you’d like the focus point to be entirely governed by Face Detection, you can simply set the autofocus mode to Wide, which as you’ll recall will encompass the whole frame.

Eye Detection

A more precise version of Face Detection, this does exactly what it sounds like – detects eyes in the frame, and focuses on them. It can also track a person’s eyes around the frame, and this function works very, very well [link]

This is a really useful function for portrait photographers, who need to get the eyes dead-on and are also working with very shallow depths of field. The tracking feature also expands the possibilities of a shoot – if you want your subject doing something a little more active than sitting perfectly still, Eye AF means you can track them in motion without sacrificing pin-sharp focus or your shallow depth of field.

Further reading

Sony has provided a useful chart on its website as to the specific sports and situations you might want to use different a9 focus modes for [link], but the best way to find out is of course practice! Use your a9 in different situations, experiment with its focusing modes and find out what works for you.

We hope you found this guide useful. Are there other functions of the a9 you’d like to know about? Let us know in the comments or on social media!

Gumball 3000 | Shooting with the Sony A7S II & FS7 II image

Gumball 3000 | Shooting with the Sony A7S II & FS7 II

Gumball 3000: A mass collection of supercars, taking on a 3,000 mile journey from Riga to Mykonos in the summer of 2017.

The entrants have 6 days to complete the drive which is segregated nightly by parties and dinners full of glitz and grandeur. Crowds fill every city that the moving circus pulls into, with fans desperate to get a glimpse of the cars they have swooned over on Instagram. It’s a level of euphoria that is hard to explain without witnessing first hand with tens of thousands of people filling streets, squares, climbing trees and attempting to clamber over security barriers. Through past work with Gumball, Finn, Hugo and 8 Seconds Media were granted AAA for the entire event, so had free roam to shoot as they pleased, enabling them to cover the rally from a unique and embedded angle, with the help of Fixation.

Gumball 3000 © Hugo Pettit© Hugo Pettit

In Hugo’s own words:
Organising the logistics for the trip ourselves, we planned a 3 week route with Gumball sandwiched in the middle and the first stop in Thirsk to see long standing partners Twisted. Having picked up our beautifully re-engineered Land Rover defender, we boarded the ferry to Europe, the start of a huge triangular trip around Europe. Commissioned to shoot both film and stills, we used the Leica SL and M 240 and for film we used our own Sony A7S II and bolstered it with another A7S II and the Sony FS7 II with a couple of Sony 24-70mm ƒ/2.8 lenses. These were rented from Fixation and were chosen for the A7’s ‘run-and-gun’ abilities and ease to mount on the DJI Ronin-M, and the FS7 II for the higher frame rate and image quality.

Arriving in Riga, we planned our route through the 10 countries that comprised the rally. It was a surreal trip; it’s rare to be able to have the time to travel through each of these countries by car and actually explore them. Although driving circa 500 miles per day, the route dissected some of each countries most beautiful roads. Mountains, coastlines, plains and stunning rivers, it was amazing to watch the scenery change the further south we travelled. Staying each night in generally the capital city of whichever country we were in, we also had the job to capture the other side to the Gumball price tag; the wild and decadent parties that occur each night, laid on for the Gumballers. While only a certain amount can be disclosed and captured on film, safe to say it was an eye-opening and amazing experience.

Gumball 3000 © Hugo Pettit© Hugo Pettit

A particular highlight was arriving at the Albanian border. Met by a huge convoy of police men and cars, one for every 10 Gumball super cars, we were under the assumption that it was going to be one of the more boring legs of the journey. Not only is Albania absolutely stunning but it seemed the the ‘creme-de-la-creme’ of police cars and drivers and been chosen for the role, while what felt like the rest of the Albanian police lined the road into Tirana (our stop for the night) to keep other traffic and people off the roads. There was not one point along the route in Albania that there were not fans in sight, desperate to see the cars.  Back to the police cars, it seemed they had been instructed to drive at 110mph through the whole country, regardless of the then unimportant speed restrictions lining the roads, corners and other cars. There were moments that were effectively 170 super cars in a line/group speeding legally through some of the most beautiful countryside we’d driven through. To then be met by the crowds that awaited us in Tirana and the night that followed topped it off. A true Gumball experience, one that could not have been replicated in any way shape or form.

Gumball 3000 © Hugo Pettit© Hugo Pettit

We spent the trip effectively moving from hotel to hotel and otherwise living out of the back of the Twisted, only just about enough space for the 4 of us, our kit and the ability to work and edit continuously while driving. With power inverters for the car, we also had all of our kit charging, definitely pushing the limits of what car fuses can usually handle.

Living out of a bag and shooting is something we’re used to but to do so while working the hours that were required each day was taking, not only for us but the kit too.

Our daily routine would see us up at 5.30am and we worked straight through until around 2.00am when we could finally hit the sack.

We finished up a laptop screen and a Sony RX100v down at the end, but the Sony A7S II’s (kept in Tilta cages or on the DJI Ronin-M) and the FS7 II kept in it’s supported bag were safe from the enduring amount of use they saw. Sony have an amazing range of cameras, of which the FS7 II and A7S II were perfect for this job. While the superior image quality and higher frame rate of the FS7 II were key for certain shots, we used the A7S II for the majority of the work, especially as we had one mounted constantly on the DJI Ronin-M. With our very-much run-and-gun approach to the job and lack of specific structure to the edit afterwards, the key for this project was to shoot as much as we could and build the edit’s story afterwards. This suited the A7S II hugely. It’s light, holds an SD card (great for quickly dumping footage onto an Macbook Pro) and is easily small enough to have sat with me while editing in the back of the car. I had it set up to shoot at 100fps continuously, giving me the ability in the edit afterwards to be able to slow footage down appropriately.

Gumball 3000 © Hugo Pettit© Hugo Pettit

The FS7 II however, although providing beautiful footage and amazing dynamic range, was much harder to have as a run-and-gun camera. Almost too bulky to have out the window of the car while moving and definitely not the space to have it next to me while editing, the FS7 II lived in its case in the boot when not being used for setup shots at specific locations. Once on location however, it performed beautifully. With its built-in stabiliser function, the camera lived on my shoulder and even at 25fps shoots a very steady image with functions easy to manage without putting it down (once you had the menu system memorised!). With the FS7 II, we shot mainly in 150fps and had the camera set up (through a customised S&Q button at easy reach) so it took just one button to switch between 25fps and 150 fps, a very handy function to have.

Having grown up as a photographer, I’ve got used to constantly and manually managing light through ISO, aperture and shutter speed, dependant on the point of the shot. The A7S II works well for those that have evolved from stills photographers, apart from the added necessity of a variable ND. If you shoot in S-Log3, which has the best dynamic range, your minimum ISO is 3200, which therefore immediately requires a variable ND, even if you were to dare shooting at ƒ/22 and a shutter far too fast for the fps (to match the speed of you eye, your shutter speed should be double that of your fps e.g shooting 100fps, your frame rate should be 1/200 and similarly, if you’re shooting 25fps, your shutter speed should be 1/50). One of the beauties of the FS7 II however, is the easy switch between the terms ISO and GAIN and the use of the in-built variable ND, which operates seamlessly, great for variable lighting conditions.

Gumball 3000 © Hugo Pettit© Hugo Pettit

Both cameras have well-discussed pros and cons that I’ve highlighted above and below, but using them in conjunction with one another was the perfect combination on such an event. Where the image quality and higher frame rate were needed, the FS7 II was the camera of choice, while the A7S II had the huge ‘run-and-gun’ advantages that were required more often the not shooting in night clubs, out of cars and in areas where bulkier cameras are less welcome/easy to operate. One of the beauties of having what looks effectively just like a stills camera is people don’t immediately react. The FS7 II doesn’t go unnoticed!

A7S II advantages:

  • Light and Easy to use
  • Great for night life with the low light capabilities
  • Great continuous autofocus capabilities with native Sony lenses attached
  • Great handheld image stability when not on the DJI Ronin M

A7S II disadvantages:

  • Complicated menu if it is not your own camera and difficult to quickly setup custom buttons
  • Noticeably lower image quality than the FS7 due to it’s 8Bit limit
  • Poor battery life

FS7 II Advantages:

  • Beautiful dynamic range and footage quality
  • Easy and smooth variable ND built into camera
  • With correct setup, easy to switch between S&Q Motion (High frame rate) and continuous 25fps 4k shooting
  • Good battery life

FS7 II Disadvantages:

  • Difficult to setup
  • Can only use constant high frame rate settings with specific software updates and v lock power pack
  • Bulky and therefore cannot use on the Ronin M or have it in a small rucksack or sitting on lap
  • Small monitor and hard to view in bright sunlight, imperative to use the eye-cup


Gumball 3000 from 8 Seconds on Vimeo.

Sony releases the A7R III image

Sony releases the A7R III

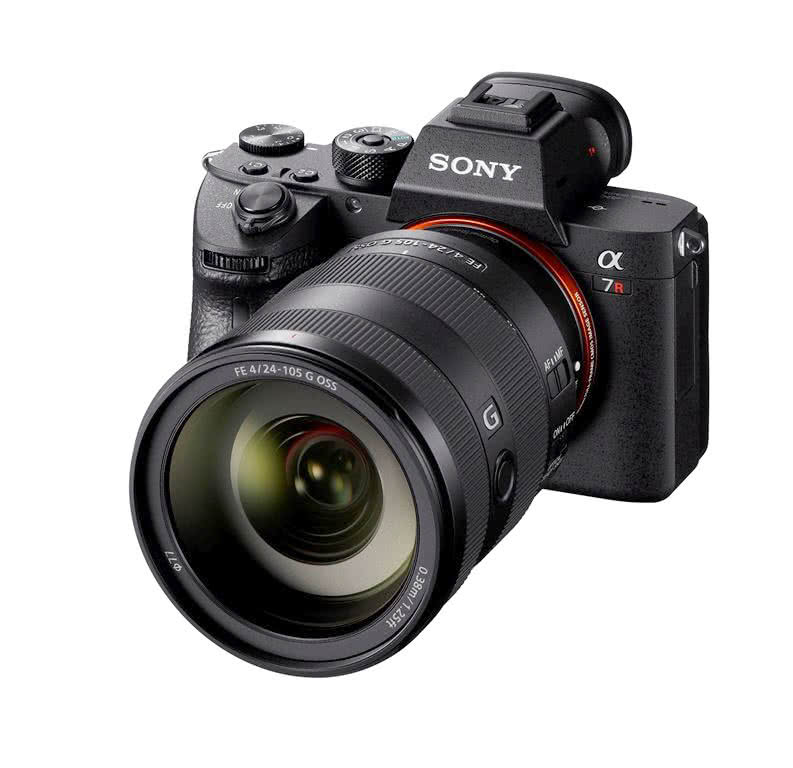
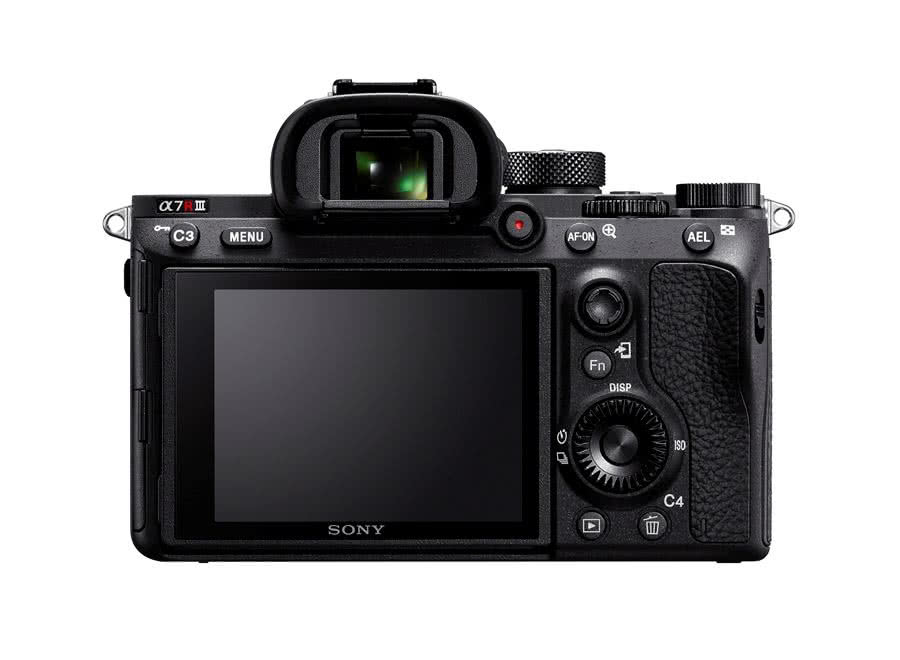
The new Sony A7R III, announced recently, takes the high-resolution 42.4MP Exmor R CMOS image sensor and gives it a speed boost. A new front-end LSI effectively doubles the readout speed of the image sensor, while an updated Bionz X processing engine promises speeds 1.8 times as fast as the A7R II.

Given that it’s also capable of shooting at 10fps with AF tracking, carries an ISO range of 100-32,000 (expandable to 50-102,400) and offers a 15-stop dynamic range at low sensitivity settings, the A7R III should be useful in all situations and in all shooting conditions. If you’re in live view mode, the camera can still manage an impressive 8fps.

The focusing system has been overhauled from the A7R II, with 399 focal-plane phase-detection AF points covering approximately 68% of the image area, complemented by 400 contrast AF points. This advanced system is expected to deliver AF acquisition that’s twice as fast as it was on the A7R II in low-light conditions, and with tracking that’s twice as accurate.

Video hasn’t been neglected – the A7R III shoots 4K (3840×2160 pixels) video recording across the full width of the image sensor, and uses full pixel readout without pixel binning in Super 35mm format to produce oversampled 4K footage. There’s a new Hybrid Log-Gamma supporting instant HDR footage, and S-Log2 and S-Log3 have been added. The camera also records super-slow-motion at 120fps.

For more information on the A7R III, contact sales@fixationuk.com or call 020 7582 3294

Sony PRO Support Centre Now Open image

Sony PRO Support Centre Now Open

The first UK walk-in service centre for Sony professional camera users is now officially open at Fixation.

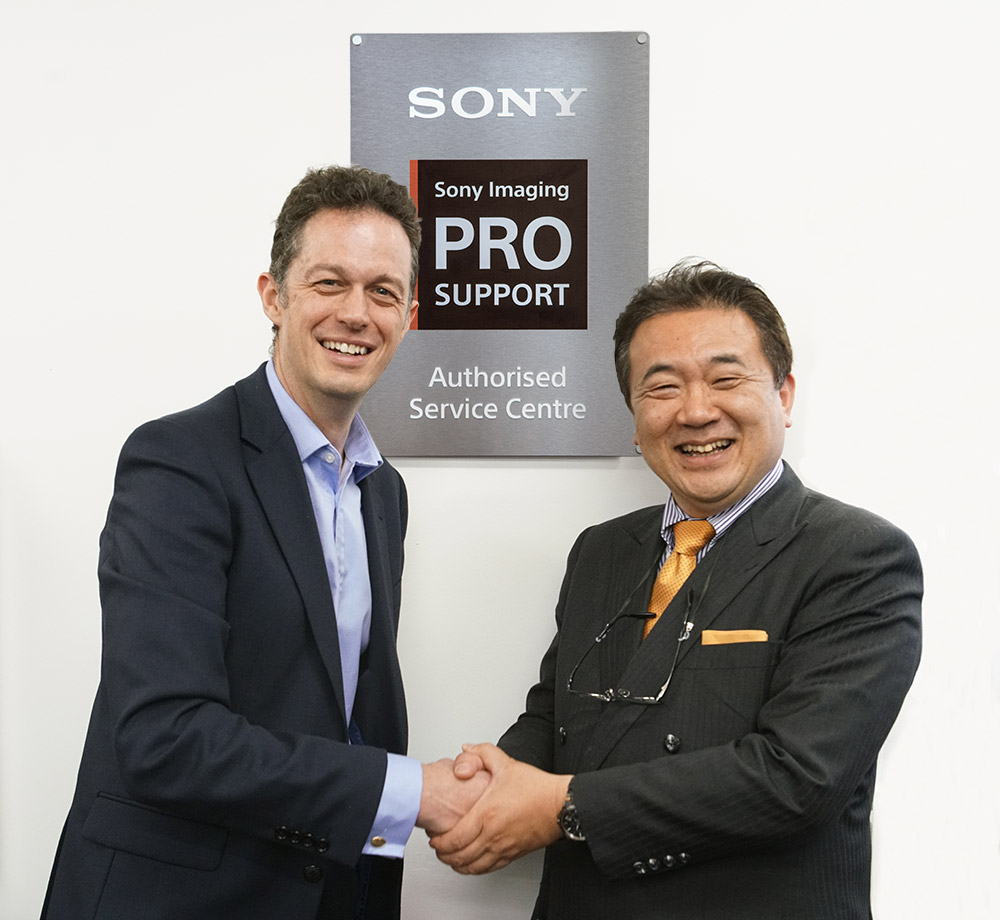
Plans for the pioneering Sony PRO Support Service centre were announced in June at a special joint presentation by Yosuke Aoki, Sony Europe Digital Imaging Vice President and David Garratt, CEO at Wex Group (Fixation’s parent company) – with a planned a target opening date of September 1st.

Yosuke Aoki, Sony Europe Digital Imaging Vice President and David Garratt, CEO at Wex Group at the Fixation announcement in June

Said David Garratt: “We are delighted to announce we have met that deadline pledge. This is a truly groundbreaking partnership with Sony – and a very important development for Fixation. 

Now the growing numbers of Sony professional camera shooter can simply drop their kit off at Fixation for service and support rather than having to despatch it to the Sony plant in Wales.”

He added: “Our long experience in this business tells us professionals want choice, advice, convenience and continuity. Our new service promises free estimates, free sensor cleaning opportunities and fast turnaround times on service and repairs, and incorporates all Sony E-Mount bodies and lenses. Enhanced services will be offered as part of the Sony PRO Support Programme.”

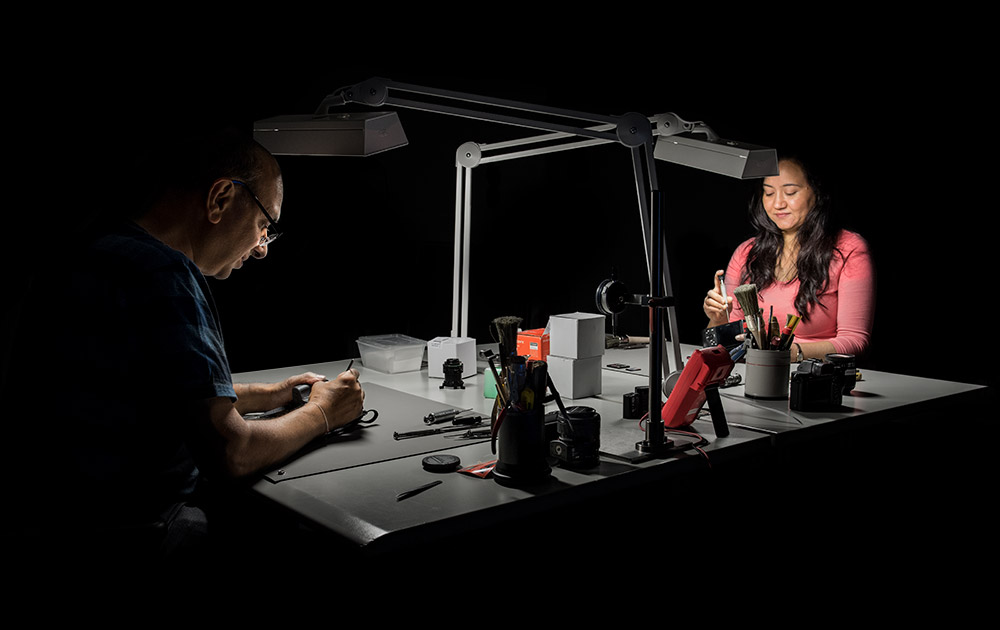
Jay & Pabita, two of our experienced technicians are now fully trained to handle our Sony Pro repairs

Yosuke Aoki said: “This new centre demonstrates our intent to support professional photographers to the fullest extent. The very latest Sony capture products, including the new A9 means there are now huge opportunities for professional photographers to create many new and original images.”

He added: “But it’s not just about the sale of the camera, it’s also about providing highly professional support and service.”

Barry Edmonds senior workshop manager at Fixation added:  ‘Sony are upping their game for professional photographers and we’re seeing more and more of our customers realising the benefits of their mirrorless cameras. It’s important for us to be able to offer these users the same level of support that we’ve been renowned for over many years.’

For more information on pricing and the models we can service, see the Sony Repair section

Sony A9 & G Master Lens Review

Sony A9 & G Master Lens Review

The recently released A9, Sony’s latest addition to the Alpha mirrorless series cameras, promises to be the tool of choice mainly for sports photographers. With its unparalleled shooting speeds and autofocusing system that’s able to precisely track objects in fast motion it enters the race with the likes of Nikon D5 and Canon 1D X II, cameras that already have a strong position in the market. So how does it perform?

© Jordan Matyka | a9 + 70-200mm ƒ/2.8 GM | 100 ISO, 1/3200s @ ƒ/2.8

Jordan Matyka, a professional freelance editorial and music photographer has recently been using an A7s for his work and was delighted when we asked him to review the A9. Here are his thoughts in his own words:

I took it for a day’s shooting in London’s South bank to check it out and also took the opportunity to try the Sony G Master 24-70mm ƒ/2.8 & 70-200mm ƒ/2.8 lenses. I was particularly interested to see the telephoto’s ability to work with the camera’s AF tracking as this is the longest native lens currently available for the system, until the recently announced 100-400mm ƒ/4.5-5.6 GM OSS becomes available.

Also, as an (soon to be) ex-Nikon shooter, I’ve tried to outline the pros and cons between the two systems to make it easier for anyone thinking of making the switch. But let’s go through the basics first.

Features

The A9 is currently the flagship model in the full-frame Alpha series. A lot of people are very confused about the lineup as at first glance; the differences aren’t obvious but they can be simplified down to the following:

  • Alpha 7 and 7II – good all-rounder, mid-resolution (24MP)
  • Alpha 7r and 7r II – high resolution (36 and 42MP respectively)
  • Alpha 7s and 7s II – low resolution (12MP), fantastic high-ISO quality

There are other differences, especially in the AF and video specs and capabilities, but I think the above outlines the key areas of interest.

The new A9 on the other hand, being the flagship model, encompasses all of the above in one package. The 24 megapixel provide files big enough to satisfy most studio photographers. It’s BSI (back-illuminated) CMOS sensor provides low-noise images when using high-iso and also expands the dynamic range – this will be a huge benefit to anyone working in low light but also to sport shooters as it gives the opportunity to use higher shutter speeds, especially when using lenses without particularly low aperture.

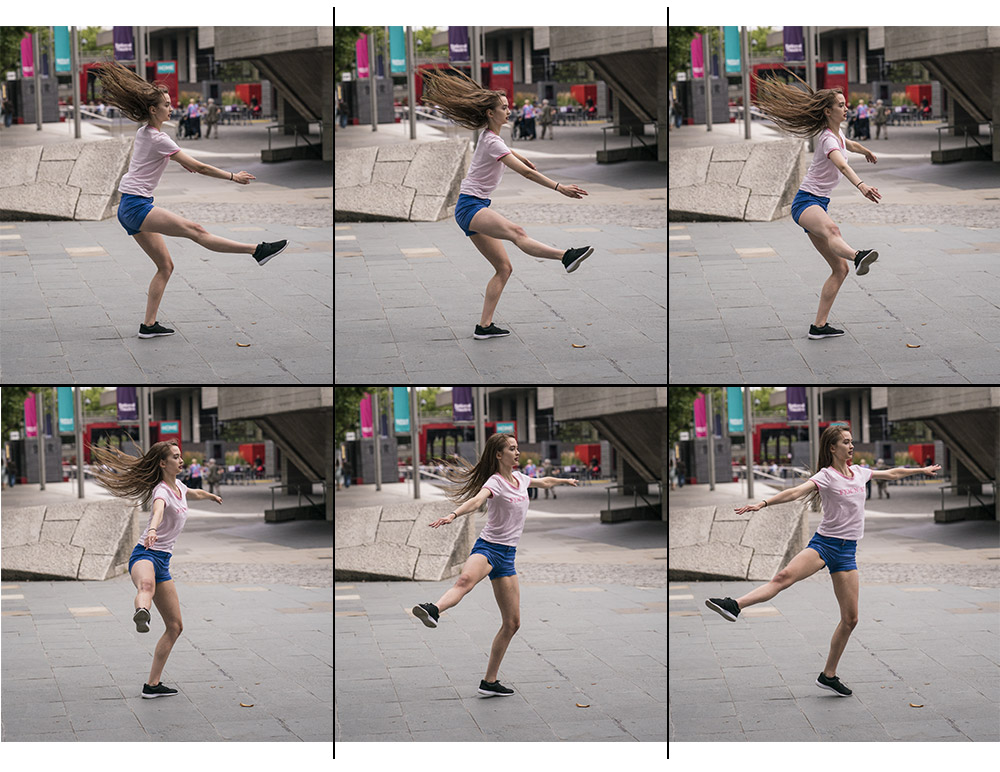
The sensor combined with BIONZ X image processor allows the camera to produce 20 compressed RAW shots per second when using the electronic shutter. That’s 6 more than the D5 and 4 more comparing to 1D X MkII. It may not seem like a lot, but having these few more fps in a critical moment may be decisive. The camera does that with absolutely no viewfinder blackout meaning that you can focus on what’s in front of you without any distractions. The buffer can hold about 250 consecutive shots (that’s over 12 seconds of non-stop shooting) before it starts to clear. Using a Class 10 300MB/s SD card it only takes about 3 seconds to clear approximately 50 images meaning that you can capture an action sequence and almost immediately continue with another one.

© Jordan Matyka | A9 + 24-70mm ƒ/2.8 GM | 1000 ISO, 1/12,800s @ ƒ/2.8
A series of frames shot with the electronic shutter at a higher than usual shutter speed.

Speaking of the viewfinder, a lot of DSLR users are wary of electronic models as opposed to the optical ones they’re used to. After years of seeing not-so-good examples of these on different compact and mirrorless cameras I can fully appreciate this. However, it’s not the case here. Looking though the A9’s EVF is a pleasure – it refreshes at 120 frames per second and has a 3.68 million dot resolution providing a very smooth and extremely detailed view of the action.

There’s another advantage of using an EVF over classic optical – exposure preview. Yes, if you’re a pro you will know what you’re doing and rarely set this incorrectly, but we all sometimes make mistakes and this feature provides a backup for these situations. Secondly, when shooting in extreme low light it allows you to see things that would be impossible to notice when using a traditional DSLR.

However, as pretty much anything in this camera, the EVF exposure preview can be customised or turned off altogether and you can shoot the way you’re used to. It’s also worth mentioning that the viewfinder covers 100% of the frame so critical framing is not a problem and will especially benefit architectural and studio photographers.

Design & Operation

Mirrorless cameras are small; the A9 is roughly the same size as the A7 II series bodies. When compared to the flagship Canon and Nikon models it dwarfs at about half the size. This can be a good or a bad thing, depending on the type of work you’re doing and, well, your hand size. Being 6’ 5” with palms to match I found the body just a bit too small with my pinky sliding just beneath the battery compartment. Sony’s GP-X1EM grip extension rectifies this and there’s also the VG-C3EM battery grip that makes the whole setup a lot more comfortable to use.

The body, at 673g, is just over half the weight of the aforementioned models. Again, the advantage of this may be questioned especially by sport shooters using big lenses, but having walked all day with the 70-200mm attached to it I did not feel the imbalance reported by other people. This is, of course, a matter of personal preference, but I’ve found that combination to be pretty well balanced and the lens did not feel too big at all for the body. The metal lens mounts feel secure and even without supporting the lens it feels like it can withstand even rough handling that pros often expose the gear to.

Which brings us to the build quality. Nikon’s D5 can take pretty much anything you throw at it. Similarly, the A9 is constructed from magnesium alloy and Sony lists weather sealing as a feature. However, a closer look at different openings such as the card slots cover and I/O ports reveals lack of rubber outlines which would make me cautious of taking it out into the rain. That being said, the camera has only been out for few weeks and durability can only be tested over time so we’ll have to wait to make a judgment.

Even though the body is small, Sony managed to place dedicated, essential controls outside so there’s no need to wander around the menus to find the desired function. Four custom-function buttons can be assigned to perform different operations so even when there’s something missing, you can add it yourself. The menu system may feel a bit overwhelming at the start but the often used points are easy to find and the redesigned interface and customisable ‘My Menu’ section help to move around quickly. The camera offers a great number of tweaks which can be applied that, with a little bit of practice, can greatly improve the experience and help to make the most of the system.

Autofocus

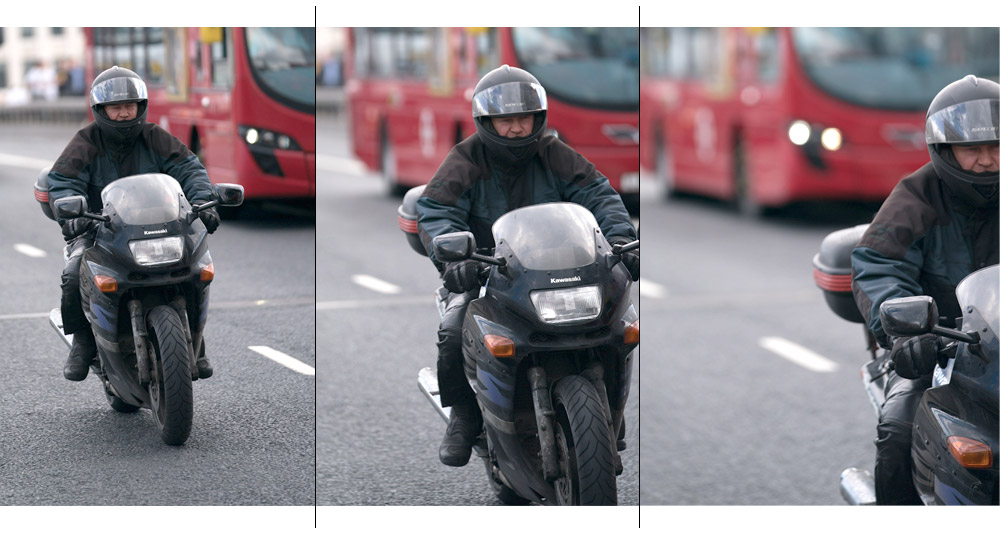
The new AF system on the A9 is simply outstanding. 693 focusing points cover 93% of the frame and with 60 calculations per second it can track fast moving objects with staggering precision, right to the edge of the frame. When testing this with the 70-200mm I often found myself not being able to keep up with the subject’s movement when the camera kept the focus locked regardless of the subject’s movement within the frame. I’m not a sports photographer but someone experienced in the field will surely be able to use their experience combined with the AF system’s capabilities to capture pin sharp series of photos and pick ones that they need.

© Jordan Matyka | A9 + 70-200mm ƒ/2.8 GM | 400 ISO, 1/2000s @ ƒ/2.8
Even as the motorbike leaves the frame, the focus hasn’t switched to the bus behind.

During many attempts to test the limits of the system I’ve rarely found out-of-focus shots afterwards. Shooting at 20fps it only takes the camera a handful of frames to refocus on the subject and after that it tracks it without fail. Even in situations when another object moved in between myself and whatever the AF locked on, it kept the focus spot-on.

Zooming in or out on the subject whilst tracking– also a difficult ask for some cameras – proved not to be a problem for the A9.

The only tricky moment was shooting against strong backlight when the amount of misfocused shots was higher than normal but this would prove difficult for any AF system so I won’t deduct any points here.

A type of focus mode worth mentioning is the Eye AF introduced earlier in the A7 models. Face detection is something that we’ve already seen on some compact, mirrorless and even DSLR models but the A9 takes it to another level with phase-detection continuous AF. In this mode the camera will focus on the subject’s face if it’s too far to find the eye, but if the subject is close enough for the feature to be distinguishable it will lock on the eye and keep tracking it flawlessly. Combine that with another great property – the ability to switch the focusing points within the frame if you change from portrait to landscape orientation – and it’s something that portrait photographers will absolutely love. No more focus locking and re-framing – you can just keep on shooting and every photo will be focused on the subject’s eye.

© Jordan Matyka | A9 + 70-200mm ƒ/2.8 GM | 100 ISO, 1/800s @ ƒ/7.1
This shot of a bubble was part of a 33 frame sequence where all but 2 of the images kept focus, despite the bubble drifting out of the frame a few times.

Sony provides a detailed guide to the system, with recommended settings for different shooting scenarios that greatly help to set the camera up, without having to go though a tedious trial-and-error process. The guide can be found here.

Image Quality

The A9’s 24MP sensor is capable of producing 14-bit uncompressed RAW files, weighing about 50MB each, as opposed to 24MB compressed ARW (Sony’s RAW format). Such resolution may seem like not a lot these days, with some cameras going way beyond that, even in the Alpha lineup, but it’s a good compromise as higher resolution would hinder it’s low light performance. Using it in this mode limits the fps to 5 which is still very good, considering that it will only be required by studio, landscape or architecture photographers not in need of the highest frame rate.

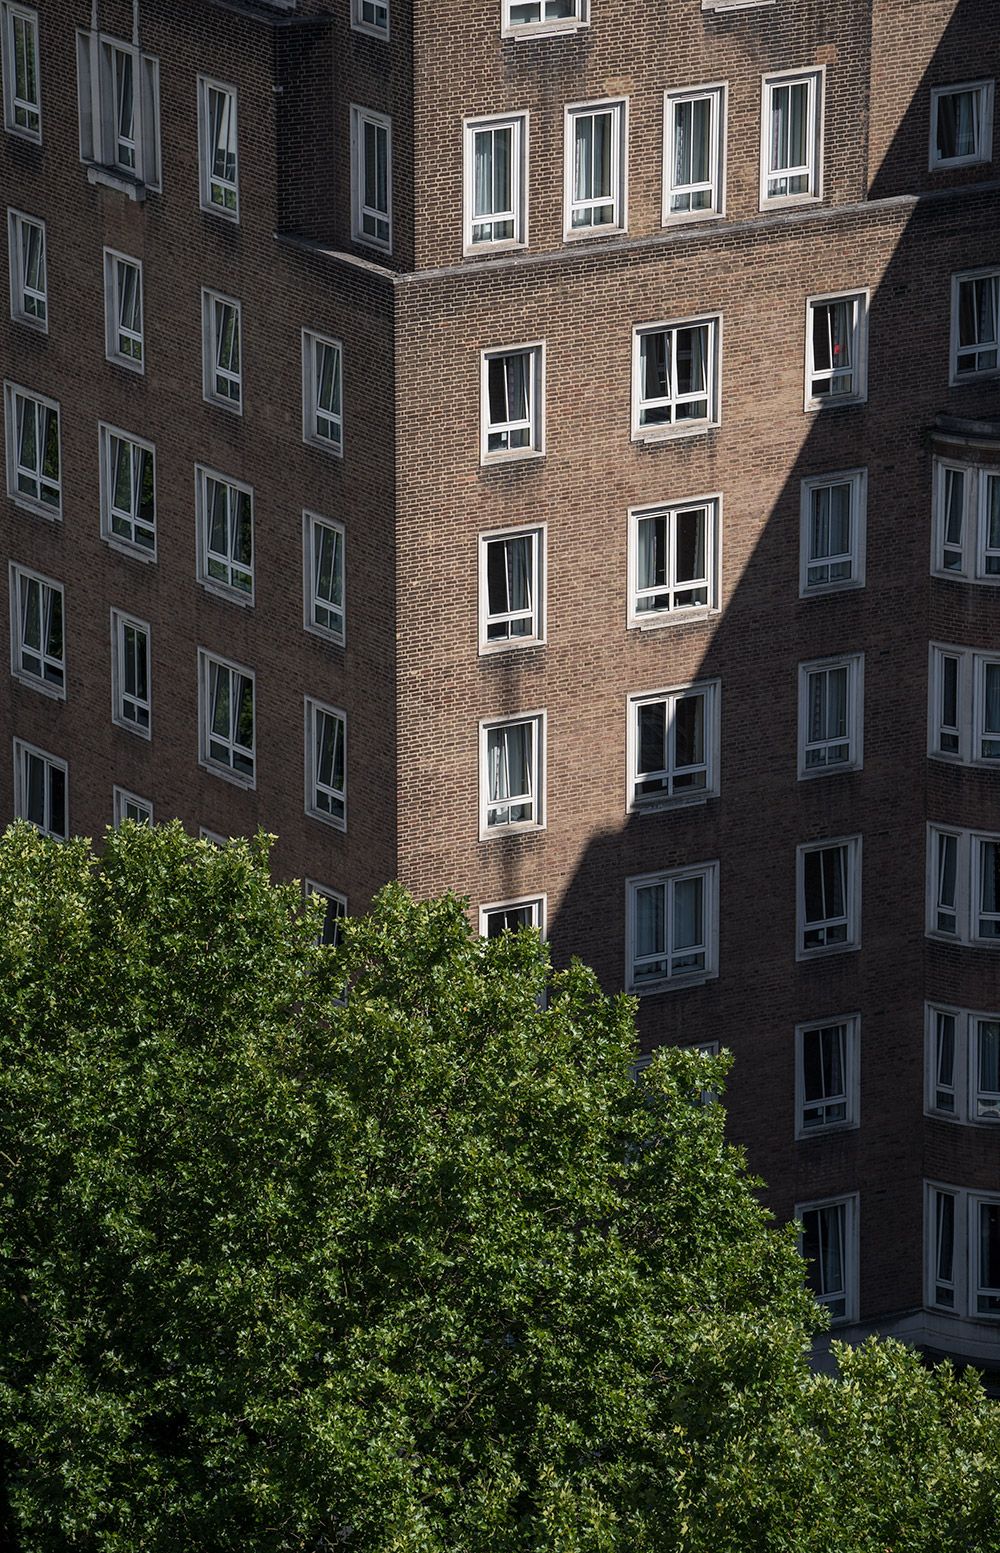
Regardless of whether you use the compressed mode or not, the output files have great amount of detail, colour reproduction is accurate and there’s enough dynamic range to allow you to pull the shadows up in your image editing software.

© Jordan Matyka | A9 + 70-200mm ƒ/2.8 GM | 100 ISO, 1/800s @ ƒ/5
The A9 seems to cope well with a wide dynamic range of tones.

The best results are of course achieved with Sony’s G-Master series lenses. The whole family of these proved to resolve at the highest level when used with the A7r II model (42MP) and are reportedly designed to be able to go way beyond that resolution, which makes them future-proof should – or rather, when – an even higher resolution model arrives.

Almost zero aberrations were noticed on all the images I shot. Colour fringing was virtually non-existent, even wide-open at ƒ/2.8 and the same for moiré. Both lenses were used without hoods and even then, on a bright and sunny day, there were only a handful of shots with flare.

One thing that many mirrorless users were complaining about is banding. It is a phenomenon when, under certain conditions, the image will have off-coloured stripes running along the long edge of the frame. It can happen under certain types of artificial light (mainly LED), at very high shutter speeds, high ISO and mainly when using the electronic shutter. And even if these conditions are met, not all shots will suffer from the problem. Out of several thousand shots I’ve so far taken with the A9, only a few, shot at a concert under very difficult artificial light had the banding visible at a level that was causing a problem.

In terms of low light, high ISO quality, the A9 performs really well. Not as good as its older siblings, the A7s and A7s II, but these were designed to specifically tackle this particular area. It’s got quite a way to go to compete with the D5 but the top-range Nikon models were always a benchmark for high ISO performance. It’s worth mentioning that the D5’s sensor comes from Sony so this seems like a matter of image processing engine, not the actual hardware.

Battery life & other features

Another bane of the previous Sony Alpha models users was the battery life. A smaller body means a smaller battery and previously it was only possible to shoot a few hundred shots before seeing the empty flashing symbol on the screen. For a professional series camera this is hardly acceptable, especially considering that the Nikon D5 and Canon 1D X II can shoot a few thousand shots on a single charge.

With the A9 Sony has improved this greatly. The 2280mAh NP-FZ100 battery has more than double the capacity of the previous ones which places it close to the other big players. With 2 of these batteries inside the VG-C3EM grip I was able to shoot nearly two thousand images and still had 30% juice left. This was with with the screen turned on most of the time and all the bells and whistles like AF tracking, 20fps etc.

What most people forget about when complaining about short battery life on mirrorless cameras is how these camera actually work – not having a mirror means that what you see in the viewfinder comes  from the sensor that’s in practice turned on all the time. It’s worth remembering that all the benefits of having a pro-quality, small and lightweight camera come at a small cost.

The camera has a built-in 5-axis image stabilisation that Sony claims to offer a 5-stop speed advantage. Using this with the 24-70mm ƒ/2.8 at the widest angle, I was able to handhold a sharp 0.8sec long exposure, something previously impossible with a DSLR due to the mirror slap and vibration from the shutter.

You will also find features expected from a pro-series camera like dual card slots and a LAN connection but also Wi-Fi, NFC, HDMI output, sync terminal, mic and headphone sockets.

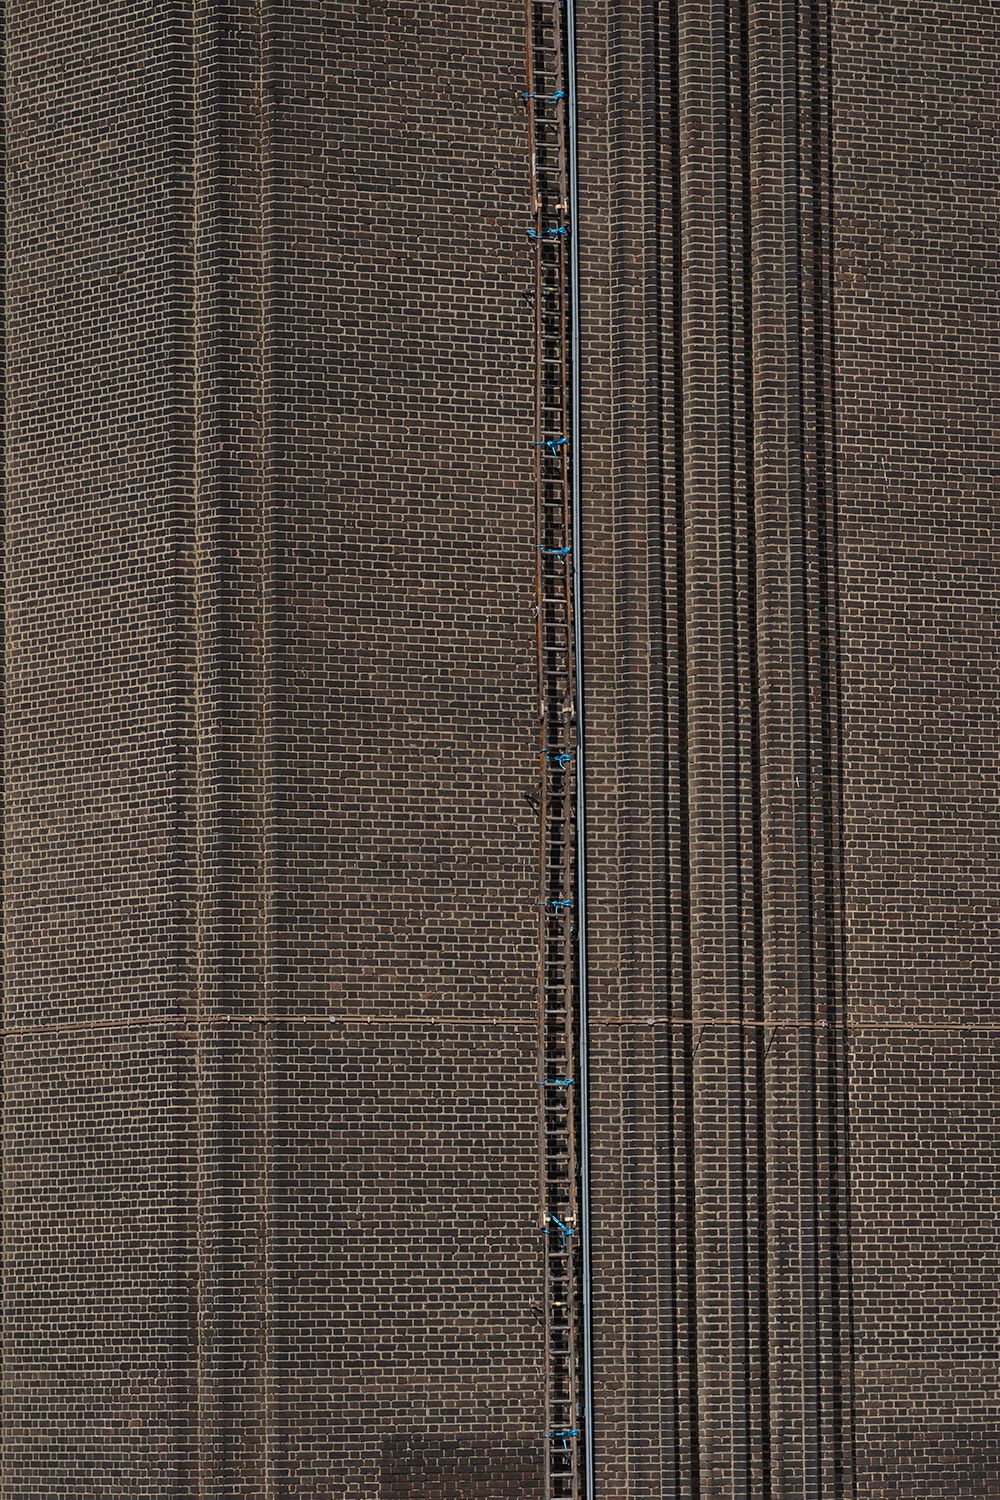
© Jordan Matyka | A9 + 70-200mm ƒ/2.8 GM | 100 ISO, 1/800s @ ƒ/5
The G Master 70-200mm ƒ/2.8 performs well at relatively wide apertures and the camera is showing no obvious signs of moiré.

The last two things I’d like to mention are relatively small features, though offering great benefits for certain situations. The first one is the tilt screen. A lot of people see this as a gimmick but will appreciate it when shooting from low or high angle. It’s also really well made and I was at no point worried that it could snap. The second one is something that myself and many other Sony Alpha users just love: a totally silent electronic shutter. Being able to take photos with a camera that’s 100% silent (and yes, the lenses focus and zoom without a squeak) opens up many possibilities that were in the past reserved for either rangefinder cameras (contrary to popular belief not completely silent) or DSLRs encased in cumbersome, difficult to use and expensive blimps. Shooting reportage, performance, theatre, events, interviews, street and film sets suddenly does not require changing the way you’d normally work. The rear screen can be turned off with the viewfinder taking over its role when you’re not shooting so you can be quiet but also invisible as there will be no screen glow.

Conclusion

The Sony Alpha A9 is a fantastic camera. It offers almost all the qualities of the bigger, heavier and more expensive competitors from Nikon and Canon and in some areas it surpasses them. Users of these systems will possibly look at the current FE lens range with a smirk but Sony’s quickly expanding lens range already offers some outstanding glass that in some cases outperforms the rivals. There’s always the possibility of using your existing lenses via adapters, some of which offer fast AF and stabilisation (!), especially with Canon’s EF series lenses.

Hi, how can we help?