Close up | C-Log on the EOS 5D Mk IV image

Close up | C-Log on the EOS 5D Mk IV

More and more professional photographers are diversifying their skillsets, adding video production to the list of services they can offer their clients. Camera technology is changing accordingly, with video on new models no longer thought of as an optional afterthought, but an essential headline feature.

Few camera lines better exemplify this than Canon’s EOS 5D series, the revolutionary progenitor of DSLR filmmaking. Canon’s EOS 5D DSLRs offer both superb stills performance and exceptional video capabilities, none more so than the latest in the series, the EOS 5D Mark IV.
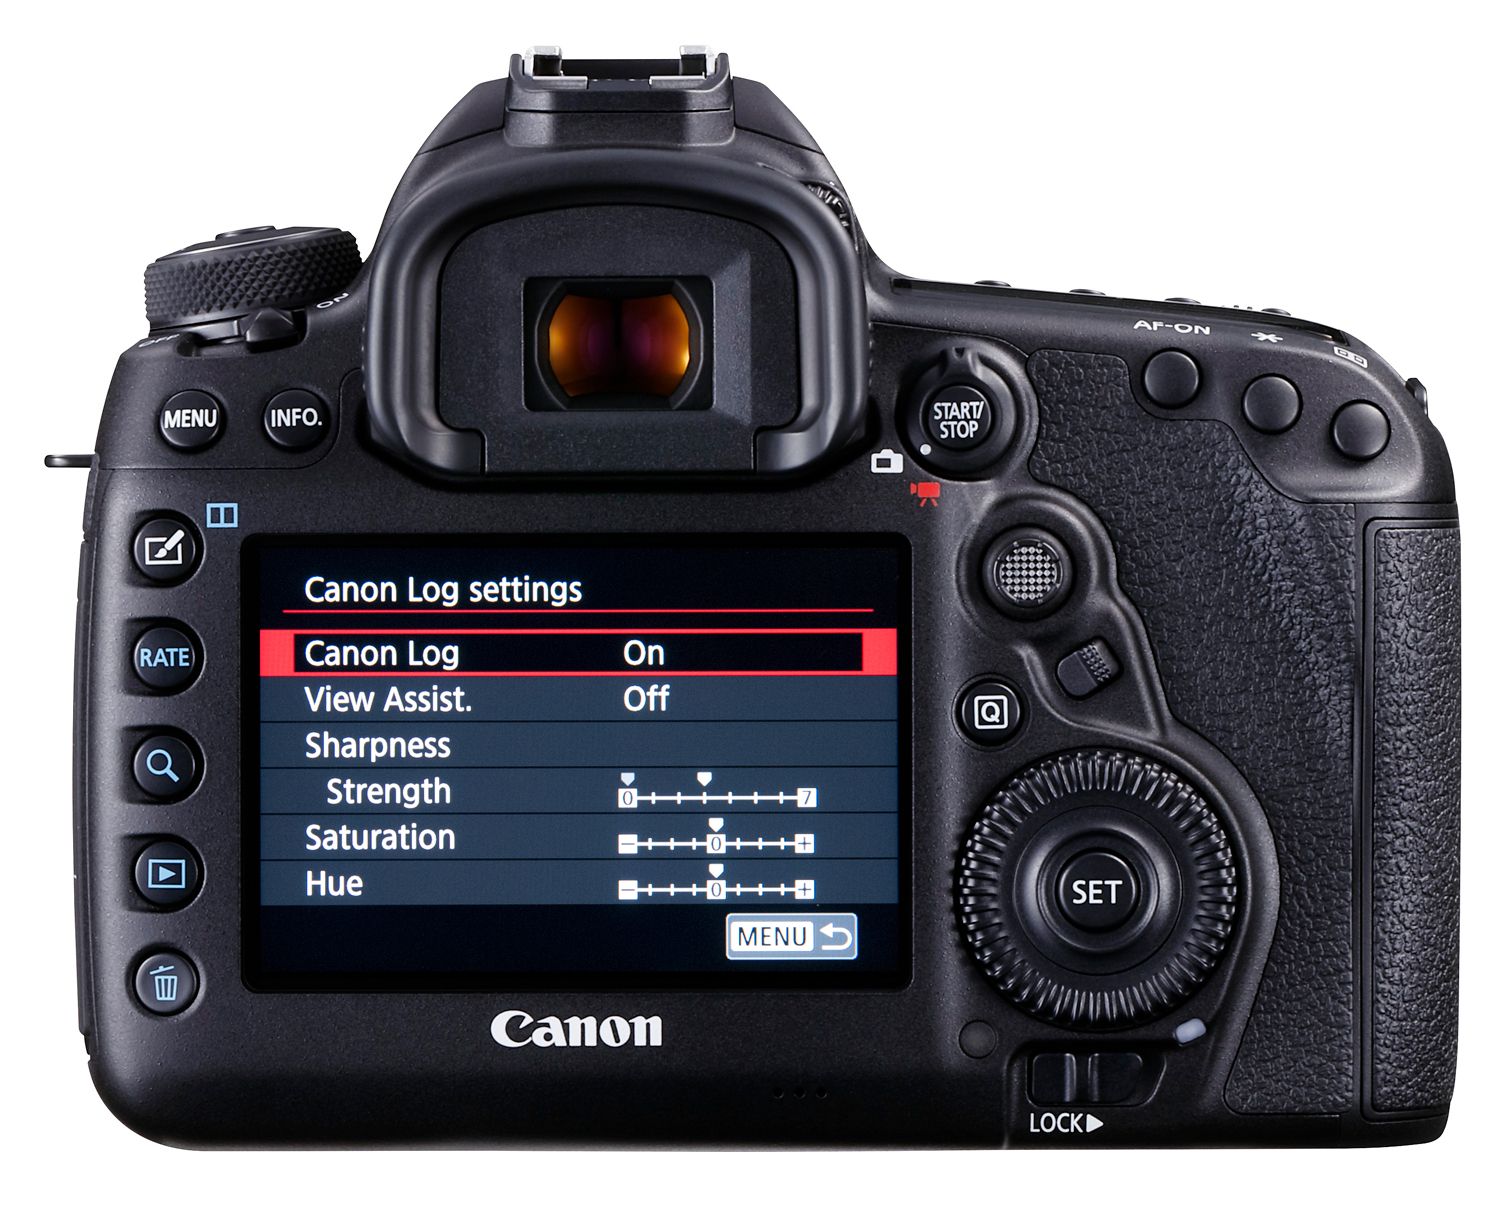
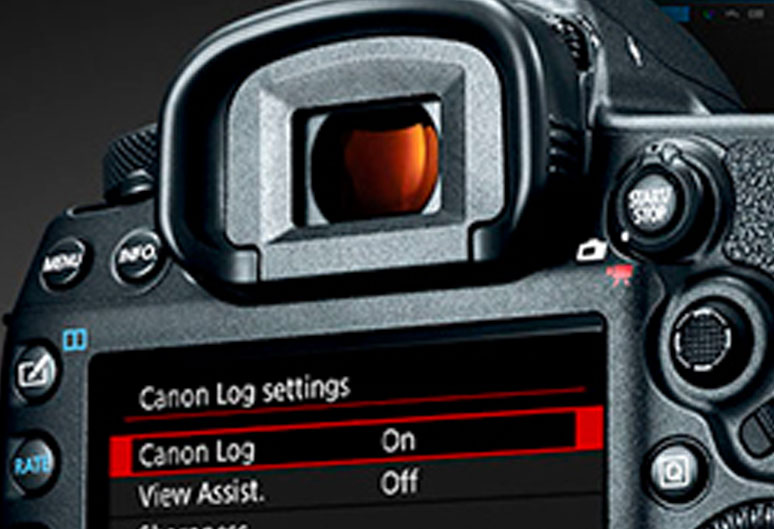
The ears of every filmmaker pricked up last year when Canon announced that it would be bringing something special to the EOS 5D Mark IV – its Canon Log colour profile from the Cinema EOS range, more commonly known as C-Log.

So what is C-Log, and why does it get filmmakers so interested? Let’s take a closer look.

What is C-Log?

As mentioned above, Canon Log Gamma was first introduced on the Cinema EOS range of pro video-oriented cameras. It’s been around for years, but the Canon EOS 5D Mark IV represents its first appearance in the DSLR range.

Put simply, it’s a colour profile for shooting video. It’s a logarithmic tone curve, delivering an image with 12 stops of dynamic range at ISO 400 or higher, preserving the maximum amount of detail possible in shadows and highlights.

If you were to look at footage shot in C-Log straight out of camera, you might wonder what all the fuss is about, as it’ll look flat, dull and really rather grey. This, however, is precisely the point. C-Log is designed to provide maximum flexibility in video post-production. Those preserved colour details and low-noise shadows mean you can tailor the look of shots exactly as you want it, giving you complete control over the final product.

Another useful aspect of the fact that C-Log has been ported from the Cinema EOS line to the EOS 5D Mark IV is that it ensures continuity between cameras – you can take footage shot on your EOS C300 Mark II and your EOS 5D Mark IV and grade it all to give it a consistent look. This means that if you decide to step up your video production and invest in the Cinema EOS line, your 5D Mark IV will still be useful as a B-camera.

Using C-Log on the 5D Mark IV

Once C-Log is installed on your EOS 5D Mark IV, there are a few tips and tricks that are well worth being aware of in order to use it effectively.
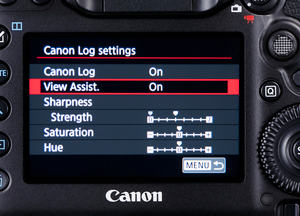
One useful function the camera offers is View Assist. Remember, your footage shot in C-Log is going to look pretty flat and uninteresting on the view screen, as the colour comes out in the grade. This can make it difficult to get a feel for the quality of what you’re shooting. View Assist solves this problem by giving the shot a pre-made LUT (a basic colour grade) in the view screen, making it look more like the final product for the shooter while still capturing that lovely flat Log profile for the grade. It’s also possible to tune your Log image in the settings menu of the 5D Mark IV, turning up the contrast or saturation if you’re after a specific look.


Canon has ensured that some of the EOS 5D Mark IV’s key features are compatible with C-Log shooting. The powerful Dual Pixel CMOS autofocus system can be used when shooting C-Log, allowing for fast and accurate focusing, though it is worth being aware that C-Log may cause the AF system to struggle a little more than usual in low-light or low-contrast situations. Shooters can also film Full HD at up to 120fps, as well as 4K at 25fps.

It’s worth knowing that there are a few modes that are not compatible with C-Log shooting – these are: Picture Style, Auto Lighting Optimiser, Highlight Tone Priority, Time-lapse Movies and HDR movies.

Watch out for banding

While the vast majority of the time your C-Log footage should come out beautifully, Canon notes that there are a few situations and settings that could cause some horizontal noise patterns when using the profile. Canon says, “The colour gradation of the sky or white walls may not be reproduced correctly. Irregular colours, irregular exposure or noise may appear.”

As stated by Canon, the presence or absence of banding in C-Log footage will depend on a number of factors – the lighting, the nature of subject, the movement of the subject or camera, and just in general the environment you’re shooting in. This is why you always want to do some test shots before you start filming in earnest.

If you do encounter some banding, there are a number of ways to remedy it. Shooting at a lower ISO is a good option if possible (Canon generally recommends an ISO setting of 400 as being optimal for shooting in C-Log), and you can also correct the problem the old-fashioned way by simply adding some more light if you have it. Another potential solution is to delve into the menus and disable peripheral illumination correction, though of course, you always have the option of handling correction in post.

Getting C-Log on the 5D Mark IV

So, you’ve got your 5D Mark IV and now you need C-Log? Well, it’s a little different from a normal firmware in that you can’t simply download and install the update yourself – you need to get it done by professionals.

The good news though is that your friendly Fixation techs can get the update installed for you, for the same price as the official Canon team – just £69.25 plus VAT! Head to our Canon repair page and we’ll get you all set to go.

 

Crash Course | Introduction To Sound Recording image

Crash Course | Introduction To Sound Recording

It’s very easy to focus on the visual side of video production, but sound recording plays a huge role in the quality of the finished piece.

We sat down with our Rental Manager, Rob Gardner, and asked his advice on the basics of location sound recording.

Can you give us an idea of the basic kit needed to record professional quality sound on location?

In essence all you need is a means of gathering the sound with the highest fidelity – a microphone – and a means of capturing that sound, a recording device. The tools and techniques vary but at core it is that simple.

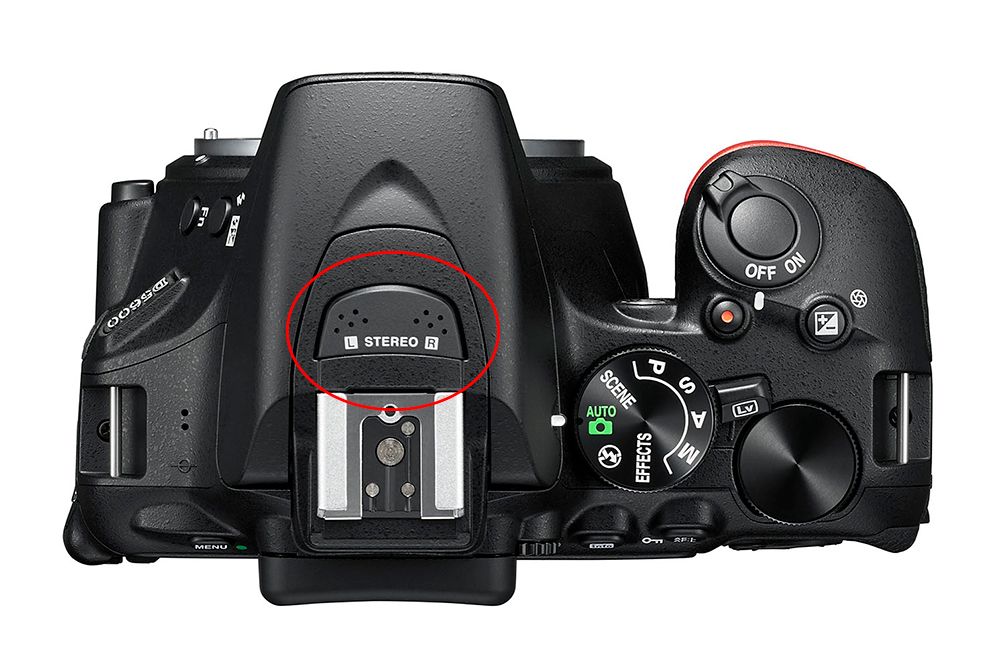
D5600_mic-compressorMost video-capable DSLRs have built-in microphones. Some, like the Nikon D5600 pictured here, have stereo microphones.

Can’t I just use the built-in microphone on a DSLR?

Certainly in-built camera mics fit those criteria, but anyone who has used them will know that they produce poor results. The first problem they create is one of distance. In recording studios you see the singer inches away from the microphone. On set you’ll sometimes see boom swingers heroically hanging microphones in from over 10 meters away to capture sound as well as possible. Sound recordists go to great lengths hiding microphones in costumes and even wigs in order to get as close to the source as they can. The in-camera mic is often just too far away to be useable.
The next consideration is that the in-camera mics are just too small and too low quality to gather satisfactory sound quality. A top end microphone can cost thousands of pounds and the reason for this is the materials used, the research that went into their design and the expertise in their construction, the mics in cameras just can’t compete.

zoom-h4n-rentalRecorders such as the Zoom H4n are perfect for location recording and offer a choice of microphone inputs alongside built-in XY mics.

My DSLR has an external microphone socket. Can I plug one in and record the sound directly to camera, or should I use an external recorder?

It will largely depend on your shooting conditions. An external recorder gives you more control over the recording but it is then an extra bit of kit to monitor and operate. If you are moving around this might prove problematic. In an ideal world you would have a dedicated sound recordist to take care of all of this, a lone operator may have to think about simplifying their approach.

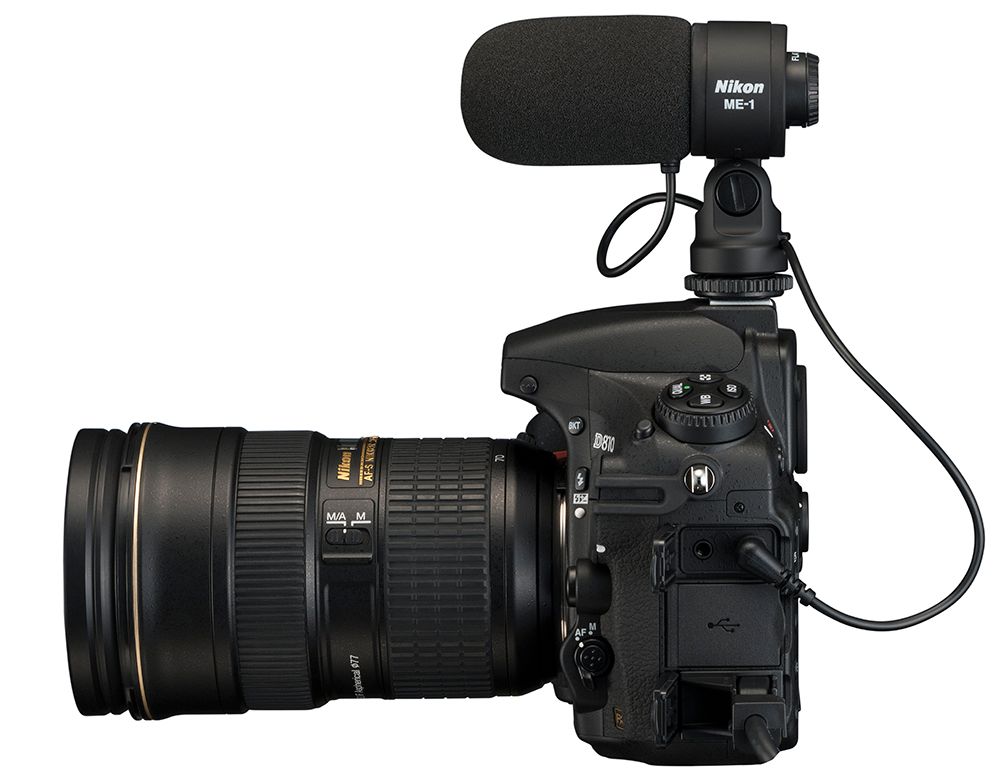
d810-with-mic-compressorOn-camera microphones such as the Nikon ME-1 offer a better recording experience than built-in mics.

If I record the sound on an external recorder, what is the best way to sync it back to the footage?

Traditionally the clapper board at the top or end of a take was used to give a frame accurate sync point. A less professional but equally accurate technique is to have someone actually clap at the top of the take to give a sync point.
A more modern approach is to use embedded timecode generated by externally synced generators – again, this would normally fall under the auspices of a sound recordist.

Should I use auto or manual record levels?

If you are on your own you’ll almost definitely have to use the auto levels. Monitoring the image will be taking up too much of your focus. If you have an external recorder and someone to work it then manually ‘riding’ the levels is a more versatile approach.

How does a limiter work and what does it do?

Limiters are there to stop the analogue signal from overloading, thus corrupting the digital recording. They can also be used to set a lower limit to the sound recorded to avoid too much bass.

I’ve read about Directional and Omni-directional mics. Can you tell us the difference?

The names of these mics pretty well cover it. Omni-directional Mics are indiscriminate and pick up sound from all directions. Directional mics are designed to have a narrow ‘beam’ or corridor of sensitivity outside of which significantly less is picked up. For the majority of applications relating to AV recording, Directional mics would be the more appropriate tool.

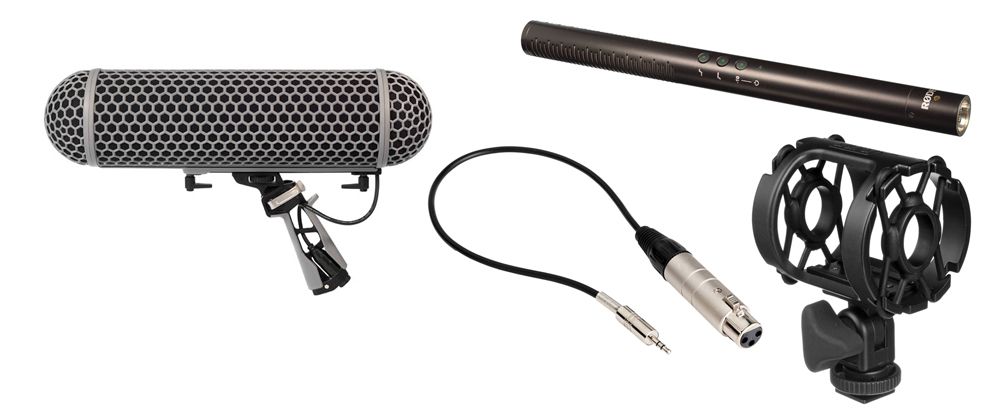
rode-mic-compressorDirectional mics such as the Rode NTG-2 are perfect for location recording and can be mounted on a DSLR hotshoe (with a suspension mount) or on a boom with a wind-jammer if necessary.

Fixation’s rental department carries a wide range of microphones and recording equipment. For advice on your needs, speak to one of our advisors on 020 7582 3294 or email rental@www.fixationuk.com

Crash Course: 4K Video

Crash Course: 4K Video

Know nothing about 4K video but want to give it a shot? Get up to speed with our crash course on 4K video recording.

No longer just a feature confined to pro-grade, video-centric models, 4K video recording has filtered down to many DSLRs and mirrorless cameras. If you have this functionality at your disposal but you’re unclear on the terminology or the various benefits of shooting in 4K, read on.

What is 4K?

Broadly speaking, 4K refers to one of two resolutions found on capture and display devices.

The most common resolution is known as Ultra High Definition 4K (4K UHD) which records at a resolution of 3,840 x 2,160. It is often used on cameras, television and other consumer devices. In the same way that 1080p (the vertical display resolution) has come to refer to Full HD, 2160p is a term that’s used to refer to 4K UHD.  It can also be called Quad Full HD (QFHD).

The other is known as DCI 4K, a system developed by the motion picture industry and refers more broadly to a set of specifications for standardising recording and display. This records in a slightly higher resolution of 4,096 x 2,160. Given that both have approximately 4000 pixels across their longest side, they fall under the 4K umbrella.

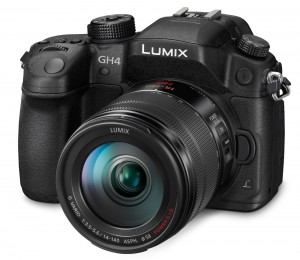
It’s usual for a camera to offer only one of these options. Canon’s EOS-1D X II and EOS-1D C each offer DCI 4K, for example, while Nikon’s D5 offers 4K UHD instead. However, some models such as Panasonic’s Lumix GH4 and Samsung’s now-retired NX1, offer both.

Nikon D5
The Nikon D5 offers 4K video recording at the 4K UHD resolution of 3,840 x 2,160

So how is 4K different to HD and Full HD recording?

The main difference between HD and 4K formats is resolution. 4K UHD footage uses four times as many pixels as Full HD recording, thus producing an image with far more detail. There are a number of additional benefits of 4K recording. If you record 4K footage with a view to output it at a lower resolution (say, Full HD), the extra detail you’ve captured provides you with plenty of latitude in post production. You can crop away peripheral areas and zoom into details in the frame, for example; or zoom with a view to panning across the scene, knowing that you’ve retained sufficient resolution for output. Obviously, if you make these kinds of adjustments but subsequently output your footage at the same 4K resolution in which it was originally recorded, fine detail is like to be compromised.


Panasonic GH4
The Panasonic GH4 can have individual frames from 4K footage saved as images

One further advantage is that a number of recent cameras that record video in 4K quality can have a frame extracted and saved as an image. At a Full HD resolution, this would work out at just over 2MP (1,920 x 1,080), meaning obvious limits with regards to how it can be used. A frame from 4K UHD footage, however, increases this to around 8.3MP (3,840 x 2,160), while a frame from DCI 4K footage ups this to around 8.8MP (4,096 x 2,160) and these are far more suitable for printing and other uses. Of course, for a frame to be usable the shutter speed used at the time of recording needs to be high enough to capture it sharply. This may well work for largely static subjects, but less so for moving ones.

Many cameras that record 4K video are also capable of recording footage at particularly high frames rates, such as 120fps, and outputting this at a lower frame rate in Full HD quality, thus creating slow-motion footage. While slow-motion recording is not new, previous camera generations could not output this at a usable resolution, making it little more than a novelty. We’re also starting to see products such as Sony’s AXS-R7 that allow for footage to be both recorded and output in 4K at such fast frame rates.

Do I need a 4K display to view 4K footage? 

You can view 4K footage on a non 4K display – you just won’t be seeing it at its actual 4K resolution. Instead, this footage will be downsampled to match the resolution of the display. This has the advantage of making subjects slightly out of the plane of focus typically clearer and sharper than if they were viewed on a 4K display, in the same way that low-resolution footage upscaled to a higher-resolution display will appear softer and less detailed than if it were viewed on a display matching its resolution.

Are there any downsides to 4K over Full HD?

The main advantage of 4K footage, namely that it records far more information than Full HD, is perhaps its most obvious downside when you consider the implications this has on performance, storage and editing.

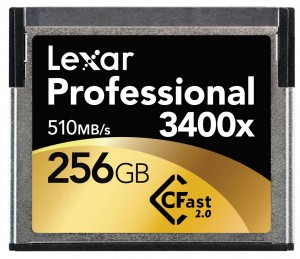
When recording to a memory card, you will need to ensure that it is fast enough to record footage without interruption. Memory cards marked with a UHS speed class are generally the minimum recommended for 4K footage, with U1 guaranteeing a minimum sustained write speed of 10Mbps and U3 cards upping this to 30Mbps. Professional bodies, however, may require the faster transfer speeds of CFast or XQD memory cards, particularly when recording high-bit footage at faster frame rates.

Lexar CFast card
CFast memory cards, such as those from Lexar, are well suited to the demands of 4K video recording.

The SD Association recently announced a new Video Speed Class system, which makes things somewhat easier to understand. Here, the convention sees cards marked with a ‘V’ followed by the minimum sustained write speeds in Mbps. So, a card marked with ‘V60’ will indicate a minimum sustained write speed equivalent to 60Mpbs.

4K footage also takes up more space on cards and hard drives than Full HD footage, although the extent to which this is the case will depend on factors such as frame rate and the compression method used.

With editing, you may find that software that can edit Full HD video files without issue may struggle with the higher resolution of 4K footage. Newer computers equipped with superior processors and graphics cards, and fitted more RAM, will stand a better chance of handling this smoothly. It may also help to create proxies of your original files and edit these instead, before using the full resolution files prior to exporting. This is known as offline editing and is explained in more detail here.

Premiere Pro
You may find editing 4K footage taxes your computer’s capabilities

What other limitations are there that I might need to know about?

Your camera’s manual may point out any specific limitations with your model, although there are a handful of common ones.

Some 4K-enabled cameras only allow you to record 4K footage for a few minutes at a time, while others can continue for thirty minutes or so. It’s possible to get around time limitations by recording footage directly to an external recorder rather than to a memory card inside the camera.

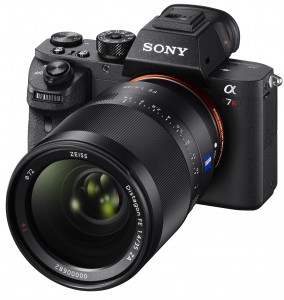
Some cameras also use their full sensor to record 4K footage while others use the Super 35mm format, which uses a central portion of the frame that’s slightly larger than APS-C. The latter approach will clearly impact on the effective focal length, which may or may not be seen as a bad thing depending on the desired framing. Some cameras, such as Sony’s A7R II, give you the option to choose between the two formats.

Sony A7R II
The Sony A7R II records 4K footage in both Super 35mm and full-frame options.

Should I record my 4K footage to a memory card or to an external recorder?

Many cameras allow you to record 4K footage either directly to the memory card inside the camera or to an external recorder plugged in via the HDMI output, and some allow you to do both simultaneously.

Recording to a memory card has the advantage of convenience, and for many applications this approach is perfectly suitable. However, you may be restricted by the level of the control that has been determined by the manufacturer with regards to recording time limits, compression methods and so on.

An external recorder will allow you to bypass these time limits and may also provide you with a wider variety of codecs for recording. If your camera has a clean HDMI output, you may be able to output your footage without any of the compression that internally captured footage may be subject to. Some recorders, such as Atomos Shogun, also have a built-in display to view your footage while recording at a much larger size than your camera’s LCD panel, thus allowing you to use features like focus peaking with greater accuracy.

CLOSE-UP: SONY A7S II VIDEO OPTIONS image

Close-up: Sony A7S II Video Options

We take a closer look at the video functionality on the Sony A7S II

Sony A7S II 4

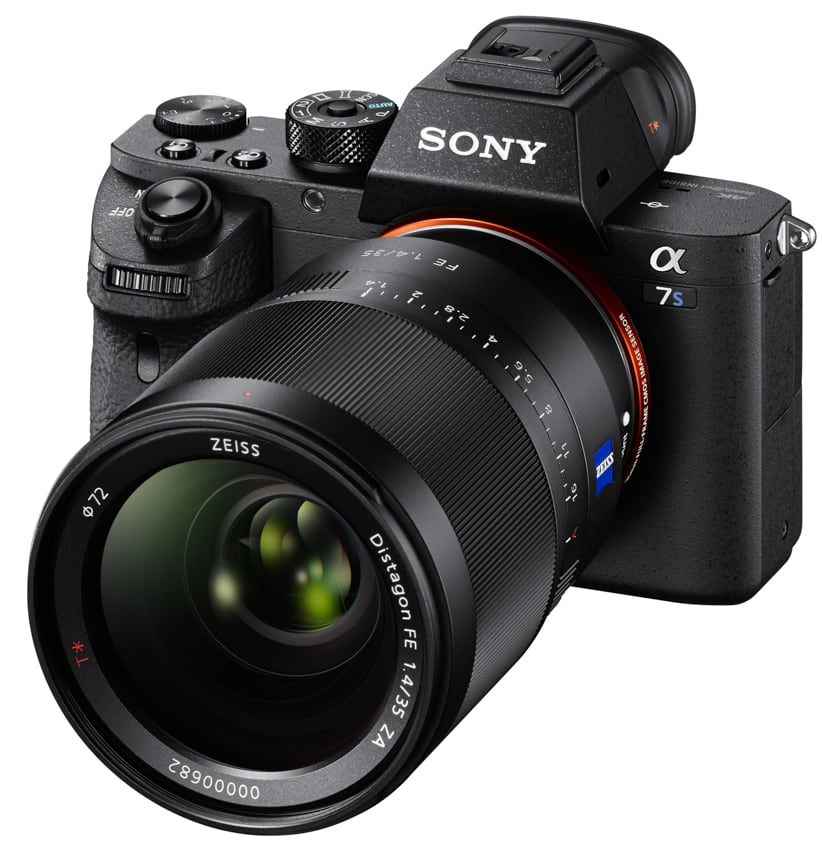
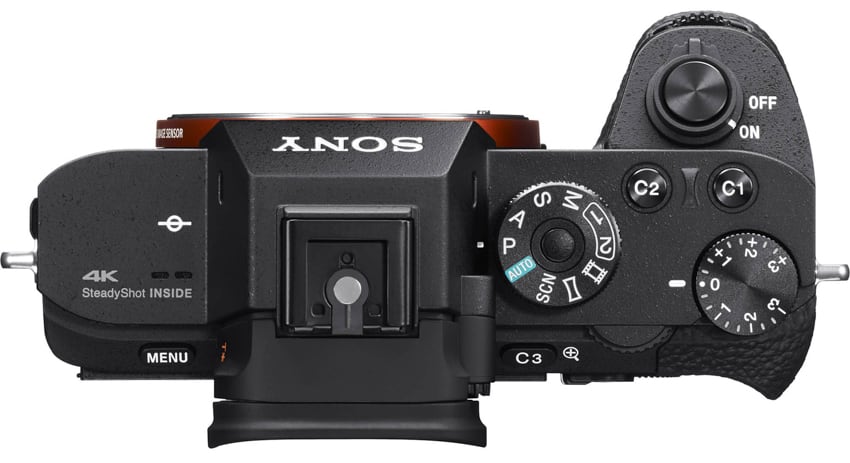
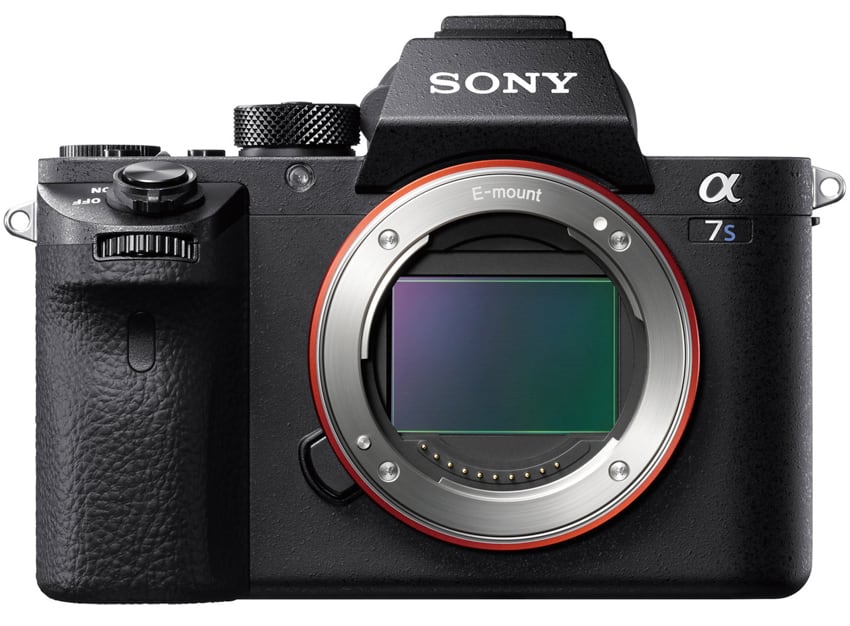
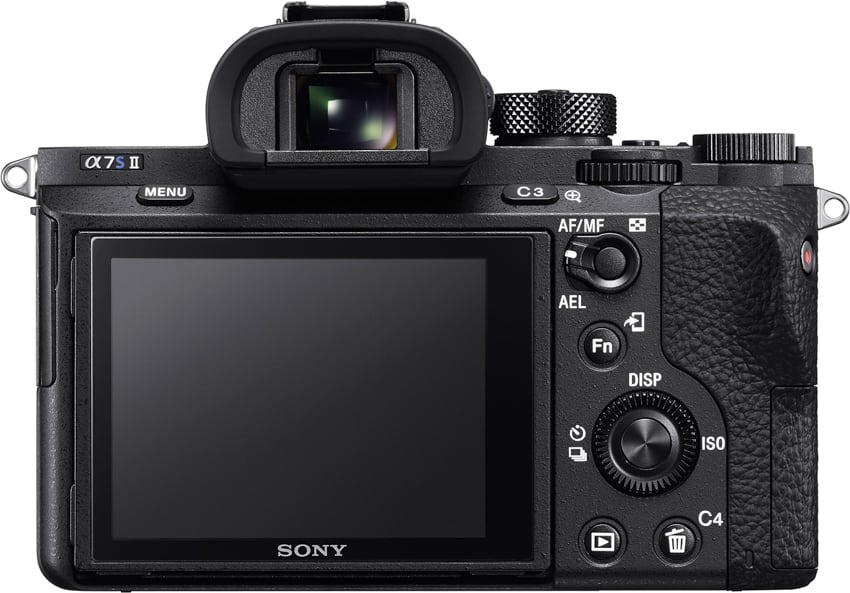
Sony’s A7S II has fast become one of the most attractive options for the videographer from all current mainstream camera systems. In this article, we take a closer look at the wealth of functionality it offers for video users.

First – what is it?

The α7S II is the successor to the α7S compact system camera announced in 2014. It currently joins the α7 II and the α7R II in Sony’s full-frame mirrorless lineup, the former being a relatively affordable all-round option with a 24MP sensor and the latter camera’s 42MP sensor making resolution its priority (hence the ‘R’).

The α7S II, meanwhile offers the same 12.2MP pixel count as the model it updates, although Sony is said to have revised the circuitry and processing to enable better noise control.

Video resolution

The camera records 4K footage in the 4K UHD format (3840×2160) in contrast to the DCI 4K resolution of 4096×2160. The fact that the camera records 4K video footage is not in itself that special. After all, aside from pro-grade video cameras, this is now being offered by many other interchangeable-lens models, as well as compacts, GoPro action cameras and a growing number of smartphones. What sets the Sony’s α7S II apart from more mainstream models are two things: the way this is captured and the tools the videographer has at their disposal at every stage of the shoot.Sony A7S IISony states that the camera records video with full-pixel readout to improve quality and suppress aliasing artefacts such as moire, and this is the case whether you’re recording video in 4K or Full HD. This process means the sensor takes information from every pixel before the image processor downsamples it to 4K (or HD) resolution. This is in contrast to binning, where the values of multiple pixels are combined into one at the sensor level to boost the signal-to-noise ratio, and line skipping, where certain rows or columns are ignored.
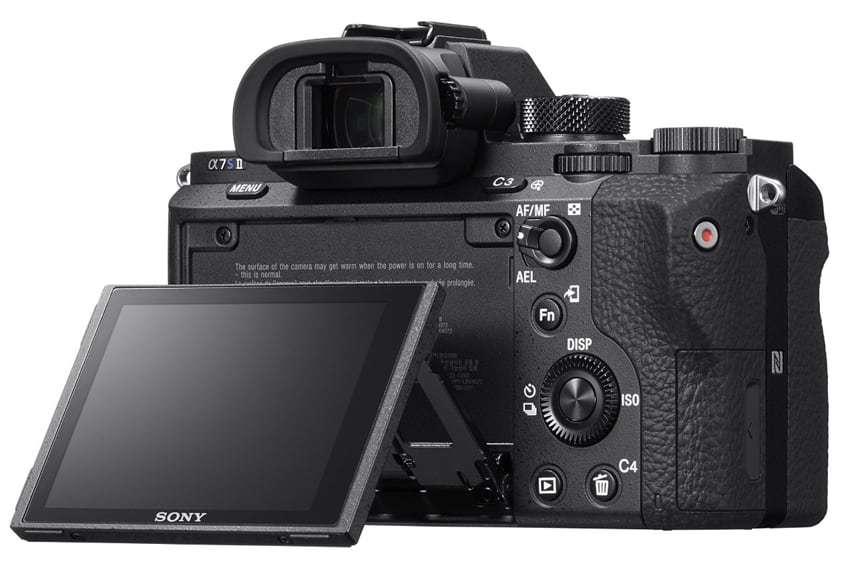
Sensitivity

The ‘S’ in α7S II stands for sensitivity, and it’s this that made most of the headlines upon the camera’s announcement. When capturing videos, the camera’s sensitivity stretches over a respectable range of ISO 100-102,400, although this can be boosted to an option equivalent to ISO 409,600 when required.Sony A7S II

Codecs

The AVCHD codec that Sony has previously used for video is maintained on the α7S II, although this is joined by the more recent XAVC S codec. Based on the MPEG-4 AVC/H.264 format, the XAVC S codec is used to record 4K footage at 25fps, at either 60Mbps or a higher-quality 100Mbps, and stores this as an MP4 file.

The camera can also record Full HD footage where the higher resolution of 4K is not required, at frame rates between 25fps (50Mbps) to 120fps (up 100Mbps) for slow-motion-video recording, using the XAVC S codec. When shooting at the 120fps setting (or 100fps in PAL), the frame is cropped by a factor of 2.2x.

Sony A7S II

Recording internal and externally

Unlike the previous α7S, which required an external recorder to actually record 4K footage, the α7S II follows the α7R II in being able to do this internally. You can, however, use the Dual Video REC option to output clean (uncompressed) 4K video through the HDMI-out to an external recorder, while recording 4K footage to a memory card inside the camera. You can also use this to record XAVC-S and MP4 or AVCHD and MP4 video to the memory card.

There is another benefit to recording through the HDMI output through to an external recorder, namely 4:2:2 chroma subsampling. When recording 4K or Full HD video internally, chroma subsampling happens at 4:2:0. However, one caveat is that, when outputting 4K footage to a recorder, the rear display goes dark.

You can record video continuously for around 29 minutes at a time, although this varies with temperature, with higher temperature shortening this. Should the sensor get too hot while recording video, a warning will appear on the display to indicate that it should be stopped.

Gamma and Picture Profiles

The α7S offered the S-Log2 option for recording video, this is joined by the S-Gamut3.Cine/S-Log-3 and S-Gamut3/S-Log3 alternatives on the α7S II.

Sony states that these options offer better tonal reproduction in shadows to mid greys, with 14EV stops of dynamic range. This latitude potentially makes it better when it comes to editing footage.

Sony A7S IIOrdinarily, this footage would appear flat and lacking in contrast on the rear display, making it hard to accurately assess focus and exposure. This is where the Gamma Display Assist option steps in; this uses the Rec.709 standard to provide the user with a more natural rendition of recorded footage when the camera is set to either the S-Log2 and S-Log3 settings.
Sony has also revised the previously seen Zebra function to make it easier to gauge correct exposure, whether or not you’re shooting in one of the Log settings.

Sony’s Picture Profiles allow you to specify how footage is recorded with respect to the colour, gradation and so on. This gives you the control to either get the footage right in camera for immediate use or to create the most appropriate file for grading.

Audio

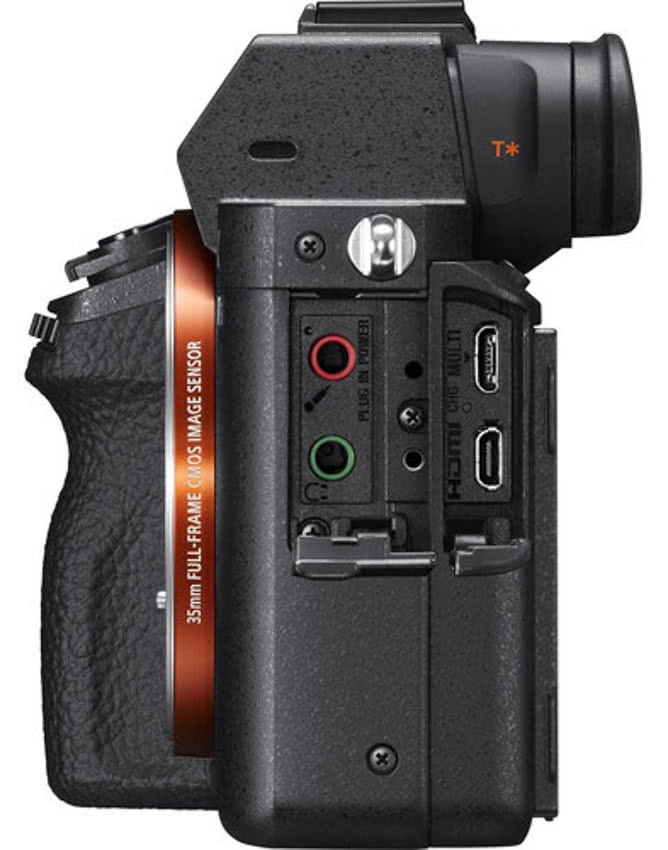
As we’d expect from a camera targeted towards professional video use, the α7S II has both built-in stereo microphones and the option of attaching an external one through a 3.5mm port at its side.

Sony A7S II

There’s also a port for attaching headphones so that you can monitor audio while recording. A separate control allows you to choose whether to have audio levels displayed on the monitor.

You can disable audio recording where not required and there is also the option of a wind noise filter, which is effective with the in-built microphones (ie not external ones).


Other advantages

One of the other major advantages of the α7S II over other models is its 5-axis image stabilisation system, which works over pitch, yaw and roll, as well as shifting in vertical and horizontal directions. The fact that this is located at the sensor gives it the benefit of being compatible with all mounted lenses, which is just as well as the camera can accept a range of lenses from other manufacturers via adapters.

Focus peaking is also on hand for those wanting to use manual focus. This gives you the option to change colour between red, yellow and white (which you may want to change depending on what it is you’re recording), as well as the peaking level, which can be set to high, mid and low settings.

The camera also offers an Auto Slow Shutter option. When this is enabled, shutter speed is reduced when the camera deems necessary in order to better balance the exposure during video recording. Time coding support is also provided should you wish to use it.

Sony A7S II 1

Hi, how can we help?